Today for each of us begins with turning on the computer, and, consequently, the Internet. It is on the Internet that we find for ourselves what we need or what we like. The most popular websites on the Internet are social networks. With their help, we will be able to find the music or video file we need at any time of the day, we will be able to play various applications, and the main thing is that we will be able to communicate with our family and friends without obstacles.
To make your life on a social network a little more varied, GIFs were invented. GIFs are animated pictures with a .gif extension. With their appearance, people on the Internet became increasingly interested in how to send a GIF on VKontakte. In fact, this is not at all difficult to do.
The first thing we will discuss is how to upload VKontakte GIFs to your wall. In order for you to be able to add gifs to your VKontakte wall, you need to:
- Copy the link to the gif you found;
- Paste this link into the wall text input field;
After these steps, an attached animation will appear that you can send. Before sending the gif, you can remove the link to it. Convenient, right? Instead, you can now send funny GIF animations.
How to add gifs to notes?
If you want to add an animated picture to your notes, first you will need to go to “My Notes”.
Next, you will need to click “Add Entry”, then click on the “Add Photo” icon. Then you will see an open window at the bottom of the browser, click on the link “Go to select a photo by URL”, then insert a link to the VKontakte gif, specify the size of the animation and click the “Add” button. Is it possible to send a VKontakte GIF to an old album? No, you cannot do this. Since the site exclusively uses only those animations that were previously uploaded to Contact.
How to put a GIF on your avatar?
First, you need to be on the friends list of the author of the GIF you need.
If you did this, then tag yourself in the GIF. Afterwards, click “Done” and refresh the page. Now under the GIF there is an option to put it on your avatar. Will it be displayed exactly as a GIF? No, it will be static. There are many collections of animated pictures on the Internet that can be posted on the wall, in a group and in notes on your page on the social network VKontakte. You can find exactly what you want for yourself. For example, these could be animated pictures in the form of a declaration of love. Or animated pictures with various jokes. In general, such a gif is quite capable of reflecting your entire inner state of mind: either you are having fun now, or sad, or you are in love with someone, or you want to philosophize. Different categories of pictures.
If you have free time, then you can find a huge number of GIFs for yourself. Just enter a query in the search engine to find gifs and look for the ones that suit you. By the way, VKontakte has long created special groups with so-called “Animated Pictures”. A large number of participants in such groups share their materials with other participants every day. Thus, expanding your search for images.
This approach to searching for GIFs has become very simple and quite popular. Now you know how to upload VKontakte gifs. By the way, you can do them yourself. How? We'll tell you in the following articles.
In this material we will look at how to add gifs to VK. Files of this type can be placed in documents, posted on a wall, or sent in a message to another social network user.
How to put a GIF on your VKontakte avatar?
There is not a single way to put an animated image on an avu. However, if we look at the situation a little more carefully, it turns out that:
- Nobody forbids putting a file with the .gif extension on the cover;
- the social network does not change the formats of files selected and uploaded by users (the main thing is to comply with the established size restrictions);
- but the loaded image simply will not move, being fixed in its original position.
That is, the desired effect is not achieved, despite the desire and attempts of users to upload a moving image to their page. There are no ways to correct the situation and bypass the established restrictions.
PC
Let's look at it in practice, in VK, using a personal computer. This is done in a few mouse clicks. But first you need to figure out the question: where are GIFs stored in VK?
Files of this type are placed in the “Documents” section. So, download or create an animation. Add it to “Documents”. To do this, just click on the section of the same name in the left menu. A list of downloaded documents opens. If they are missing, they will not be displayed in the list.
Let’s move on to the next stage of solving the question “how to add gifs to VK.” Click on the “Add Document” button. This will allow you to load material from your hard drive. A window with restrictions appears. It states that the file must not infringe copyright, and its size cannot exceed 200 MB. The types of materials that are supported by the project are also listed. Among them there is a gif that interests us.
We use the “Select file” function. We point to the animation we need on the computer. After downloading, a window appears where you need to select the type of our document. If you indicate that the material is personal, it will not be available to other users of the social network. Click the “Save” button. The file will appear in our documents. Now it can be used.
Application
Now we will look at how to add gifs to VK and place them on the wall. Go to your personal page. We begin to enter a message on the wall. We reach the place where we should insert the animation. Next, click the “More” button. Select the “Document” option. A list of materials will appear in front of us. Opposite the required animation, click the “Attach” button.
We can add this type of material to the wall, not just by selecting it from our documents. There are thousands of files in the format we are interested in on the VK social network. Therefore, you can use the search in the add document window. To do this, specify the appropriate keyword and press Enter. We get the result. Among the proposed options, most likely, there will be animation. Next to the appropriate file, click on the “Attach” button. When the animation is added to the window, click the “Submit” button.
How to copy a GIF to VK?
Having figured out how to search for GIFs on VK, you should move on to the next topic: copying animations. For this you will need:
- Find a suitable picture (make sure it can move).
- Hover your mouse cursor over it and right-click.
- Select the option that offers “save as”.
- In the window that opens, specify the save path (select the file download folder).
- Specify gif as the save format (or make sure it is specified correctly).
It is important to point out that making a mistake when choosing a format will not prevent you from enjoying the moving image. To correct the omission, you need:
- copy the appropriate format;
- select the existing format in the source file (the inscription after the dot);
- paste the copied text;
- Agree with the warning and save the changes.
Nothing additional is needed.
Letter
Now we will look at how to add gifs to VK and send them in a personal message. Above we have already discussed how to search for and download animation. To send it in a personal message, we find the interlocutor to whom we need to send the file. We write the text of the letter. Next, select the “More” function. After that - “Document”. We follow the procedure described above - attach the animation. After that we send a message.
As a result, our interlocutor will receive animated material. To view it, you just need to left-click on the file. Note that GIF is a raster graphics format. Such material is capable of storing compressed images without loss of quality if they contain no more than 256 colors. This format is hardware independent.
How to upload a GIF to VK, detailed, step-by-step instructions.
Do you want to know how to consistently earn money online from 500 rubles a day? Download my free book =>>
Yes, you may ask, why are they called GIFs? The answer is simple, this word comes from the name of the file extension - gif.
Previously, when loading animated GIFs on VKontakte, the animation disappeared, and friends saw a static picture without animation. Of course, the effect of such a picture was lost.
Now on VK there are so many gifs of various topics that you don’t have to download them, but search for them and add them to yourself.
This is done as follows:
However, there are situations when you need to download a certain animated picture that you have on your computer. Then, exactly as described above, go to the documents section, but do not enter anything into the search, but click on the icon to the right of the search - add a document.
We upload the image in the usual way, that is, we find it on the computer, then indicate another document.
How to add a GIF to a wall
This is how your friends will see your appeal to them and appreciate it.
I offer you some more useful articles:
PS
I am attaching a screenshot of my earnings in affiliate programs. And I remind you that anyone can earn money this way, even a beginner! The main thing is to do it correctly, which means learning from those who are already making money, that is, from Internet business professionals.
For a long time, the social network VKontakte did not support animated images. But users often wrote and complained even to Durov himself: they say, when? And a miracle happened - VK supports GIF animation! Of course, users immediately took advantage of the opportunity and began uploading thousands of GIFs to the site. And for those who don’t know how to do this, we have prepared an article.
To upload a GIF file, you need to select the “Documents” section. Here it is on the menu:
If you don’t have it in the menu, click “My Settings” and on the general tab, check the box next to “Documents”, after which it will appear in the menu.
Go to the “Documents” section. If the gif is on your computer, click on the “Add Document” button.
You will be prompted to upload a GIF from your computer.
You can do it easier. Enter a word into the search, for example “Funny”, and you will see a list of gifs already uploaded by other VKontakte members.
You will see a huge list of GIFs. To add them to your documents, click on the plus sign.
Now let's talk about how to add GIF animation to a wall or, for example, to a comment in a group. There are two ways. In the first case, click on the “Attach” button and select “Document”.
After that, select a GIF either from saved documents, or use the search for all downloaded GIFs in VK.
The second method is a little simpler. We find a gif, for example, on the Internet. We copy the link to it, paste it into the window and wait until it is uploaded to the server:
Then click on the “Submit” button. GIF uploaded.
As you can see, everything is very simple.
vkhelpnik.com
How to put an animated avatar on VKontakte
Fans of social networks spend a large amount of time on the Internet and sooner or later begin to feel the need for a larger circle of friends, more interesting ranks and a more authentic avatar . And it's probably hard to find anything more engaging than an animated avatar.
Instructions
1. If you liked any of the examples on the Internet and you want to upload it to the VKontakte social network, download the picture to your computer, save it to a hard disk and open the VKontakte network. After this, log in to gain access to your page. 2. Under your avatar menu, find the “Edit Photo” option and select the service to upload a new image. When the window for uploading an image appears on the screen, click “Prefer Photo”. Select the desired image from your computer’s hard drive and click “Open.” 3. After completing the process of copying the animated image to the VKontakte server, set up a small copy of it. To do this, move the borders of the pointer to the desired size and click “Save”. Your page image will change to your newest avatar. 4. When using this method, you should remember that the animation in the picture will be motionless. The public network VKontakte does not allow uploading dynamic pictures as an avatar. However, you can upload a picture to your page so that you can then freely view it, as well as send it to other users as a postcard or present. To do this, use the options in the “Documents” menu, which includes the function of uploading files with stretched gifs. Go to the settings panel of your page and check the box next to the “Documents” item. An additional section called “Documents” will appear in the left column of the page. 5. Go to the “Documents” section and click on the “Add document” item in the right-left corner of the page. When the window for adding a picture appears on the screen, select the animated image and click on “Open”. After this, define for the picture its name and rank - “individual document” (set by default) or another document, then click on “Save”.
An avatar for a forum, ICQ or for public networks, like beautiful clothes for a person, must strictly be present in the user’s profile. Today, a nickname without an avatar is understood as an anonymous person, a little deserved of trust. In addition, it is not at all necessary to search for avatars somewhere. There are several free Internet services that offer rapid creation of unique avatars. With their support, making a creative avatar is not difficult and only takes a few minutes. But you can be sure that no one else will have one like this.
Instructions
1. Open your browser and load a site where you can make an avatar for free. On the main page there is a special form for creating them. 2. Upload the photo with which you want to make your avatar. To do this, click the “Browse” button on the page and select the required file on your computer. Or enter the URL of the image in another field. To display the selected picture, click the “Upload photo” button.
3. Set the required size for your avatar in the drop-down list. Next, you need to choose the area in the photo for your avatar. Select the desired area of the photo with your mouse. Nearby in the window you will see the resulting area. Click on the “Crop” button.
4. Now give your avatar different results if you wish. By selecting the appropriate modes, you can set the image to black and white, add a beautiful border of flowers, make a frame around it, and much, much more.
5. To complete the process of creating an avatar, click the “Finish” button. Your new avatar will appear on the screen, completely ready for use. You can save it to your disk using the context menu and the “Save image...” item. That’s it, you can insert an avatar into your profile on any website.
Video on the topic
Let's start by figuring out what an avatar . An avatar is a kind of picture that is used to personify a user of online sources: chats, blogs, forums, etc. Usually it characterizes a character who lives online.
Instructions
1. Today, many websites offer a huge selection of avatars for every color and taste. Therefore, by easily typing “prefer avatar ” in the search bar, you will find a large number of pictures, different in theme, shape, color, size. 2. Choose and save the one you like on your computer. To do this, right-click on the picture, then select the command “Save picture as...” in the window that appears, save it. 3. Any photograph taken by you or found on the Internet can become an avatar. It is possible that you will have to resize it. For this we will use a primitive program for viewing photos - Microsoft Picture Maneger. 4. With support for the “Change Picture” tab, you can crop the picture, change its size, brightness, etc. 5. It turns out that the avatar has been selected, processed, if necessary, now we’ll try to load it. On the forum, in the chat, find the “Your profile” button or something similar, now find the avatar . 6. You will be asked to choose avatar or upload your own from your computer. It is easier to choose from those proposed, but there is no guarantee that another visitor to the source will not have avatar 7. In order to upload an avatar prepared in advance, find the line “Upload from your computer”, click the “Browse” button, find the picture. Now click “download” and wait. Very soon the system will notify you that the avatar has been successfully changed. 8. Click “Save” - now your avatar (this is how the word avatar ) will invariably accompany you. Video on the topic
Many users, especially beginners, ask about the possibilities of creating an animated menu (motion menu). An animated menu can be created in virtually any program you have. There are a lot of programs, both professional and non-professional. Let's say: like “Adobe Premiere”, “Video Vegas”, “Ulead Media Studio Pro” or “Puremotion EditStudio”. Below we will consider a method for creating an animated menu (motion menu) using the DVD-lab Pro program with the additional use of an external encoder application.
You will need
- DVD-lab Pro program with the additional use of an external encoder application.
Instructions
1. Open the DVD-lab Pro program. 2. Click the “Create” button and name the new file. For beginners, it is better to prefer the MPEG-2 saving format. In this case, the program will do everything itself. 3. Compile the DVD and get the most real animated menu (Motion Menu). By changing different settings, you can customize your menu to suit your needs. Note! There is no need to remove any objects from the created menu. Otherwise, the animated background (motion background), if it is defined without objects, will be visible, and this does not look very nice. Helpful Hint Animated menu (Render Motion) allows you to combine static graphics (say, images, backgrounds or buttons) with animated video. One app can combine a video in the background with a static object. Another application is capable of making animated menu thumbnails. An animated menu can combine video files, with different parts of films, with some static elements. This menu is able to recognize all the objects that can be used as animated thumbnails and present them with a list of Motion Objects. If there are Dynamic-FX objects in the menu, they will be displayed in the list of Dynamic-FX objects. Dynamic-FX objects do not in any way affect the settings described below. They are invariably created at the end of the work, and they can be changed in the properties of Dynamic-FX. When selecting an animation object, you can set different parameters for the clip: 1 – Render this object. 2 – Set Start Point of the motion clip. 3 – Fine Scrub, for more precise setting of the starting point of the clip. 4 – To set other settings. You can also adjust the parameters for any animated object: 1. Total Clip Time. Specifies the duration of the menu display.2. The result of the intro (Intro Effect). It is possible to add a screensaver that will be used in the menu in case of a button delay. In other words, this result determines how objects will appear during the cutscene. It is usually recommended to set the screensaver time from 10 to 30 seconds, after which frames loop.
On some public networks, there is a possibility of uploading video avatars . Similar avatars are easy to find on the Internet, but it is difficult to sign with your nickname. This article will tell you how to easily and easily sign a video avatar.
Instructions
1. In order to quickly and easily sign a video avatar, you need to download Photoshop. You can also use this program on-line. 2. You need to create a new folder on your desktop and place the desired avatar in it. 3. After this, you should open Photoshop. There is a toolbar in the upper right corner. You should prefer: file – edit in ImageReady. 4. The ImageReady application window will mechanically appear on the screen. A toolbar will appear in the upper right corner. You should prefer: file – extract folder. A conductor will appear on the monitor. All you have to do is select the required folder with the avatar. 5. Next, you need to select the “text” tool, which is also located on the toolbar, and sign the video avatar with the desired nickname. 6. To save the avatar, you need to click: file - save for web and choose a saving location. Video on the topic
Today, there are a lot of methods that allow the user to transfer certain files to other people on the Internet. These include animated postcards . They have become famous among netizens as congratulations for any holiday. The more “animatics” can convey all your feelings and wishes without words.
You will need
- computer,
- Internet access
Instructions
1. There are two particularly primitive and famous methods for sending animated postcards on the Internet: sending by email, as well as sending through different types of messengers (say: Skype, mail spy, ICQ). 2. To send an animated postcard via email, you need to know the recipient's email address. Open the page of the mailer you use and log in. As soon as you log into the service using your username and password, you need to go to the page for writing a new letter. 3. On the page for sending a letter, indicate the recipient’s address, and also fill in the “Subject” field. In the body of the letter, write your message to the recipient, if any. At the bottom of the page you will see the “Attach file” button. By clicking on this button, find the animated postcard on your computer and attach it to the letter. After waiting for the file to download, click the “Submit” button. The recipient will receive your postcard in the body of the letter. 4. Sending an animated postcard via messenger programs. The action algorithm looks similar in any messenger. In order to send an animated postcard using this method, you need to start a dialogue with your interlocutor. In the chat window, find the “Send files” button. By clicking on this button, you will be able to find the required postcard on your computer and upload it to the sending form. After the interlocutor confirms the receipt of the file, its transfer will begin. At the end of the transfer, the recipient will receive an animated postcard in the same form as it is on your computer.
Very often, users of the famous public network VKontakte , visiting this page several times a day, wonder how to change the boring standard design. There are a lot of articles on this subject, tips and tricks, and a lot of topics made by the users themselves. But when you get tired of the riot of colors and flowers on your page, you won’t even remember how you put it up. Therefore, you must always remember how to return to standard settings if you change something in the system.
You will need
- – a computer with Internet access and a browser program installed.
Instructions
1. Remember how you installed additional themes for the VKontakte . Acceptable, if you use the Mozilla Firefox browser, this was the Stylish add-on. Then, in order to restore the standard theme , it must be completely removed. To do this, go to the “Tools” menu, select “Settings”, then select “Add-ons”, find the Stylish command in the list, click on it once, the “Disable” and “Delete” buttons will appear. Select the one you need and click OK. Later, update the VKontakte and check that the theme has changed. 2. If you are using the Internet Explorer browser, then to return the standard theme, go to the “Tools” menu, select “Internet options”, then go to the “General” tab. There, select the “Accessibility” option and uncheck the opposite of the “Format documents using my style sheet” command. After that, click the “Apply” button and close the menu. Go to the VKontakte website and make sure that the standard theme has returned. 3. In the Opera browser, go to the “View” menu, select “Site Settings” and uncheck “Disable form styling”. Also delete the path to the genre files (css), the one that stores the settings of the previously selected theme. Click OK, update the VKontakte . 4. If the theme has not changed, go to the Opera program, go to the VKontakte , right-click anywhere on the site and select the “Site Settings” section. There, select the “View” tab and uncheck all the boxes. 5. Change your password for the VKontakte , after you managed to install the standard theme . Very often, programs that expand the ability to work with this site (making it possible to download music and videos, send pictures to friends’ walls, change themes) steal passwords, email addresses and other personal information. Note! If after all the actions the topic remains the same, try restarting the browser program and visiting the site again. Helpful Hint The menu commands used in these guidelines may be named slightly differently in your program, but they are basically the same. For example, instead of the “Settings” command there may be “Options” or “Tools”.
When choosing avatars, we often do not think about the consequences of their perception by others. And the tea avatar on the Internet represents the very clothes by which one is greeted. And when your image shows a sad face, you will certainly be treated the same way.
You will need
- – a computer with Internet access;
- – avatar.
Instructions
1. Find a character that matches you. You may prefer, for example, an anime avatar, this is considered a sign that you will always find what you are looking for. However, those who do not watch and have not watched similar cartoons are simply not aware of your image and are unlikely to begin to respect you. People don’t like not understanding or not knowing something, and this often makes them hostile. 2. Put an ordinary smiley emoticon on your avatar if you don’t want to spend a lot of time making a choice. This will invariably create a positive attitude among those around you. True, similar people often turn out to be targets of cynics. Many people consider similar avatars to be too primitive, and their owners as people hiding their emotions. 3. Choose an avatar with flowers if you want to achieve peace of mind. Such a feeling still remains a rare occurrence and will come in very handy, given that on forums, blogs or other platforms with angry discussions, very few people remember peace of mind. 4. Try to point out that at heart you are soft and furry (or furry). Avatars with kittens and other “gentle” and cute animals are suitable for this purpose. 5. Set sports equipment as an avatar if you want to show your passion for one or another sport, even acceptable as an amateur who easily likes to watch. 6. Choose an avatar with your own photo if you are completely confident. Occasionally this can be unnerving, and there will be many dissatisfied individuals. Therefore, few allow themselves a similar “luxury”, but traditionally those who invariably have an influential opinion among friends. In other words, if you are new to the forum, better not put your photo on your avatar, on the contrary, you will certainly become the subject of ridicule. Video on the topic Useful advice You should not put a “sharp” car, weapons or a lot of money on your avatar, this will obviously demonstrate your pride and that you have none of this. Important people who own any of the 3 components or even all three will never set themselves such avatars.
The modern letter delivery system has changed a lot. However, despite the new possibility of sending a message by e-mail, many people continue to openly rejoice at greeting cards sent for Valentine's Day, New Year's Eve and other holidays. And if it’s also a flash card, then the recipient’s furore will know no bounds.
You will need
- – a computer with flash software and Internet access;
- – a computer program for creating postcards.
Instructions
1. Choose a theme for the upcoming card. If this is a greeting card, then you need to create a plot that matches the theme. It is possible that the theme of the upcoming New Year celebration will be in demand. 2. Download and install a program for creating flash animation on your computer. This can be either the famous Macromedia Flash program or any other alternative software, say, Sothink SWF Quicker. 3. Start making an animated postcard. Make the usual symbol of the New Year holiday - snowflakes. It is better to choose a dark, approximately black background background so that the snowflakes look more advantageous. Draw snowflakes inside the pre-drawn rectangle. To create a spectacular illusion of snowflakes moving and falling, move the rectangle slowly and carefully. At the same time, do not forget that smooth movement in the animation file is achieved with the help of a thoughtful arrangement of snowflakes over each area of this geometric figure. 4. Divide the rectangle into several parts (usually three or four fragments). Make sure that the pattern of snowflakes matches in adjacent episodes. Otherwise, the postcard will turn out sloppy, gluing and jerking of the image will be noticeable. Turn on storyboard mode and locate the ending frame. Remove it by closing the plot of the postcard and thus making a “loop” or a resulting loop in which the animation will repeat indefinitely. 5. In order to achieve more realistic movement, make another layer, in which you also draw snowflakes inside the rectangular fragment. Use the result of perspective. Draw smaller snowflakes, the 2nd layer will act as a backdrop. Because of this, it should be in total a little smaller than the first, but at the same time wider. 6. Choose a suitable font and write the desired text. If desired, you can also insert a pre-voice greeting or a beautiful melody card Video on the topic
Public networks are at the peak of popularity among means of virtual communication. Many of them now allow you to exchange not only text messages, but also share photos and pictures.
Instructions
1. VKontakte website is constantly evolving. Its developers are adding more and more possibilities for using the source, ensuring versatility and convenience in the operation of the public network. As a site for communication, VKontakte initially had the ability to upload photos and images, however, they were posted only in the personal albums of users or groups. In order to please a friend with an image on his “wall”, it was necessary to draw graffiti , which not many people could do in the distance. Now VKontakte have the opportunity to share different images with friends, adding them from a computer or any photo album. 2. Open the page of the participant to whose “wall” you want to send a photo. This can be any registered VKontakte who has allowed the posting of images on their “wall” in their privacy settings. You can also post pictures and photographs on the “walls” of groups where you are registered as a participant or manager. upload a photo instead of graffiti to your “wall”, after which the new image will be displayed as your rank and will be available to any user of the public network; your friends will see a new image on your wall in the News. 3. Having opened the “wall”, click on the message entry window. If you need a caption or statement for the photo, enter the text in this field, and then proceed to upload the image. Click on the “Attach” button that appears under the lower right corner of the message field. The system will show you your probabilities, limited by the user of this page or the group manager. If you are allowed to send images, click on the “Photo” button in the list of functions that opens. 4. A window with photos of your albums has opened in front of you. If you want to place one of them on the “wall”, click on it with the left mouse button. Instantly you will find yourself in the message input field, where pressing the “Send” button will save the message and image on the “wall”. 5. If you want to upload a photo that is on your computer, in the window for selecting uploaded photos, click on the “Browse” button in the “Upload a new photo” column. In the window that opens, specify the path to the required image, left-click on it and click the “Open” button. The selected photo will automatically appear on your “wall”. Confirm its publication by clicking on the “Submit” button. Video on the topic
Our state of health often changes and, depending on it, all of us are inclined to change our avatar on the public network VKontakte . This can be done quite quickly and even using two available methods.
Instructions
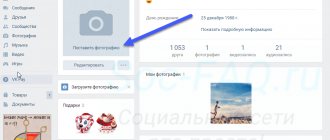
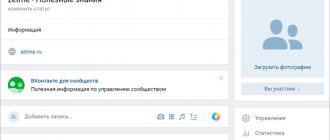
1. Go to your profile page. Directly below your photo (avatar) there is a list of options. The second option is “change photo”. Click on it with the left mouse button once, and a list of options for adjusting the photo will appear in front of you. Select the “upload new” option and also click once with the left mouse button. A photo upload window will appear in front of you. 2. By clicking the “browse” button, you will be able to select the required photo from your computer in a new window that opens. As soon as the new avatar is selected, click on it, then the “open” button. The “edit small copy” window appears in front of you. With its help, select the area of the image that will be presented on a smaller copy of your avatar in friends lists, discussions, and more. To do this, move the square of the window around the picture with the mouse. After that, click the “save” button, and the main photo will be updated on your page. 3. You can update your avatar another method, using photos uploaded to your albums. To do this, go to your photo albums (either by finding the “my photos” link in the column to the left of your avatar, or by finding “my photo albums” under the list of friends). Select the photo album you need, and then a photo. 4. At the bottom right of the photo, in the list of options, you will find “post on my page.” Click on it once. A frame has appeared on the photo, by editing it you will select the desired area of the photo that will become your avatar. To do this, move the squares in the corners and edges of the frame by clicking on them with the left mouse button. 5. After editing, click the “done” button at the top right of the photo, and your page will open with a new main photo. Otherwise, click “cancel” if the selected picture does not satisfy you in any way. Video on the topic
Desktop design is very important for many computer users. Wallpapers are extremely pleasing to the eye . But such a design requires proper installation. How to install live wallpaper?
Instructions
1. Determine the power of the computer. It should allow you to work with the new Windows 7 and Vista systems. If there is not enough operating memory, then you should not install animated wallpaper. Animation, of course, will make your desktop look beautiful, but it will place an excessive load on the processor and, accordingly, will not allow you to work effectively on the computer. 2. Now download the “Windows DreamScenes Enabler” utility. Install it on your computer as follows: right-click in the context menu and click “Run as manager”. After launch, click the “Enable” button, and then “Finish”. Restart your computer. 3. After this, locate the folder in the directory: C:WindowsWebWindows DreamScene. It will contain the DreamScene file. Right-click on it. In it, click on the “Set as Desktop Background” item. Video wallpapers must appear in the design of your desktop. 4. Next, make a shortcut. To do this, right-click on the DreamScene file in the context menu and select “Send” – “Desktop (create shortcut)”. 5. If you don’t find such an item in the menu, go to the desktop menu and select “Create” – “Text Document”. After that, click on the “Properties” file item. The name of the new file will be “Newest Text Document.TXT”. Name it “Desktop (make a shortcut).DeskLink” without putting quotes. The appearance of the file will change and become similar to the monitor. 6. Place the completed file in the SendTo folder, located at: C:UsersusernameAppDataRoamingMicrosoftWindowsSendTo. To make it visible, go to the “Start” menu – “Control Panel” – “Folder Options”. And uncheck the “Hide protected system files” checkbox. And after that, click “Save metamorphoses”. After moving the desired file, you can hide the system files again by checking the box in the same place. Now try to create a shortcut by going to step 4. 7. Next, add to the selection of animated wallpapers. You are allowed to download archives with a set of screensavers from the Internet. But they take up several Gigabytes. In addition, you lose the right to choose. Better yet, choose those video wallpapers that you really like and download them separately. 8. The next step is to unpack the entire archive and place the files in the C:WindowsWebWindows DreamScene folder. She will protect all video wallpapers of your desktop. 9. To install animated wallpaper, you can use the Windows 7 DreamScene Activator program. Run it as manager. Click the mouse in the empty rectangle of the window that appears, and then click ON. Then restart your computer. Now install animated wallpaper from any folder that contains files with mpeg or wmv extensions. 10. Check if the animated wallpaper has sound. In the system tray, check that the volume is turned on. If this is not possible, then go to the “Start” menu - “Settings” - “Taskbar and Start Menu” and uncheck the “Hide unused icons” option. After that, adjust the sound volume. Note! To bring up the context menu, always use the right mouse button.
Gifts on VKontakte are an inexpensive method to make a loved one happy or to congratulate them on a holiday. There are a lot of payment methods available. The purchase occurs in a harmless mode, and you do not have to worry about your money falling into the hands of scammers.
Instructions
1. Go to the page of the person to whom you want to send a gift. Find the "Presents" section and click the "Submit" tab. A window will open in front of you in which you can choose what you like. Presents are divided into sections: “Romance”, “Friendship” and “Jam Day”. Choose a surprise that suits the occasion and click "Send". 2. Pay for the gift. In the window that opens, select any payment method that is convenient for you: mobile phone, payment system, credit card or electronic money. Click "Proceed to Payment". 3. Enter your country and phone number from the account from which you want to pay for the gift. Later, select the number of votes you need to purchase. Click the "Buy...votes" button. A message with a confirmation code will be sent to your number. Enter the code in the tab that opens and click “Get votes.” Wait for the transaction to be confirmed and send the gift. 4. Enter your card number if you prefer this payment method. Indicate its validity period, the last 3 digits from the signature strip and the name of the holder. If you want to pay for votes with electronic money, select WebMoney or “YandexMoney” in the tab with payment options. “VKontakte” will redirect you to the payment system website, where you need to prefer the payment method, amount and enter the wallet number with the payment password. When paying for votes using your Qiwi wallet, you will also be redirected to the system page where you need to log into your individual account and make a payment. 5. Wait for the votes to arrive in your individual VKontakte account. Select the privacy type of the gift. It can be public, hidden for everyone except the recipient, and unknown. Under the gift, you can write a message for the user containing congratulations or a comment on the surprise. Useful advice You can send a surprise from your page. Go to your presentations section and click the “Send” tab.
VKontakte website (now vk.com) regularly introduce innovations that simplify communication for their users. If previously, in order to share a fascinating picture with friends, it was necessary to send a link to it, now images can be attached to personal messages, published both on your wall and on the walls of friends.
Instructions
1. Go to the page of the person you are going to send the picture to. Below the photo, click "Send Message." In the lower right corner of the window that appears there will be an inscription “Attach” - click on it with the left button of the mouse or touchpad. Select “Photo” from the list. If the picture you are going to send is in your albums, select the one you need from the images that open in front of you, click on it, and it will be mechanically attached to the message. All you have to do is click on the “Submit” button. If the picture is not in the albums, but it is saved on your computer, you will find the message “Upload a new photo” above the photo thumbnails. Click on the “Prefer file” button located next to it, then in the window that appears, find the required image, select it with a left-click, click “Open” and “Send”. 2. In order to publish a picture on the user’s wall, go to his page. On the right side, above the last wall post, you will see a window with the phrase “Write a message.” Place the mouse cursor in the window, and then, just like in the first step, attach an image to the message. 3. To share a picture you like, published in a community or news feed with all your friends, open it with a left-click, click “Like” in the lower right corner, and then click “Tell Friends” in the pop-up window. Note! Pictures that are attached to VKontakte messages must be in JPG/JPEG format. You can change the image format, say, in the Paint program, which is standard for the Windows operating system. Helpful advice: To send pictures, do not use programs that require you to enter your username and password. It is possible that they were developed by scammers to hack pages and then send spam from them. Video on the topic
Instructions: How to insert Gif animation on VKontakte.
Recently, VKontakte has officially become able to post animation in posts and comments. Gif animation is a sequence of several static frames, as well as information about the timing of the transition between frames. You can loop the animation and then, after the last frame, the playback of the first frame will begin. Although this kind of animation is already widely used on the social network, including all sorts of gif threads, many users still do not know how to insert VKontakte animation into their messages and posts. Most people try to upload animations like regular photos and end up with a static image with the first frame of the animation.
Short and clear instructions for embedding animation on VKontakte:
- We select/select/create animation. You can take one of our examples for the first time:
- In the comment or post, select to download the document. Specify the path on your local computer to the file.
- Voila. Post/comment with animation posted.
Congratulations! Now you can place animation in posts.
bulgar-promo.ru
How to find a GIF on VK?
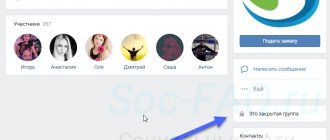
Searching for files with the .gif extension will not cause difficulties, since the mentioned prohibition only applies to avatars. It is still possible to post animations on the wall that start moving when opened. If movement has not started, you should:
- Find the desired picture on the wall.
- Hover your mouse cursor over it.
- Click the button to start repeating the dynamic picture.
If the movement has started, it is worth checking the browser settings and making sure that the user has the latest version of the program installed. If such a check causes difficulties, you should simply repeat the procedure in another browser.
The situation when the user does not want GIFs to be included automatically deserves special attention. You can disable automatic launch in the VKontakte settings menu.
How to download a GIF from VK
In this life hack you will learn how to download a GIF from VK on various devices.
Sometimes, in the feed, we find something interesting and unusual that we would like to save on our hard drive or smartphone. We have already discussed the method of downloading videos from VK, but now we have come to explain how to download GIF animations of VK. The methods are quite simple and do not require any special additional programs or services, and all you need is a browser or the VKontakte application on Android.
How to download a GIF from VK to your phone
To do this, simply open the animation you like in full screen and click on the icon of three vertical dots in the upper right corner, then “Save” and the file will be downloaded to your VK folder. It couldn't be simpler! Now let's move on to the second method.
How to download animation in contact to your computer
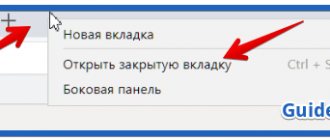
Open the desired VKontakte GIF, right-click on it and select “Open link in a new tab”, then simply click on the “Save document to disk” button and select the save directory (Chrome browser was used).
Now you know how to download a GIF from VK to Android and PC, and as you can see, everything is incredibly simple.
In this article we will talk about how to add a GIF to Odnoklassniki, following our step-by-step instructions, and you will also learn more about GIF animation. In addition to the usual media files on the OK social network (photos, audio recordings and videos), you can also add GIF images. To find out whether to your computer or to an album on a social network, follow the appropriate link.
How to disable animation of stickers in VK?
To disable animated stickers, you will need:
- Visit the sticker store.
- Find an item that offers to show animation during publications.
- Uncheck the box (to restore the function, place the check mark in its original place).
How to prohibit the movement of GIFs in posts published on the wall is indicated above, so there will be no difficulties in solving this problem. In extreme cases, if unexpected bugs occur, you should contact support agents.
What is it and how does it work?
GIF is an image format that is an animation. Therefore, you can upload GIFs to any social network in the same way as regular photos. The OK system automatically recognizes which are regular pictures and which are gifs. When the file is uploaded to the server, you will see the corresponding inscription on it. You can insert a GIF into Odnoklassniki in any place and section where it is possible to add ordinary photos and pictures. You can add GIF to Odnoklassniki on the following positions:
- to the avatar;
- in an album with photographs;
- add to comments;
- post to the group if you are the owner;
- post on your wall.
Once uploaded to a social network, the animated image will not start playing automatically. To do this, you will have to right-click on it once. Then the animation will quickly download from the server and begin playing on your screen. It is worth noting that all gif images are primarily pictures, so they do not have any sound. You can separately attach a music recording to a post with a GIF. On our portal you can read more about. Now let’s take a closer look at how to upload a GIF to Odnoklassniki. You can do this from any browser and even mobile devices.
Step-by-step instruction
You can upload a GIF to Odnoklassniki using our step-by-step algorithm:
- first go to your page after logging in to the site;
- then you have two ways to add: to the status on your page or through the notes section;
- Let's take a closer look at the first option. In your profile, click on the “What are you thinking about?” field;
- in the enlarged window, select the “Photo” button;
- A window will open in front of you with your directory on the computer. Find the required animation and click the “Download” button;
- The post will appear on your wall and will be visible to all your friends in the update feed.
This way you can upload a GIF to yourself. Let's consider the second method of adding.
Learn to send gifs in messages
Here you have two options.
Attaching from downloaded
Go to the “Messages” section and open a dialogue with the desired user. At the bottom of the form, click the Paperclip icon. An additional menu will appear - here we select the “Document” item. From the list of downloaded gifs, select the one you need. Hover your mouse cursor over it and the “Attach” link will appear. Click on it and the animation is inserted into the form. Now you can send a message.
By the way, if you sent an erroneous picture, the sent message can always be deleted from the interlocutor. But this feature is available in the first 24 hours.
Add via link
By analogy with downloading a video from YouTube to VK, you can attach a GIF to a message directly from the link.
We find the animation on any site and copy the link to it. Then we simply paste it into the message creation form. The image will automatically load and we will send it.
As you understand, this method works both in comments and in community posts. All you have to do is drop the link to the GIF and send it.
How to add gifs to an album in Odnoklassniki?
To do this, follow these steps:
- on your personal page, click on the “Photo” section in the top menu bar;
- here click on the “Add Photo” button;
- When you add animation from your computer to OK, the Gifs album is automatically created. All animated pictures that you add from other public pages to OK or from your computer will appear in it;
- After that, you can place a GIF from the album on your profile picture or on your wall.