When working with photographs, some users are interested in the answer to the question of how to change the creation date of a photo in order to change the metadata. After taking a photo, additional information with related information appears in the image file.
Digital cameras use the EXIF (Exchangeable Image File Format) standard, which adds comments to photo files. This additional information (metadata) describes various shooting options.
Metadata may vary depending on the camera manufacturer. In most cases, the following data is written to EXIF:
- camera model and manufacturer;
- aperture, shutter speed, ISO, etc.;
- whether a flash was used when shooting, resolution, focal length, etc.;
- geographical coordinates;
- date and time of shooting.
We are interested in information about the date and time the photo was taken because we need to change the date the photo was taken. Changes in metadata may be required in some situations: the camera settings have been lost and therefore incorrect information is stored, it is necessary to set a different shooting time than the actual one, changing the date to a later or earlier period.
Where to view photo metadata
After moving the photo to the computer, the user can view the saved metadata of the image. This information is in the file properties of this image.
You need to do the following:
- Right click on the photo.
- From the context menu, select Properties.
- In the "Properties: X" window, open the "Details" tab.
- Along with other information, the metadata contains information about the date of shooting.
To change the parameters for creating a photo, you need to edit the EXIF data. We need to change the shooting date and time.
In this guide, we'll look at how to change the creation date of a photo on your computer. The instructions in this article use tools from the Windows operating system and free graphics programs.
How to change the shooting date in photo properties
The easiest way to change information about a photo's creation date is to edit the capture date in the image file properties. This can be done using the Windows operating system.
Go through the steps:
- Right-click on the file.
- In the context menu, click on the “Properties” item.
- In the window that opens, go to the “Details” tab.
- Select "Date taken".
- Click on the date and select the appropriate value: year, month, day.
- Click on the "OK" button.
Using this method, you can change the shooting date, but the time the photo was taken will remain the same.
How to change the shooting date in Windows Photo Gallery
The free Windows Photo Gallery app is part of the Windows Live Essentials suite of apps. At this point in time, Microsoft has stopped distributing the main components, but the programs included in them continue to work in the operating systems Windows 10, Windows 8.1, Windows 8, Windows 7.
The article Windows Live Photo Gallery has a link to download the Windows Live core components on your computer. The user can choose what to install on the PC, for example, only Photo Album or Windows Movie Studio, without installing other components.
In the Photo Album program, you can change not only the shooting date, but also enter a different time when the shooting was taken into the photo properties.
The procedure in the Photo Album program is as follows:
- Add a photo to the program through the menu or drag an image from your computer into the application window.
- Open the View tab.
- In the “Show Details” group, click on the “Take Date” button.
- Navigate to the desired image.
- Left-click on the date to change this information, and then on the shooting time to modify this setting.
Why is the time in VK wrong?
Users of the social network VKontakte often complain about problems with time and time zone. This is most often reflected when sending private messages. Sometimes the site shows the incorrect time of the last visit by a network user. What is the reason for this and can this issue be resolved?
Why does VKontakte time get lost?
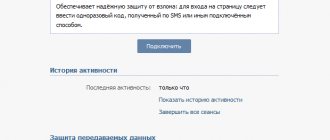
- The social network has its own user support service, but when asked about such problems, they have only one answer: the time on the device used to log into the account is incorrectly set, or there is a virus in the system.
- Technical support specialists point out an error when setting up the belts and if you fix it, the issue will resolve itself. This answer is more plausible, but is not the only way out.
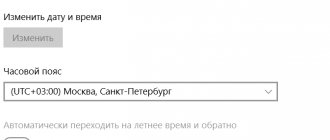
Often incorrect indication of time on the network is due to a change in time zone. If the time shows an hour back or forward, then the reason is the change of time zones in ten regions of Russia several years ago. To fix the problem, you need to update the operating system to the latest version and change the time zone to the current one. You can use automatic configuration or manually specify the desired parameter.
Group change of shooting date in Explorer
Built-in system tool - file manager Windows Explorer can change the shooting date settings of several photos in batch mode.
Follow these steps:
- Open your photos folder on your computer.
- Select a group of images in a photo folder.
- In the Explorer window, go to the “View” tab.
- In the "Areas" group, click the "Details Area" button.
- Information regarding the selected photos will appear on the right side of the window. In the “Date of shooting” item, change the original data to others.
- Click on the "Save" button.
Post a photo to the group
If you have permission from the administrator, you can post the photo to any group on VK. Sometimes there is access to publications on the community wall. If you want to add a photo to a VK page of a group, you just need to start typing a message, and click the camera icon at the bottom and select the desired photo. To upload photos to the community album, use the following step-by-step instructions:
- Log in and go to the required group.
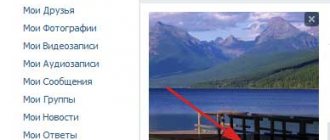
- On the right, find the section called “Photo Albums.” Click on it.
- A list of all albums will appear in front of you, click on the one you need.
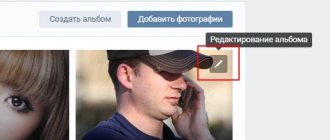
- Next, the algorithm of actions is repeated: click the “add photo” button at the top right of the window, edit and add a description if necessary.
How to change the shooting date of a photo in XnView
Free program XnView is a viewer of graphic formats. XnView is a powerful program that can help you edit photo metadata.
Go through the following:
- Open the file in XnView.
- You need to open the "EXIF" tab located below the viewing area.
- In the “Date of shooting” item, change the date and time the photo was taken.
How to change the shooting date of a file in FastStone Image Viewer
FastStone Image Viewer is a free program for viewing and processing images. FastStone Image Viewer has a tool for changing EXIF information in digital photos.
You may also be interested in:
- Resizing photos online and on your computer
- How to make a watermark on a photo online or in the program
In FastStone Image Viewer, do the following:
- Open the folder with the photo in the program window.
- Select a photo.
- Right-click on the image.
- From the context menu, first select “Tools” and then “Change selected date/time”.
- In the “Change date/time” window, in the “Change:” field, select “date/time in EXIF (date/time of shooting)”.
- Specify the desired values, and then click on the “Apply to selected” button.
Instructions on how to change age on VKontakte
After you have registered in a contact, you are asked to enter your basic data, as well as add contacts, your interests, information about education, of course, career, military service and your life position. But we are interested in how to change the age in a contact, and its immediate change is carried out in the [Basic] tab.
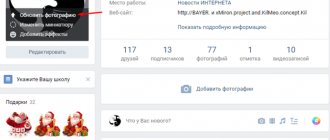
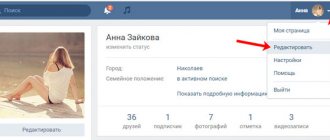
We go to the VKontakte website and log into our account through the authorization form. Then you need to edit the page, in our case, change the age, get to the edit section of your profile, in three ways. As shown in the image, the first link is located opposite the active button of the left menu [My Page], directly on the right side and has an abbreviation in the form [ed.]. The second way is to go to the editing section, there may be an active field under your photo, the link has a similar name [Edit Page]. A third, alternative way to get to the page with basic information for editing can be a direct link with the address
If the theoretical side of how to get to the editing section of my page is clear, then you can proceed to actions to change the age in contact. To do this, follow the links mentioned above, go to the [Main] tab and find the window responsible for the birthday. After this, you can use the numeric sliders, as well as indicating the month, to set the desired value for your date of birth, and click the save button. In the future, this will become your age in contact, which, as you already understand, will be calculated by the date, month and year of birth.
More information on how to change the age in a contact
If, for some reason, you do not want your age changes or simply the dates of your birthday themselves to be displayed on the contact page, then you can use an additional option, all in the same [Basic] section. To do this, you will need to lower the cursor to the next line, it is this line that is responsible for displaying age on your page. You will be offered three options - show the date of birth, show only the month and day, and not show the date at all. You choose your option, depending on your desire or secrecy, display your date and age, and save the option you need.
This was a basic instruction on how to change the age in a contact, we hope the sequence of actions is clear to you. Now, as promised, let's see how to hide age in contact.
How can you hide your age on VKontakte?
We decided to hide our age from public viewing; this can easily be done using the same analogy as in the paragraph described above. Go to my page, edit, main tab and under the [Birthday] window, choose not to show the date of birth on my page. Everything is ready, now your date of birth will not be displayed on your contact page, but you should understand that this is only a visual mechanism for hiding the date. Since you can find out the date of birth and age of a VK user even if it is hidden, this is what the next paragraph is about.
Find out the age of a contact
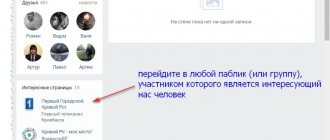
The level of confidentiality of your profile, if you have set the settings not to show the date of birth, is only visible, since the date is still indicated in your profile and is not displayed only on the page. But in search, it’s a completely different matter, for example, you know that you can find a person in a contact not only by first and last name, but, for example, by school, university, city, and also by age. To find out the age of a person, for example, knowing his first and last name, you need to enter [People], the person’s data, into the search, and then set the expected age one by one. Let's look at an example with the image below.
We entered the first and last name, clicked search, even without country, city, school, and so on, the search returns people with the given first and last name, and then all we have to do is put numbers, suggested age, and person in the drop-down list.
Please note that we were able to look at the age of both the profile of the person added as a friend, and of a complete stranger. A search in a contact displays the city, country and age, but even if the age is hidden, the number set, as in the example of 29 years, will be the person’s real age, more precisely indicated during registration, but hidden from users.
How to shift EXIF date in IrfanView
The free program IrfanView is designed for viewing and processing files in graphic formats. The IrfanView application has a tool for changing the shooting date attributes in EXIF, which is added to the program using a plugin.
In the IrfanView program, follow the steps:
- You need to add a photo to the program window.
- Enter the "Service" menu.
- In the context menu that opens, click on “Change shooting date/time in EXIF... (plugin)”.
- In the “Change shooting date and time in EXIF” window, select a new date and time.
- Click on the "Run" button.
Editing EXIF in ShowEXIF
ShowEXIF is a free program specifically designed for editing photo metadata. Using ShowEXIF you can change the time the photo was taken to another. The ShowEXIF program does not require installation on your computer and supports the Russian interface language.
If the program opens in English when you first launch it, go to the “File” menu, click on “Language”, select Russian.
You need to do the following:
- Using the folder tree, open the folder in the program that contains the desired photo, and then select this photo.
- Enter the “Tools” menu, in the context menu, alternately click on “Operations with Date/Time” and “Change date and time in the Exif section”.
- In the “Enter a new date and time” window, fill in the fields with the new data.
- Click on the "Record" button.
How to put a photo on the main page in contact
Very simple. We find the desired photo in our albums and just click on the “Place on my page” button, and then we need to select a thumbnail to display small images, and we’re done. Our photo is set as the main one for our profile. Of course, all likes and comments also remain in place.
But this is only one way. There is another rather simple and cunning way to make a VKontakte photo the main one.
. Few people know about it, but we will show it to you.
Go to the album “Photos from my page”. Of course, here we see all the photos that were the main ones in our profile. So, we find the image we need in this album and just drag it to the end of the album. That's all. Now, when an image is moved to the end of the album, it automatically becomes the main image of your profile.
Hello.
Today I will tell you how to put another photo without losing likes and the date the photo was added. Who knows, who doesn’t know, please don’t throw tomatoes. At the bottom of the topic I also described how to return / change the photo.So, let's begin. Here's my initial photo with 6 likes:
And so, in order to replace the picture without losing likes, we need the VkOpt extension. You can download it at the office. website: https://vkopt.net/ Install the extension, reload the page and open the photo you want to replace.
Under the photo we find this:
Click on the triangle -> Photo Editor.
Our window opens. Scroll down, we will have a hidden Update button in the corner:
Clicked, now the following window pops up:
Click [Browse] Next, select a new photo on which we want to leave likes.
That's it, our photo has changed, the likes and date remain.I repeat once again, do not throw tomatoes if you knew about it. Do you want to change to another? - No problem... Click on the triangle again -> Photo editor. Click “Restore Original” and repeat the steps described above. Thank you all for your attention.
If you are loading a picture, and you have an endless loading (this is not an ERROR, but an ENDLESS LOADING), Do the following:
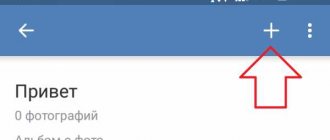
1. We go along the path where you have the picture. 2. Right-click on the picture - Edit. 3. Paint opens. 4. Press Ctrl + W. 5. Select *Pixels, set 1200 (You should get 1200 horizontally and 1200 vertically). 6. Save and upload to VK. (Loads for a couple of seconds) PS If it helped, you can give me a “Like”, good luck to everyone
- you click on the photos with avatars, select the one you need and click quot; place on my pagequot;
- open the desired photo;
- At the bottom of the photo there are items from which we need to select the item quot;Use as profile photoquot; or quot;Place on my pagequot;:
- After that, select the desired boundaries and save.
In fact, everything is simpler here. First you will need to go to your album, which is called quot; photos from my pagequot;. In this album, then select the photo you are interested in and click on it, and at the bottom of the photo select an inscription such as quot; morequot;, and then quot; take a profile photoquot;
The most important thing is that this photo is not deleted from you. If not, you will need to download it first. And then everything is simple, I’ll tell you in detail: we select the desired photo (or the one that was already on the avatar, it doesn’t matter in short), usually it is in the album, open it and in the lower right corner we look for Place on my page - click and first you will You are prompted to indicate the selected area (display for Ava), then click on the bottom line Save and continue. That's all, now this photo is on your avatar again.
Screenshot for clarity, now there shouldn’t be any questions left.
If you want/need to put a photo on your VKontakte avatar
, which was already there before, you first need to make sure that you haven’t deleted it completely. To do this, you need to go to the photos section or albums. If this photo is not there, you will have to upload it again.
If the photo is in albums, then you need to put it on your Avatar again like this:
After this, the old photo will again appear on your VKontakte avatar.
With the current website design, it’s quite easy to put a photo that was already on your profile before. You need to go to albums and open the album called photos from my page
.
Select the desired photo and scroll through it. A line called more
.
Next, click on it and select the line called take a profile photo
. After these steps, the photo will change.
If you want to put the same picture on your avatar that you had once before, then to do this you need to go to the photo album and select the desired photo there. And selecting the more button below, click on the profile photo.
Photos from my page, select the photo you need and click in the lower right corner - place it on my page.
Now the interface has changed a little. But still everything is very simple. First you need to open a photo. Under it, click on the word quot; actionsquot; and in the window that opens, click quot; make profile photoquot ;. For clarity, look at the picture.
In order to put an old avatar on a VKontakte page, you just need to go to the albums with photos from your page, select the desired photo, open it and at the bottom, or as now on the side, select the phrase to place on my page. Voila, everything is very simple.
Rocksrit asked us a great question. Of course, sometimes you want something new, something to update, and this even applies to our contact page. If you are going to put a photo that you already had on your Avaya, then you should upload it to yourself, this is only done if you have deleted it before. We need to select the photo we are interested in, which is located in our album. Next, you need to open the selected photo and click on the quot; put on my page quot;. As always, select the item called quot; save and continue quot;. Then everything happens automatically and you see that new photo on your account.
First, check the presence of the photo on the social network itself, look at all your albums for the presence of this photo. If not, then re-upload the photo to your page through the photos section. And then just open this photo and select the option to use as profile photo.
Any photo in your VK album can be used as an avatar. To do this, just click on it and find the options in the bottom right corner; among the actions you need to find the item quot; make it a profile photo
quot; ,After that, all that remains is to select the display area for the large avatar and small icons used in messaging.
Each of us sometimes decides to put a new ava in VK so that people understand that you are alive and well. Sometimes we delete old photos and then want to restore them, but keeping the likes. Moreover, popularity may fall, and only mom and girlfriend will rate new photos. How to change the ava in VK so that the likes are preserved and whether this is possible - we will find out further or dispel the myths.