Good day, my dear faithful readers and blog guests. In several previous articles, I touched on the topics of highlighting key points in the text and defining the background of the page, but I did not mention how to make text colored in HTML. This is a very simple theme that I hope you will quickly master and use to design the pages of your sites.
In this publication, I will describe the basic elements for controlling the text color palette, how to modify the background of sentences, show what a table of html color codes looks like, and also, as usual, give an example of code.
After reading the article, you can easily use the knowledge you have acquired and transform the design of text information on your web resources! So let's get down to business.
The first letter of the current sentence will become large and blue
A more well-known and widespread technique among layout designers for modifying text is CSS. To set a specific font color, you mainly use the color . It is described for a specific tag in the design style specifications.
Below is an example of formatting the appearance of the page header:
| 1 2 3 4 5 6 7 8 9 10 11 12 13 14 15 16 17 18 19 20 | Modifying the color palette using css h2 { color: orange; text-align: center; } p { text-align: center; } |
How to make multi-colored text in Photoshop
Author: Olga Maksimchuk (Princypessa). Date of publication: August 18, 2021. Category: Photoshop tutorials text.
Hi all!
Today we will create text entwined with colorful lines.
The lesson is quite simple and perfect for people who are just starting to learn Photoshop.
First we will create a new document, install the font from the source folder and write the text.
Then we will create several copies of the text layer and move each copy 1 pixel down and 1 pixel to the right.
Next, we will merge all copies of the text layer into one, lower the layer's transparency and apply the Motion Blur filter.
After that, using the Pen tool, we will draw a path, stroke the path, create a duplicate of the layer with the path and change the color of the lines.
To conclude the lesson “ How to make multi-colored text in Photoshop ,” we will fill the background layer with beige.
Create a new document in Photoshop (Ctrl+N) with parameters as in the figure below.
In the layers panel, click on the “lock” next to the background layer to unlock the layer for further editing.
Rename the background layer to “Background”. To rename a layer, double-click the layer name in the Layers panel, enter a new name and press Enter.
Install the font from the source folder. To do this, right-click on the font file and select “Install”. After this step, the font will be installed simultaneously in Photoshop and the system.
Activate the Text tool. We write the word “Aura”. In the top settings panel of the Text tool, select the font that you set in the previous step, change the fill color to #ff0000, increase the text size and enter the settings as in the figure below. Then click on the symbol panel icon in the top settings panel of the Text tool and set the following settings. Using the Move tool, position the text in the center of the canvas.
In the layers panel, create a duplicate of the text layer (Ctrl+J). Drag the duplicate text layer below the original layer in the Layers panel. Now let's create a duplicate of the duplicate text layer (Ctrl+J). With the Move tool active, move this “duplicate duplicate” text layer 1 pixel to the right and 1 pixel down. To move, use the arrow keys on the keyboard. Again, create a duplicate of the layer that we just moved and move the new copy of the layer 1 pixel down and 1 pixel to the right. Schematically it looks like this - we create a copy of the layer, move it, then create a duplicate of the layer that we just moved and move it again. We repeat the steps 8-10 times. At this point the canvas will look like this.
In the Layers panel, use the Shift key to select all copies of the text layer, except for the original layer. Right-click on them in the Layers panel and select “Rasterize Text”. Without removing the selection, press Ctrl+E to merge the layers into one. Rename the resulting layer “Shadow”.
In the Layers panel, lower the transparency of the “Shadow” layer.
Go to the menu Filter-Blur-Motion Blur and blur the “Shadow” layer.
Above all the layers, create a new empty layer and call it “Lines”.
Activate the Pen tool. In the top panel of the Pen tool settings, select the path tool type and enter the settings as in the figure below. Draw an arbitrary contour - set control points and, holding down the left mouse button, bend the contour.
Activate the Brush tool and select a hard round brush. If a set with hard round brushes is not currently loaded into the program, right-click on the canvas to bring up the brush selection menu, click on the “gear” on the right and select “Basic Brushes” from the drop-down list. Select the brush marked with the arrow below. In the Color panel, set the foreground color to #65cdfd. Again, go to the Pen tool, right-click on the canvas and select “Stroke path”. In the window that appears, select Brush as the stroke tool. Then right-click on the canvas again and select “Delete Outline.”
In the Layers panel, right-click on the “Lines” layer and select “Create Clipping Mask” from the drop-down list. After this, the layer with lines will seem to be “attached” to the underlying layer (text) and will be visible only within the text layer.
Create a duplicate of the “Lines” layer (Ctrl+J). Rename the duplicate layer “Lines 2”.
In the Layers panel, double-click the “Lines 2” layer to open the Layer Styles.
In the Color Overlay tab, change the hue to #f8e27c and enter the settings as in the image below.
The result after applying layer styles.
Activate the Move tool. Drag the “Lines 2” layer so that both layers with lines do not coincide.
In the color panel, set the foreground color to #fff5d3. Activate the Fill tool. In the layers panel, activate the “Lines” layer and click on the canvas to fill the “Background” layer with the color of the main plan.
The text with lines is ready! The lesson “ How to make multi-colored text in Photoshop ” is completed.
Bright mood and creative success!
FREE NEWSLETTERS OF VKONTAKE LESSONS:
If you don’t want to miss interesting lessons on text styling in Photoshop, subscribe to the newsletter. The subscription form is below.
- Back
- Forward
Liked? Share:
Add a comment
Enter your name, or register on the site, so that your name is inserted automatically in the answers: it will take 2 minutes! After registering, you will be able to edit your messages and will not have to enter confirmation
.
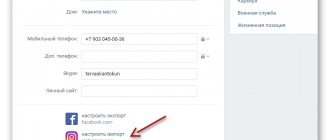
To display an Avatar
(your picture), you must have an account on Gravatar at the same email address, it’s free.
JComments
HTML color code table
If you see symbols like #F8F8FF , don't be alarmed. This is just a color indication. This “cipher” is used to simplify the work with the color palette when writing web pages.
In specialized development environments, when writing similar code manually, a panel with a palette automatically opens, where you can select any desired shade with a mouse click. Once the hue is determined, it is converted to this kind of representation.
Below I will present you an example of a table of different colors. Please note that for clarity, I will describe only four colors, but you can always look at the full table of shades on the Internet or in a special drop-down palette panel (for example, in the standard Paint program).
[td]Name
RGB Code for htmlPeachPuff255 218 185#FFDAB9LemonChiffon255 250 205#FFFACDAzure240 255 255#F0FFFFVioletRed208 32 144#D02090I think that after viewing the above table, some may have a question: “What is RGB?” And it is right!
RGB is one of the types of color models that is used to assign shades to graphic elements.
It belongs to the additive group of models, since each possible shade is obtained by adding values to black (which is given by the numbers 0 0 0). Thus, as you change the values of each channel R (responsible for red), G (responsible for green) and B (blue), the output color also changes.
Option 1: PC program
The capabilities of Discord users who have installed it on their computer are much wider, since they have access to programming language markup, which ensures the creation of colorful inscriptions, but with certain conditions. This also includes a simpler setup of roles on the server, when the name of each user is displayed in its own color. Let's look at how such inscriptions are created and roles are distributed.
Colored server member names
Let's start with a simpler task - coloring the names of server participants using roles. Keep in mind that only the creator or a user with unlimited rights on the server can distribute them.
- In the left panel, select the server you will manage.
- Click on its name to open the action menu.
- Select the third option - "Server Settings".
- Among all the available sections, you are now interested in “Roles”.
- View the list of current roles, edit them or create new ones.
Another article on our website is devoted to this topic, which you can read at the link below. Read more: Creating roles on a server in Discord - Now that the roles with the required colors have been created, through the same settings menu, go to “Participants”.
- Opposite each server member there is a plus icon, clicking on which allows you to assign a role.
- After selecting it, the color of the nickname will immediately change, which means that the task has been successfully completed.
- Return to the text channels to ensure that usernames and their new colors are displayed correctly.
For more detailed information on interacting with roles, read the article at the link attached above. There you will learn about the rights of each of them and the hierarchy, which affects the color of the nickname when adding more than one role to a user.
Writing in colored text
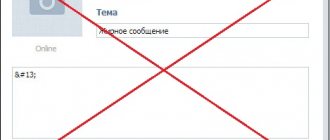
Colored text in Discord is not very convenient to use in normal communication, but it is perfect for designing channel descriptions or other information. At the same time, the main limitation should be taken into account - you can write colored text only in a PC program or through the web version, and its color will also be visible only to users of the desktop and browser versions (color is not displayed in the mobile application).
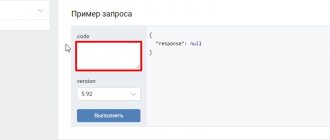
- To create colored labels, Discord's capabilities in terms of supporting programming languages and their classes are used, so to achieve the desired result you will need to declare the class itself or certain functions. To create a red color, enter the following: "`diff -text"`
- The blue color is achieved using "`md #Text"`
- In approximately the same format, writing is carried out in other available colors and strokes, but the text itself will almost always have certain features, as seen in red, blue and green. In the second case, the inscription is preceded by a “#” sign, in other cases - “-” or single quotes. This is due to the coding markup itself and it will not be possible to get rid of these signs.
Below you can see almost the entire available list with different colors. All you have to do is copy the appropriate fragment, paste it into the program and replace the color itself.
- Red:
- Blue:
- Dark green:
- Orange:
- Dark grey:
- Dark orange:
- Turquoise:
- Highlighted in green:
"``diff -text``
"`md #Text"`
"`css Text"` (English only)
"`fix Text"`
"`py #text"`
"`cs #text"`
"`xl 'text'"`
"`tex $Text"`
Do not forget that all signs before the “text” are necessarily saved, and only then the inscription itself is changed to the necessary one. If you are interested in the topic of using programming languages and classes in Discord, at least for the purpose of expanding the possibilities of writing in different colors, check out the official documentation in the article linked below.
CSS classes reference in Discord
Highlighting text using a background
As I already mentioned, I completely devoted one of my previous articles to the topic of setting the background and background images. And now I will only touch on the main points.
So, the background is best set through css elements. background is most often used . With it, you can format 5 background parameters at the same time: setting a picture or color, position, repetitions, or scrolling along with the page content.
Now let’s supplement the previous example with the acquired knowledge:
1 2 3 4 5 6 7 8 9 10 11 12 13 14 15 16 17 18 19 20 21 22 23 24 [/td]
| Example body { background:#F0FFFF; } h2 { color: orange; text-align: center; } p { text-align: center; background: #FFDAB9; } |
Option 2: Mobile application
You already know that creating colored text in a mobile application is not available; it is not even displayed there. However, this does not apply to the distribution of roles, so let's look at how to make the nickname of any server participant colored (if, of course, you have server administrator rights or you are its creator).
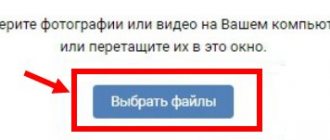
- Launch the application and on the server selection panel, click on the one you need, then expand the action menu.
- Through it, go to “Settings”.
- Scroll down the list of available options and select Roles.
- Create a role or configure the current one as shown in the article linked above (in Option 1).
- Return to the previous menu and this time tap on the “Participants” line.
- Assign the required roles to the server members, save the changes and leave this menu.
- Review the information in any of the text channels to ensure that the new colors are displayed correctly.
By the way, in the previous screenshot you can clearly see that all the text that was colored in the program on the PC is displayed in gray in the application, which once again confirms the words that class marking does not work here.
We are glad that we were able to help you solve the problem. Add the Lumpics.ru website to your bookmarks and we will be useful to you. Thank the author and share the article on social networks.
Describe what didn't work for you. Our specialists will try to answer as quickly as possible.