How to upload a VK photo? Read detailed instructions in this article.
If you are registered on VK, then you have probably already tried posting and editing your photos. All users who have a profile on this social network are only puzzled by how to post a photo and upload it to the wall, history, group, and so on.
- Of course, advanced users can do this without problems, but it is still difficult for beginners to add even one photo.
- In this article we will look at all the problems that may arise when posting VK photos.
- Also here you will find instructions to help you post a photo without difficulty. Read on.
How to post or upload a photo from a computer to VK: to history, to a wall, to a group
It may also be useful for you to study information on how to write a personal message on VK. Read the article on our website , which will help you find out everything you need about the VK social network and how to correctly write personal messages to VK.
Uploading photos to history, to a page, to a wall
So, to upload a photo to your page, follow these instructions:
Click "Add"
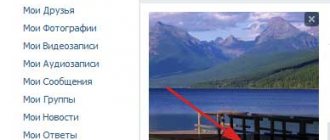
- Go to the “Photos” on your VK page.
- Click Add Photos .
- Then Windows Explorer will open. Find the folder where your photo is stored.
- Click on the photo to upload it to VK. Click Open . The photo will appear in the "My Photos" .
- Now you can choose what you want to do with this photo: “Publish on my page” or “Add to album” . If you add it to an album, then in the next step you need to choose which album. The photo will then appear in that selected album.
- If you want to create a new album, then at the same step write the name of the future album, and set the privacy settings: who can view it, and so on.
Upload to album or create new album
- If you choose to post on the page, then the photo will appear on your profile wall.
Publish on page
Another option
You can also attach a photo to the wall with two clicks. Do the following:
- There are function buttons on the wall at the top of all posts. Click on the camera icon.
Click on the camera icon
- After this, a window will open in which you will see your newly uploaded photo. If you have not yet uploaded a photo to the VK page, then click on “Upload photo” .
- If the photo is in the VK album, then click on the image itself.
Click on the photo
- All you have to do is click “Send” in the next step, and that’s it - the photo is already on your VK wall.
Click “Submit”
As you can see, uploading photo content to a page, story or VK wall is very simple. Just follow the instructions and in a few seconds you will be ready.
Posting photos to the group
Posting a photo to a community page is as easy as uploading it to your page. Do the following:
- Join the group.
- Find the "Photo Albums" . Click on the title.
- A complete list will appear, click on the selected album.
Album list
- A list of uploaded photos will appear. At the top there is a button “Add photo to community album” . Click on it. It is worth noting that many groups close this opportunity to users, so this button may not be found on the photo page in the group.
- If everything is fine and there is an add button, then click on it and proceed in the same way as we uploaded photos from a PC or album to your page. All actions were described above.
The uploaded photo appears in the group.
After this, the added photo will appear in the group album.
How to add new products and catalogs in a group in Odnoklassniki
The ubiquity of social networks and their high popularity among all categories of users of different ages and income levels has led to the fact that almost all modern stores selling their goods or services via the Internet have begun to create public pages and special groups. Following them, the developers of these sites began to add new functions, such as, for example, the ability to post their products in special sections directly in these groups.
In this article we will look at the process of adding products to a group in Odnoklassniki:
- From a computer;
- Through the official application;
- In the mobile version of the site.
It is worth noting that you can post your products in any groups, regardless of their categories.
How to add products to a group in Odnoklassniki from a computer?
Despite the fact that the function of adding products is available in any community, in some groups the corresponding section is enabled by default (for example, in stores or in message boards in Odnoklassniki) and is available immediately after creating these pages, while in regular groups This section must first be connected. To make products available in a group, you need to change its parameters. To do this, click on the icon with three dots on the page of the administered group and select “Settings” from the drop-down list.
On the next page you need to go to the “Management” section.
Scroll down this page and you will find the “Products” section. Here you need to select “Show” in the drop-down list, after which additional items will appear.
In the following list, you can select who will have the right to add products (for example, all members, or only group administrators), and you can also set rules for displaying new products in the feed (always or never).
Next, click on the “Save” button to confirm your actions.
After this, a new section “Products” will appear in the group. By going to it, the user can create a new directory by clicking on the corresponding button.
Important!
It is recommended to create separate catalogs for convenient grouping of products. We can say that they play the same role as albums in the process of adding new photos.
In the window that opens, you can enter the name of the new catalog and add a photo of this section. To confirm your actions, you need to click on “Save”.
To proceed to the process of directly adding new products, click on the appropriate button.
Next, the user will be asked to enter the name of their product in a separate window, as well as indicate its price, and you can select different currencies.
In addition, here you can add unique text describing the product, and also select a catalog for it from among those created in the group.
To make the product more visible, it is recommended to add a photo of it, and you can also indicate the place of sale here. To confirm the entered information and publish the product, click “Share”.
Important!
Products in groups are stored for one month.
As a result, the product in the created catalog will look like this.
How to add products to a group in Odnoklassniki through the application?
First, you should go to the administrated group and go to the “Products” section.
On the next page, click on the “+” button at the bottom to add a new product item.
In the window that opens, you can add a name and description of the new product. Next, you can indicate its price and place of sale, as well as upload a photo. Below you can select the catalog to which the product will be added. To confirm and add a new position, click on “Create” in the upper right corner.
After this, the added product in the general list will look like this.
How to add products to a group in Odnoklassniki in the mobile version of the site?
On the website m.ok.ru, which is designed specifically for browsers on mobile devices, you can also add products. First, go to the administrated group and select the “Products” section.
On the page that opens, you need to select “Place a product”.
In the next window, you can give a name to the new product, as well as indicate its cost and description. Here you can upload his photo and select the desired directory for placement, after which you should click on “Save”.
Important!
You are allowed to upload several different product images at once.
In the general list, the new product will look like this.
Conclusion
Odnoklassniki implements all the necessary standard functions that allow you to open a group store or bulletin board here. Using all available options, you can introduce the buyer to the product being purchased and tell about all the important qualities of the product, also attaching its photographs.
Source: https://help-odnoklassniki.ru/kak-dobavit-tovary-v-odnoklassnikah/
How to post or upload photos from your phone on VK?
If you use VK through the application, then you can post a photo through your phone. But provided that the photo is in the smartphone’s memory. Follow these instructions:
Select the desired section
- Go to the VK page.
- Open the "Photos" .
Section "Photos"
- Now go to the album from which you want to download the picture.
- Then click on the icon at the top «+».
- A window will appear asking you to upload a photo from the gallery or take a photo. Select the appropriate option. In our case, “Load photo from gallery” .
- Now add a photo to your page.
Click the camera icon.
You can also upload a photo to your VK wall. Go to the main page of your profile and at the top, above all posts on the wall, find the camera icon - click on it. Select a photo from the gallery and click Add . That's it - in a couple of seconds the picture will appear on your wall.
If you can't post a photo
Many VK users are unable to upload photos to their VK page. The reasons for this can be very different:
- Poor internet connection . Perhaps you do not have a network or its speed is low.
- VKontakte is not working - there are technical problems or work is underway on the service. This also happens. You just need to wait a little and then try again.
- Photos are too large . On VK it is permissible to upload photos no more than 5 MB. Photos that are too large need to be compressed.
If you think that you are doing everything correctly, but the photos are not loading, write to VK support. Usually the answer comes within one day.
Uploading photos to VK via phone
Often photographs are taken with a mobile device camera. Few people carry a digital camera with them. Therefore, there is no point in transferring data to a computer; it is easier to post it on a social network directly from the gadget.
To post photos from an iPhone or Android mobile device, go to the official social network application. Open the menu by clicking on the three dots in the corner of the screen and follow the “Photos” link. We are interested in the “Albums” tab. Let's go there.
If necessary, create a new folder; if not, add files to the existing one. To do this, click on the plus sign and then on the appropriate option: “Upload from gallery” or “Take a photo”.
In the same way, you can upload photos in the mobile version of the browser.
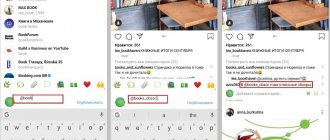
The official program for mobile phones provides another interesting opportunity - publishing pictures to VKontakte history. To do this, you need to open the news and click on your avatar with a plus sign or on the camera at the top of the screen.
If the program makes a request, allow it access to the camera. Then tap the big circle at the bottom of the screen and take a photo. The story will be shown to friends and subscribers throughout the day.
Posting images to the community
To add a photo to a group, go to it. Under the main information there should be a “Photos” block. We go there, select the “Albums” tab. We open the one that we want to replenish, and using the plus sign in the corner, we load graphic materials from the gallery or take a photo in real time.
We publish photos through the gallery
The same result can be achieved if you go to the folder where the images are stored on your phone. About the files that need to be sent to VK, click on the icon at the top of the screen. For me it looks like in the screenshot.
Now you need to select the social network icon, allow it access to files and attach pictures.
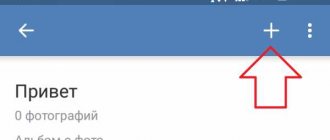
How to post several photos at once?
Uploading several photos at once on VK is not a problem, but remember that you can upload no more than 200 photos at a time. You can do it like this:
Photos are loading
- The instructions are similar to uploading one photo. Go to your profile.
- Find the "Photos" . Click Add .
- In Windows Explorer, select all the photos you want to upload at once. To do this, click on the picture and hold down the “Ctrl” .
- Then click "Open" . The pictures will begin to load onto the VK page.
When all the pictures are uploaded, click “Add to wall” or “Place in album” . Ready!
How to find out who posted a photo on VK: what to do if someone posted someone else’s photo?
It often happens that a user finds his photos from a VK page, posted by another person on anonymous sites such as “Overheard” or in some VK group. In this case, there is nothing you can do to find out who did it. You can only write a complaint to VK administrators and complain about such a post or group. But in this case you will have to prove that this is really your photo.
Now you know how to upload VK photos and how to solve all the problems associated with uploading pictures to VKontakte pages. Share your photos with friends, tell your stories, supporting their photos, and you will have one of the popular social network profiles. Good luck!