A little theory
People who professionally design websites and pages on VKontakte have their own slang.
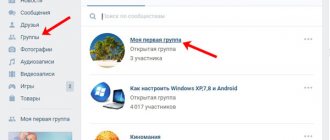
The top part of the page, which is the same for the entire site and carries general information or is present for decorative purposes, is usually called the header. A similar part at the bottom of the page is the footer. In the following narrative we will also use these terms. For example, on the pages of our group vk.com/tibimi, a header was added in order to maintain a unified design style, and the footer additionally allows you to go to the page with the menu (by clicking on the Back ):
In addition to the header and footer, illustrations can also be contained throughout the text. For example, in the example picture above, an image of our corporate hero, TBB Man, has been added.
How to change the background in a Viber group
Photos for a group on Viber can be found on the Internet, in the gallery of a mobile device, or taken using the built-in camera.
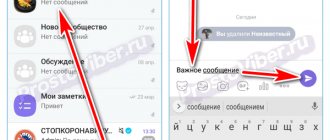
How to change the background image in a group, chat or community:
- Enter the menu by swiping across the screen and tap on "Background".
- To select, use the built-in pictures; you can enter the gallery or turn on the camera using the icons at the top.
- After selecting, tap on the button "OK", the background will change instantly.
If the background image disappears, it may have been deleted from the device memory. Photos from a group cannot be saved or sent to another user.
We recommend using pictures to design VKontakte group pages in two cases:
- When it’s easier to show once than to describe for a long time. For example, to explain to clients how to correctly determine their size: where to measure, how to apply a measuring tape, etc. Also, using a picture, you can clearly show the order process from application to receipt (you can see an example of such a diagram on the main page of our website).
- And, of course, to attract the client’s attention, because statistics say that information supported by illustrations is perceived by the reader as more interesting.
How to put a group avatar on WhatsApp
Adding a picture to a WhatsApp group is easy, you just need to follow a few simple steps. It is important to remember that only the creator of the conversation or its administrator can do this; ordinary users cannot initially upload or change images.
- First of all, you should directly enter the chat in which you need to change your avatar;
- Next you need to open the menu (three dots at the top);
- Find the “Group Info” section and click on it.
- In the window that opens, click on the camera icon and select, take, or find a suitable image on the Internet (it should not contradict the rules of the messenger). After this, the photo installation process will be completed.
It is important to remember that the image can be changed, so you should not choose it too carefully and fear that it will remain there forever.
How to choose the right pictures for VKontakte group pages:
- Pictures must be of good quality, without small, hard-to-see details. Everyone knows that when you upload pictures to the vk.com website, their quality decreases (this is how the vk.com website works and we can’t do anything about it), so small text may become unreadable, and some details will blur and look untidy . Be sure to check how your pictures look on the pages, and if quality problems arise, change them to others.
- There shouldn’t be too many pictures: it’s better to have one, but it’s high-quality, well thought out, and attracts attention, than several scattered and not united by a common idea. Naturally, the image should correspond to the text, as if enhancing it.
- Pictures on different pages should be combined with each other and be the same size, so that the visitor gets the feeling of a single design concept for the entire group.
Remember that high-quality and neatly designed pages, thoughtful texts and carefully selected illustrations make a very big contribution to creating a client’s feeling of your professionalism and reliability.
Let's move on to practice.
Uploading a cover to a group on VKontakte
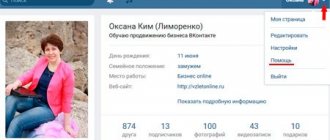
By default, immediately after creating a group, the VK website will show you an interface for uploading a traditional avatar. The cover is loaded from the settings panel.
On the main page of your public page, find the “Management” menu item. It is located in the right menu. And before the interface changed, in order to see it, you had to click on a button with three horizontal dots.
You will be taken to the settings section. On the first page, find the “Community Cover” link, this is what you need.
If the design has not yet been installed, then by clicking on this link you will see the following window:
We are now interested in the top block - “Main Community Cover”. As you can see, the basic information for creating it is presented here - downloadable file formats and sizes. It is 1590 pixels horizontally and 400 pixels vertically. There is no way to change these numbers.
When framing, it is necessary to place the most important semantic elements of the image closer to the center. The fact is that on small screens this picture will be cut off at the edges.
Click the button, select a suitable image on your computer and upload it. It may have other sizes not necessarily listed here. Immediately after downloading, you will see a window in which you can select the desired area.
As you can see, there is a light area in the middle, and dark fields above and below. This light window can be moved around the image with the mouse, and even partially changed in size, but its proportions will remain unchanged.
To ensure that the image is not distorted when loading and looks good on the page, it is recommended to choose a large source file – 1590 pixels wide or more. If you take less, then during installation the VKontakte engine will stretch it to this value, and the quality will drop.
Move the mouse over the light area to select the desired fragment, then click the “Save and Continue” button. You will be returned to the settings page. Now click the “Save” button at the bottom and return to the main page of the group. If necessary, reload the site using F5. The new picture should appear immediately.
How to upload a cover to a group
The banner is designed, made and ready to use. But how to show it in the header? The process is described in step-by-step instructions below:
- in the group menu you need to find and open the “Management” section;
- in the section there is a special line “Community Cover”, it contains a link to download the banner, you should click on the clickable word “Download”;
- A window will open on the screen in which you need to find the location of the banner and select it;
- Once the download is complete, you need to click the “OK” button to consolidate the actions and you can check the display.
As a result of these simple manipulations, the selected image appears in the community header. It can be changed periodically using the same loading scheme.
Setting a picture in the community header is a simple process. Designing and preparing a banner takes much more time. It is this stage that deserves special attention. After all, the cover is the face of the public and the first step in its promotion.
It is best to give preference to thematic pictures. And if possible, then turn to competent specialists. They will not only select the best option, but also set the direction for the development of the community. The time and effort spent on setting up and promoting the group will more than pay off. When the views go off scale, it will begin to generate income for its owner. Therefore, proper cover design is one of the priority tasks of any admin.
If you liked our article, then share it on social networks and be sure to subscribe to blog updates so as not to miss a lot of interesting things!
How to replace an image with a new one
To make communication in the group interesting and exciting, the messenger developers allowed users to change the avatar of their groups. This can also only be done by the conversation creator or its administrator.
Changing the group picture on WhatsApp is easy. However, in this matter, you need to take into account the details. The algorithm for this action completely depends on the device on which the messenger is loaded. So the picture replacement device for Android-based gadgets and for Apple equipment will be slightly different. Each of these schemes should be considered separately.
Changing the picture on Android
You can change the picture in WhatsApp in a group on Android quite simply. To do this, just go to the group, click on the “Menu” button, select “Group Info” or click on the group title. In the window that opens, you need to click on the free field at the top and, finally, add a picture from those that are already on your phone or tablet, take a new photo or find a suitable image on the Internet.
How to change pictures on iOS
To change the avatar in a WhatsApp group using Apple gadgets, first of all you need to go to the group and click on its name. It is located on top. Then click on the inscription “Photo Place”. A menu will open in which the user will be asked to make a choice:
• take a new photo with your phone camera; • select a photo from those already available on your phone or tablet; • find a picture on the Internet.
It is enough to do one of these actions and delight the conversation participants with an attractive image.
Instructions for PC
If a person uses the messenger on a PC or laptop, then most likely he has a special application installed, or he logs in through the web version. In this case, he can also communicate in groups and change avatars in them. The principle of operation in both cases is as similar as possible to that described in the instructions above. The general algorithm of actions does not differ from what is proposed for Android or iOS.
- First of all, you should click on the avatar
- then you need to select the appropriate file from a folder on your computer and upload it to your profile.
In the web version of the messenger, you can change your avatar using any browser.
When uploading a new photo image, you should consider its dimensions. Otherwise, the picture may look too compressed or, conversely, elongated.