How to make a picture a link in html on a website
Good afternoon. About a year ago, I wrote an article: “How to make a flash banner?” In this article I decided to continue this topic, but in a simpler form. We won’t talk about creating a banner, but simply about how to make a picture a link. For example, the picture above is a link to my affiliate course, How to Make a Movie. You can click and see how it works!
How to add a picture to a web page
First, the image must be uploaded from your computer to the site hosting, social network (VKontakte, Google+, etc.), Yandex.Disk or Google.Disk, so that the image has its own address on the Internet.
If there is a visual editor, then the sequence of actions is usually as follows:
- place the mouse cursor in the place where the photo should appear,
- click on the icon similar to or to,
- select a file from your computer,
- if possible, fill in the alternative text (aka image description).
Why do you need to make a link from an image?
a) For example, you have a beautiful picture of a wonderful product. You create a link from it, insert it into a specific resource. A person visits this site, sees a picture, clicks on it, and ends up in the online store where this product is located!
Convenient, I think so! The click-through rate for beautiful images is higher than for a simple mediocre link. Often they hide their affiliate links under the pictures.
b) If you have registered in any affiliate program, you have your own website, but the owner of the affiliate program has not provided the necessary advertising materials. What to do in this case?
It is enough to copy the images of his product, place the screenshot on the site, and make the picture a link. This will be something like a banner, but with less load on the site. In my opinion, it is very convenient and beautiful. Especially if you draw beautifully (or know someone who can beautifully draw a certain banner for you). You make a link from this banner image and, again, the click-through rate for this banner image increases.
c) The third reason is similar to the second. I think I won’t tell you the secret that banners significantly increase the load on the site. After all, what is someone else’s banner on your site?
This is an image located on a third-party resource that your site requests while loading one of its pages. The point here is that the time of this request can vary significantly, from a fraction of a second to several seconds.
For example, I used to have a static banner on my website from a well-known company. The banner was beautiful, with constantly changing pictures. But the point is that it greatly slowed down the loading time of the site. Loading time reached 50 seconds. That's a lot!
As soon as I removed this banner, my blog began to load many times faster (the site started loading in 1.5 seconds, not 50!)! That is, you can create a screenshot of this banner, insert a link into the screenshot and its loading time will not be a few seconds, but a fraction of a second! Although, of course, not so beautiful. It will not change, but the site loading time is more expensive!
d) I think I won't surprise the web. masters if I say that some of your banners are simply not visible to users. The browsers of such people have the “Anti-block” or “Adguard” extension installed. These extensions simply block advertising. Including some banners.
If you have an image link, the anti-block will perceive such a banner as a regular image, and without any blocking. For example, I had a “live pictures” banner running for some time, but there were few clicks on it. At first I didn’t understand what was going on, then I saw that Adguard was simply blocking it.
I went to the manufacturer’s website, took a screenshot of the part of the material I liked, created a link from the picture and the result is obvious, not a single blocker is blocking it anymore. Moreover, the copy came out even more beautiful than the original, and works great, you can see for yourself!
https://livephoto.andgin.moviesecrets.e-autopay.com
e) Another reason why it is better to make a banner out of just a picture is that search engines, especially Google, do not like it when there is a lot of advertising on the site. And they will perceive your picture link as just another image, and not as an advertisement. Comfortable? I think yes! But let's get back to the essence of our question.
Making a picture a link by creating a new post
You can add a URL with a VKontakte picture by creating and publishing a new post on your page or in a group. I'll tell you how to do this in your profile.
Log into your VK account and click on the “What’s new with you?” field.
Next, open the desired Internet page in your browser and copy the URL from the address bar.
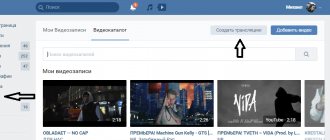
Return to the VKontakte page and paste the URL into the empty field. Hover your mouse over the image and click on the camera icon that appears.
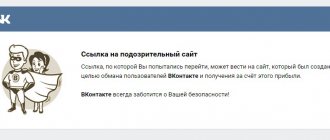
A window like this will open. In it, click on the “Select file” button to add an image. Please note that its size must be greater than 537x240 px, otherwise a warning message will appear.
Through Explorer, find the desired picture on your computer, select it with the mouse and click “Open”.
Use the markers to select the area to be used and click Save Changes.
Remove the URL itself from the text entry field so that it does not appear in the post. Click "Submit".
The selected picture will be an active link; by clicking on it, the user will be redirected to the site you specified on the Internet. All your friends will see the published note in their News.
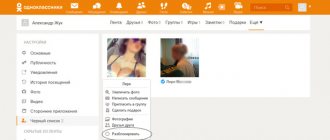
If you need a specific person to see the link you made, or you want to add this picture to your group, then click on the speaker image under the entry.
On the “Share” tab, mark the appropriate option with a marker and click “Share post.”
If you select "Send as a private message", then you need to specify the users from your friends list to whom it will be sent. You can select one or more people.
If you want to add a post you made to a group, select your group from the list.
This is what a post with a link picture that you shared looks like on the group wall.
How to make an image a link in the sidebar
This is done quite simply. I will give the construction of such an image with a link:
alt="" />
In the link address we insert the entire link, with https:// and other things (although this is not always necessary, but don’t worry about this). The same applies to the image address.
How to find the address of your image? Click on it and you will see your link in a new window at the top. Or, by logging into the admin panel, select “Media” - “Library” and view all your images on the site.
Find what you need, click on the link above, and view the link.
Also, I would like to add that if you want your picture to open in a new tab, it is advisable to add target="_blank" to this code.
Accordingly, our code will take the form.
<a href=»адрес ссылочки» target=»_blank»>a></a>
Images on blogs are most often found in the /wp-content/uploads/ or /images/ folders.
Essentially, the above code is ready to be inserted into your sidebars. You can make it in the center, placing it between the tags
..., or code
As you can see, everything is quite simple.
I advise you to read: - How to make money on the Internet 36 ways and
How to find out the address of a picture and copy it
There are several ways to copy the image address:
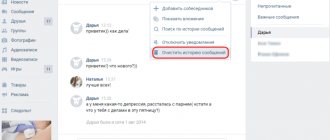
- Place the cursor over the photo, click on the right mouse button, in the context menu that appears you will be asked to copy the URL, click on the required item.
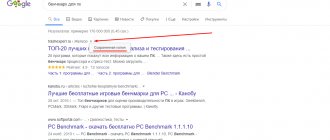
- Place the cursor over the photo, click on the right mouse button, in the context menu that appears you will be asked to study the characteristics of the photo, click on the required item (in Fig. 1, see the “Image Information” item; in Internet Explorer, see the “Properties” item), in the window that opens, select the address of the picture,
- Right-click on the mouse and click on “Copy” in the context menu that appears.
- press the keyboard shortcut Ctrl+C.
- Place the cursor over the photo, click on the right mouse button, in the context menu that appears you will be asked to go to the picture page, click on the required item (in Fig. 1, see the “Open image” item). A page will open containing only one image. Full height if it was previously reduced using the height and width attributes or using CSS. Select the address of the page that opens in the address bar of the browser,
- Click on the right mouse button and select “Copy” in the context menu that appears.
- press the keyboard shortcut Ctrl+C.
- On touch devices (smartphone, tablet), hold your finger over the photo for a long time without moving; in the context menu that appears, you will be asked to go to the picture page, click on the required item (it may be called “View picture”). A page will open containing only one image. Full height if it was previously reduced using the height and width attributes or using CSS. Then long press on the address in the browser address bar. After the sliders appear and the entire URL is selected (if necessary, the sliders can be moved to the required distance), click the “Copy” button in the appeared panel.
- Place the cursor over the photo, click on the right mouse button, in the context menu that appears you will be asked to go to the background image page, click on the required item. A page will open containing only one image. Full height if it was previously reduced using CSS. Select the address of the page that opens in the address bar of the browser (see Fig. 3),
- Click on the right mouse button and select “Copy” in the context menu that appears.
- press the keyboard shortcut Ctrl+C.
- From the source code of the site page.