Hello, dear readers of iklife.ru.
Social networks are intended primarily for communication and information exchange. This can be text, images, video. And today we will figure out how to add a photo to VKontakte.
Let's start with posting on a personal page, then we'll talk about communities, pay attention to publishing from a phone, and at the end we'll learn how to quickly post materials from Instagram on VKontakte.
We post a photo on our profile
There are several options for this placement: on the wall, in the photography section, in an album, and by setting an avatar. You may find some or all of them useful. Let's look at each method separately.
On the wall
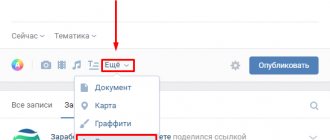
To attach an image to a post, click the camera icon below the text. You can post graphics without an accompanying message, but this is rarely done.
Then follow the “Upload photo” link.
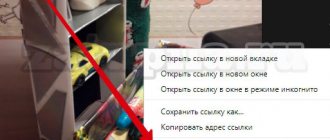
In Explorer on your computer, select the required file. Or take a photo in real time, it will appear under the new entry. Click "Submit". Done, new material has been published on the wall.
On the page
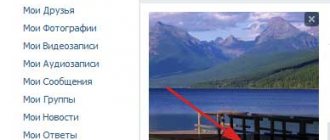
Go to the corresponding menu item.
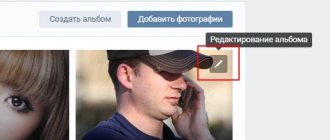
Click on the “Add Photos” button. Select one or more files in Explorer and open them. Now you can make some adjustments:
- make a description,
- to turn,
- open photo editor,
- remove if necessary.
All this is done using icons on each thumbnail.
After processing is complete, we confirm our desire to publish the images on the site.
Now you can see them in your account in the appropriate section.
In album
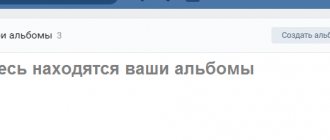
If you don’t already know that graphics can be stored in separate folders, read the article on how to create an album in VK. If you already have ready-made catalogs, after uploading photos from your hard drive, you can choose not “Publish on my page”, but “Add to album”.
In the window that opens, select the location where you want to move the files.
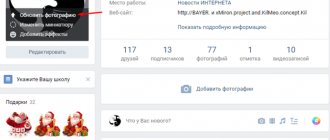
Main profile photo
Hover your cursor over the current image and a menu will pop up. Select Update Photo.
Here you can take a snapshot or download a ready-made one from your computer. When the download is complete, confirm your choice with the “Save and Continue” button, or go back and select another option.
Finally, define an area for a small avatar that will appear next to your messages and in other users' friends lists. Save your changes.
Changing the image format in the Paint editor
The simplest image editor, Paint, is a Windows component, you can find it through the “Start” button (we have already found out where the “Start” button is located). To change the image format, Paint's are quite sufficient. Example from my computer: left-click Start , select and left-click Paint
and find ourselves in the Paint editor window.
To open an image, you need to specify the path to it. At the top left of the Paint , left-click on the checkbox:
The menu opens. In it, left-click on the “Open” option (or press CTRL+O on the keyboard)
We look for the folder on the computer in which our file to change is located, select this file by clicking the left mouse button, and left-click on the “Open” button at the bottom right.
The image opens in Paint. Next, left-click on the checkbox at the top left, a menu opens, click “Save As” in it, and then click on “JPEG image”. Now there are two (I have 3) photo files in your folder; when you insert a photo on MIRTESEN, select a file in .jpeg format.
If you are already in a folder with an image file that you want to save in another format (in our case, with a photo), select this file with the right mouse button. A drop-down menu will appear, left-click on the “Open with” option, another drop-down menu will appear, and in it - a list of all programs that can open this file. Left-click on Paint and resave the file in a different format as described above.
Now that our file is in jpg format (or .jpeg, .gif, .png), we will finally install the portrait on your personal page.
There are several ways to get to the portrait setup page:
Add a photo to the community
If you are the creator or administrator of a community, then posting graphic content is an obligatory part of filling it out. Here, as in a personal profile, there are several options for publishing materials: on a page, in an album, changing the main thumbnail.
And we will use the same techniques. First, go to the main menu section “Groups”, “Management” and go to the community that we plan to edit.
To publish news with a picture on the wall, write text in the “Add entry” field and attach a graphic file. To do this, click on the icon depicting a camera. You can select from the materials available on your personal page or download from your PC. When the download is complete, we post the content to the wall.
To create and fill a group album, you need to go to the “Management” menu, “Sections” and add the ability to publish photos. The program offers you to choose from 2 types of access – open and closed. In the first case, all group members can post photos, in the second - only administrators. Save the settings and move on.
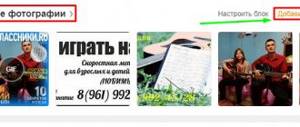
On the main page on the right we find the “Add photos” link and follow it.
Here you can upload images to the main directory created automatically or go to the “All photos” tab - “Create an album”.
You can then download pictures saved on your hard drive. To do this, go to the album and click on “Add photos” or drag documents from a folder on your computer with the mouse.
To change the “face” of the group, upload a photo to the main page.
Method 4:
On your personal page, at the top, click the “Edit profile” button
We get to the profile and click the Portrait menu.
We get to the photo upload page. Click on the “Browse” button and find the folder with your photo on your computer. In this folder, select the photo that you want to see as your portrait, click on it once with the left mouse button, selecting the photo. Then left-click in this folder with photos on the OPEN option at the bottom right. A file with your photo is uploaded from your computer to the MIRTESEN server. The photo is immediately set as a portrait.
Uploading photos to VK via phone
Often photographs are taken with a mobile device camera. Few people carry a digital camera with them. Therefore, there is no point in transferring data to a computer; it is easier to post it on a social network directly from the gadget.
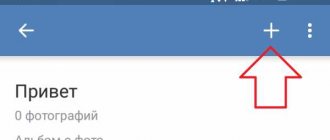
To post photos from an iPhone or Android mobile device, go to the official social network application. Open the menu by clicking on the three dots in the corner of the screen and follow the “Photos” link. We are interested in the “Albums” tab. Let's go there.
If necessary, create a new folder; if not, add files to the existing one. To do this, click on the plus sign and then on the appropriate option: “Upload from gallery” or “Take a photo”.
In the same way, you can upload photos in the mobile version of the browser.
The official program for mobile phones provides another interesting opportunity - publishing pictures to VKontakte history. To do this, you need to open the news and click on your avatar with a plus sign or on the camera at the top of the screen.
If the program makes a request, allow it access to the camera. Then tap the big circle at the bottom of the screen and take a photo. The story will be shown to friends and subscribers throughout the day.
Posting images to the community
To add a photo to a group, go to it. Under the main information there should be a “Photos” block. We go there, select the “Albums” tab. We open the one that we want to replenish, and using the plus sign in the corner, we load graphic materials from the gallery or take a photo in real time.
We publish photos through the gallery
The same result can be achieved if you go to the folder where the images are stored on your phone. About the files that need to be sent to VK, click on the icon at the top of the screen. For me it looks like in the screenshot.
Now you need to select the social network icon, allow it access to files and attach pictures.
Autoposting from Instagram to VK
And finally, as I promised, a little trick for fans of Instagram and VK. Open your VKontakte profile and click “Edit” under the main photo. In the menu on the right, go to “Contacts”.
At the bottom of the window we see the inscription “Integration with other services”. When you click on it, social networks will appear with which you can link your VK profile.
Follow the link “set up import”. An Instagram window will appear in which you need to click on the authorization button.
I have already entered my data, so they offer me settings for transferring materials. I recommend checking the box next to “Do not import (with hashtag only).” Then not all posts will be automatically transferred from Instagram to VK, but only those with the hashtag #vk - for import into a pre-selected album, #vkpost - for publication on the wall.
Save your results and try new possibilities. If something goes wrong, you can disable this feature at any time.
How to add a photo to VK from a computer
Often, users prefer to upload new images from their computer. This is due to the convenience and ability to process a photo in a high-quality manner in a special editor.
Reference. You can add a photo column to the main menu for quick access to photos. Move your mouse cursor slightly to the left of the “My Page” inscription. When you hover over it, a gear sign appears. Click on it. In the window that opens, check the box next to “Photos”.
Loading
To upload an image from your computer, follow these steps:
- Go to your VK page.
- In the menu on the left, select the “Photo Albums” section.
- Click the "Add Photos" button.
- Find the photo on your computer and click “Open”.
After some time, the photo will be uploaded to the social network.
Important! Using the described method, you can add one or several images. For example, to upload two photos at once, select them with the mouse and click “Open”.
What can you do with the image?
After successfully uploading a photo to the server, you can perform certain actions with it.
- Add to album. If you uploaded pictures through the general upload window, you can place it in one of your photo collections. To do this, do the following:
- Click on the “Add to Album” button.
- In the window that opens, select exactly where you want to move the photo card.
- If by chance you placed a photo in the wrong album, you can easily fix it.
- Hover your mouse over the image.
- Click on the button in the form of a list of three stripes.
- Select the correct album that this photo should be in.
- Add to your profile wall. Just click on the big blue “Post to My Page” button. You will be redirected to your feed, where you will see the newly published post.
- Add description. If necessary, you can write a couple of words as a description for each image you upload. These could be your thoughts or emotions about the photo you took, or a description of what is happening. You can also add hashtags to make the picture easier to find. You can print a description in a special field, which is located immediately below the thumbnail of the uploaded photo.
- Rotate photo. If for some reason the loaded picture is displayed upside down or sideways, you can turn it over by pressing the button in the form of an arrow that goes in a circle. It will appear if you hover your mouse over the thumbnail of the picture.
- If you accidentally uploaded the wrong photo you wanted, you can delete it in one click. Hover over the image and click the cross in the upper right corner. If you change your mind about deleting, click on restore.
- To view a picture in full size, just click on its mini version.
- You can correct your photo in the built-in VK photo editor. To get to the editor, click the button in the form of a half-filled circle. The functionality of this Photoshop from the VKontakte developers is very impressive. Here's what you can do with a photo card.
- Add text. Press the "A" button to write the letter.
- Crop - crop an image or cut it out and save only some part of it.
- Blur. After applying this function, some parts of the photo will be blurry. This tool can be used to focus attention on a specific part of the picture.
- The sun-shaped button will allow you to make auto-correction. This function will select the optimal, from a VK point of view, colors and filters for your photo.
- If you are not satisfied with the quality of auto-correction, you can adjust the settings yourself using the tools at the bottom of the image page.
Important! After processing the photo, be sure to click the “Save” button. Otherwise all work will be lost.
How to return photos to your feed
If you want to hide one of the photos in your feed, you need to click on the cross on it in the upper right corner. After this, a window will appear in which you will read that it will not be displayed in this block. If you immediately change your mind and want to return it, you should click on the “Cancel” link. And the photo will appear in the feed again. But keep in mind the fact that if you leave this page or refresh, this window will close and it will be impossible to restore it back to the feed. If you nevertheless closed the page with the window from which you could still restore deleted photos back to your feed, you can try writing a letter to those. site support. Although, as it seems to us, they may not help you with such a trifle. On the other hand, no one forbids you to enter the album where the desired photo was and delete it forever. And then re-upload it as we already described above, so that it appears in the feed again. This method is simple and uncomplicated. Remember that this feed shapes people's opinions about your page as a whole when they first view it. So, make sure that these four photos are the most interesting and high-quality. We hope that we have covered this topic from all possible angles. Stay with us, there are still a lot of interesting and useful articles ahead!
How to add a photo to VK from your phone
When adding photos from your phone, you won't have as many options as when working with a PC. The main convenience of this method is that you can immediately download photos that were taken on your mobile device. Step by step execution of the task:
- Log in to your account using the official VKontakte application.
- Go to the “Albums” section and select which one you will add the photo card to.
- Tap "+" at the top of the screen.
- Select upload from gallery, specify one or more photos and click “Attach” to add images that are already on your smartphone.
- Tap “Take Photo” to take a photo and immediately upload it to VK.
Reference. You cannot upload pictures to the “Saved”, “Photos on my page” and “Photos of me” albums.
How to add a photo to a group
Adding images to groups from your computer and phone is done in almost the same way as uploading pictures to your personal page. The only difference is that you first need to go to the community management section:
- Go to your group.
- Click the "Add Photos" button. It is located in the main community menu.
As you can see, the procedure for uploading photos is very simple. It is much more difficult to perform high-quality processing and color correction to make the image as attractive as possible and get more likes. However, the built-in VK photo editor greatly simplifies this process. You can even optimize the image with the click of a button. Try posting and editing photos on the page. Only experience will help you take photos for social media. The networks are getting better and better.
White stripes for VK posts, when used correctly, allow you to qualitatively design the visual component of a post on the wall, making it more attractive and giving it a slightly different look. It’s easy to use this add-on in post design, and the effect will be amazing.
How to hide updates from friends?
If you think that VKontakte users are following you, you can play hide and seek and hide updates not only from unregistered users, but even from friends.
VK offers an official way to do this:
● To hide photos on your personal page, click the “My Page” link, find the block with photos and hover your mouse over the photo you want to hide. Be careful not to delete it! A tooltip will prompt you to hide. Click it and you will see notifications that say “Photo will not appear in this block.”
● In this case, the photos are not deleted, but simply moved to an album with special privacy settings. You can drag any photo into it so that it remains on VK servers and is available only to you.
You can do this procedure on any type of device - iPhone or computer.
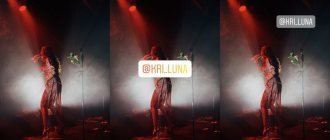
What are stripes for VK posts?
These are small inserts of different sizes and different lengths, which are used to separate photos and create more colorful collages. Thanks to the stripes, there is empty space between the images, preventing them from merging and improving the visual component. Below are two examples: on the left is a photo without using strip inserts, on the right is with use. You can see the difference for yourself. The size of the strips is selected individually for each case. For example, in the post below, the insert size is 10x130 pixels.
White stripes for VK posts are often used by editors of communities whose main content is photographs and pictures. This tool allows you to stand out among many similar projects, qualitatively positioning yourself in this market.
In order to increase the effect of the publication, it is necessary to experiment and change the design, displaying not only pictures, but combining them with suitable music tracks, text captions, emojis, emoticons, polls and hashtags. Thus, by playing with the design of posts and tracking the activities of subscribers under them, you can select a number of optimal options, which in the future will need to be alternated to obtain maximum response and profit. It’s just important to remember that the total number of all attached materials should be no more than 10.
Selecting the optimal picture size
One of the disadvantages of VKontakte is the loss of image quality when uploading it to social media. net. There is no way to completely avoid this, but the appearance of the final picture in a VK post can be improved if you stick to certain dimensions. The optimal proportions for uploading images will be the following:
- picture for the post – 700x500 px;
- image for external link – 537x240 px;
- Profile photo – 200x500 px.
If you follow the dimensions indicated above, the quality of the uploaded photos will remain as good as possible, which will help you get the desired visual effect from working with them.
Using delayed posting
The functionality of VKontakte allows you to set a timer for published posts so that they are published at a set time in automatic mode. This function makes it possible to competently plan a publication schedule for a long period (a deferred entry can be made a year in advance), arranging posts in the required order for a certain period of time. This allows you to free up time both for analyzing the group’s activities and preparing new content, as well as for other equally important matters that will always be found when running a group.
A delayed post is created on the wall by clicking on the “More” button and selecting the “Timer” item. Next, set the desired date and time and click “Add to Queue.” The deferred recording is ready.
2nd method:
Your name is written at the top of your profile page. In our case - Vasya. When you right-click on your name (and here we are on Vasya), a drop-down menu appears. Select the “My Photos” option...
and go to the photo upload page:
Click on the “Browse” button and find the folder with your photo on your computer. In this folder, select the photo that you want to see as your portrait, click on it once with the left mouse button, selecting the photo. Then left-click in this folder with photos on the OPEN option at the bottom right. A file with your photo is uploaded from your computer to the MIRTESEN server. But in this case the photo is not set as a portrait, but as one of the photographs.
To display this photo as a portrait, you need to left-click on it. The photo will open in a new window, in which there is a menu at the bottom of the page, on the right under the advertisement. In this menu you need to select the “Set as portrait” option.
How to tag a user in a post
There are two ways to mention a person in a post:
1 – just copy the link to his page and paste it into the post. In this case, he will not know about it until he sees this recording himself.
2 – create an active link to your profile. To do this, you need to open any post on the user’s wall by clicking on the date of publication/repost and copy the numbers from the address bar following the word “wall”. If there are no posts on the wall, then you can open any photo and copy the numbers after the word “photo” from the address bar. This way we will get its id. Now we create a new post, put *, after it we insert the resulting id and after it we enter the person’s name in brackets. The final result looks like this: * id 11111 (Name), where “11111” is the user id address. We publish a post and immediately receive the result in the form of a person’s name with an active link to his page, and this user, in turn, receives notifications about the publication of a post mentioning him.
How to make bold text in a VKontakte post
Not in the post itself. Today such a possibility does not exist. Bold font can only be used when designing wiki pages. If you are the owner of a group and not a public page, you can use bold text to design the main news. To do this, you need to go to the community settings and make “Materials” open. After this, the “Latest News” tab will appear at the top of the main page, which is designed in wiki markup mode and allows you to attach photo and video materials and change the font type. But this opportunity is available only for groups and only for one top post.
How to take a screenshot of VKontakte from a computer
Everything is extremely simple. For this purpose there is a special key on the keyboard “Print screen”. It is located in the top row of function keys.
If you are working on a laptop, then you may need to press it together with the “Fn” key. It activates additional functions of the function keys.
Now all you need to do is open the VKontakte page on your desktop, the screenshot of which you want to take. Let this be the main profile page. Go to it and press “Prt Src” or “Prt scr + Fn”, depending on the type of keyboard you have.
At this point, the screenshot will be copied to the clipboard. Nothing will change visually on the screen.
Now you need to open any graphics editor. The easiest way is to use Paint - it is built into any version of Windows.
Launch it and immediately press the key combination “Ctrl+V” to paste an image from the clipboard.
After this, we save the resulting image and use it for our own purposes.