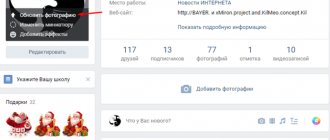
From the main profile page
There are two options for events. Now I’ll tell you everything and show you, be careful.
First option:
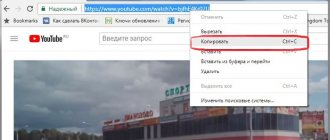
- First, let's go to our favorite social network - classmates.
- Once we are on our page, we begin to look for the “Photos” block.
- And there, in the upper right corner there will be “Add photo”, click on it.
- Then a window like the one below will appear.
This is Windows Explorer. All we need to do here is select the files we need, which are located on the PC. And you're done.
Second option:
You can also add a photo from the main profile page using the “Create notes” block. At first glance, it may seem that if you add a photo, it appears only in the notes, but no.
I hasten to surprise you that this function is the same as above mentioned. Perhaps this is a mistake, or maybe it was deliberately designed this way, so to speak, they showed creativity. Let's use it while it works.
Through the Photo section
The simplest and most familiar method for many, try it, perhaps it will become your favorite. We do the same work. Go to our page and click “Photo Section”. It looks like this as shown below.
I remembered the song, there are three roads, three paths, but which one should I take?
What I mean is that we now have three options:
- We create a new album and upload the photo to it.
- We place the pictures in our already created album.
- Or simply click “Upload photo”.
I propose to consider each option in more detail in order to better understand what is at stake.
Creating a new album
- First, we are required to click “Create Album”.
- Then a window will appear in front of us where we need to enter the name of the album and click “Create”.
Important! I suggest you pay attention to your privacy settings. We may limit who can view our album. If the need arises, you can completely hide it from everyone and only you will see it.
- So, we have done the above steps, now we have this picture in front of us.
- Before us is the window of the album we created. Click on “Upload photos”.
- As a result, the same window called Windows Explorer will open in front of us.
- Here we select the files we need and then click “Open”.
By the way, you can simplify the situation by adding photos. We take and select the number of them we need and “Open”. At the same time, we do all this from the PC folder directly into the browser window from the Odnoklassniki website.
After all, our pictures will be loaded and you can see them on your page. A notification will also appear indicating the completion of our work.
Why are the photos not loading?
In the process of uploading photos to the site, the user may encounter some troubles. There are a lot of options for such problems, but do not despair - they are easily solved. Let's figure out why photos aren't being added.
Problems with Cookies
After visiting various sites, special files – cookies – are stored in the browser. When they are not deleted for a long time, the browser’s work with information slows down, and all sorts of errors may occur. This is one of the likely reasons why photos are not loading. To solve this, find the Cookies tab in your browser settings and click “Delete.”
Adobe Flash Player is faulty
If clearing cookies doesn't help, there may be a problem with Flash Player. Try reinstalling it: go to the official website, download the latest version and install it.
Slow Internet connection
The next reason is the low speed of the Internet connection. In this case, in addition to uploading photos, other functions of the site will not work well, for example, you will not be able to attach music. To resolve this issue, check your internet connection and contact your internet service provider.
Browser errors
If your browser gives an error when loading an image, it may be outdated or damaged. To check, try loading photos from another browser, use someone else's computer. If the download is successful using another program, you need to reinstall the browser.
Site conflict with other programs
It is possible that the software installed on your computer is blocking some functions of the site. This could be an antivirus or an ad blocker. Go to the settings of these applications and open access to the Odnoklassniki website, mark it as a verified source.
We have considered all options for adding images to the Odnoklassniki website. Now you can share them with friends and upload photos from various devices. And also post files downloaded from mail or old scanned pictures.
Related Posts
How to change your name in Odnoklassniki
I'm disgusted with the gifts sent to Odnoklassniki, but I can't leave
Dating in Odnoklassniki
Adding to an existing album
Adding our photos to an existing album is as easy as a piece of cake. To do this, go to “My Albums”. In each of them there will be three vertical dots on the right, click on them and there we will be offered two options for events.
- Upload a photo.
- Edit.
We select the first option, and we are immediately transferred to the explorer. Here we already know what to do, or more specifically, select the files we need and click “Open”.
In this way, you can add an image to a new album, as well as to an old one.
How to upload photos to Instagram from an Android phone
To post pictures on a social network you need to take several steps:
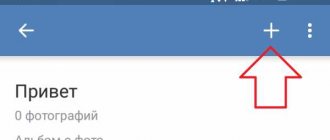
- Launch the application and log in. After that, click the button with the plus sign. It is located in the lower center of the screen.
- Your gallery will open in front of you. At the bottom there will be 3 buttons available: “Gallery”, “Photo” and “Video”. In the first tab, you can select and publish an existing photo, and through the remaining ones, take a snapshot or video.
- We will look at the example of a gallery. To do this, select the image you need. The application will offer to crop the picture, allowing you to focus on the details that are important to you. When moving the picture, you can easily select the desired area. Click the “Next” button.
- Next, the utility will take you to the editing section, where you can apply a variety of frames, filters and effects to the photo. They will make your photo more vibrant, interesting and attractive.
- After processing the image, it must be published. To do this, just click on the arrow at the top of the screen. Here you can add a description and hashtags. When everything you wanted to add has been added, click the “Share” button.
- At the next stage, you will be transferred to the news feed and you will see the inscription “Completion”, and a little later the entry itself will appear.
This way you will add an image to your account page. How to upload a photo to Stories?
- Open Instagram on your phone and go to your profile. To publish stories, click on your avatar above.
- The camera will open in frontal shooting mode. You can shoot a story in live mode, or you can select a photo from the gallery and publish it. To do this, click on the icon at the bottom of the screen, highlighted with a yellow rectangle in the screenshot below.
- Select a photo from the gallery that you would like to add to your story. If you wish, using the standard program settings, make a signature on the image, attach a sticker, and so on.
- Click on the “Recipient” button located on the right side of the phone screen and send the finished photo for publication. And choose how you want to publish the story, send it only to your best friends or make it public.
- After publishing, you can view your story by clicking on your avatar on the main page, or go to the news feed, and your story will be displayed at the very beginning of the story.
Add pictures using the “Upload photo” button
Guys, it is not necessary to immediately put our photographs in a new or old album. There is another interesting way. You can throw it directly into the photo section. For this we need the “Upload photo” button.
You can also use the mouse to move classmates to the window from Explorer. Don’t worry, everything will automatically be in the “My Photos” section.
So we figured out how to add a photo to Odnoklassniki from a computer to your page.
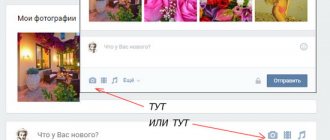
From the news feed
The very first thing we see after registering with OK is, of course, the news feed. What am I talking about all this and the fact that you can add images straight from the feed.
To do this, there is a “Photo” button just in the note-taking block that I told you about above. Our actions will be the same: click this button, then select the necessary files on your PC.
How to add a photo to Odnoklassniki from a phone or tablet?
You can add images from your phone through a specially trained OK application and through the mobile version. I don't really like the second method, so I suggest stopping and looking at the first method.
Moreover, the algorithm will be more similar to the computer version. Here we will find buttons already known to us, such as:
- In the photo section.
- On my personal page.
- In the news feed.
I will show all examples from my girlfriend’s page and from my iPhone. The process is similar with Android.
For example, in the feed everything is very transparent. In the “What’s new” column there is a section “Photos, click on it, and your photo albums will open, select the files and click “Upload”.
You can also go to your page and click “Photo.
Then all photos, as well as albums, will appear. Find the camera icon at the top and click on it. And then it’s like clockwork.
If we add our photos through the photo section, then this is basically the same as what we analyzed on our personal page. Let’s go to “Photos”, and you already know the rest.
Now you know how to add a photo to Odnoklassniki from your phone from the gallery.
iPhone
In gadgets on iOS, there are also two ways to upload images to Instagram - through the social network itself and from the camera roll.
Via the application:
- Open the application.
- Click on the plus sign.|
- Select the one you need from recent photos or use folder search, click “Next”.|
- If desired, we edit the image: change the size, apply filters, and do color correction. Finally, you can tag people and places.
- Click on “Share”.
Done, the photo is published on your Instagram directly from the gallery of your phone or tablet.
From photographic film
To post a photo directly from your camera roll, you need to follow these steps:
- Launch the Photos application.
- Among all the pictures, we choose the one that we will post on Instagram.
- Click on the image sending icon (arrow with a square).
- Select Instagram from the list of applications. If it is not on the panel, click on the three dots “More” at the end of the list and enable Instagram access.|
- If desired, we process the photo using filters, color correction, and add text or marks.
- Tap on “Share”.
Done, so you posted a photo on Instagram directly from the memory of your device.
Video
Conclusion
So, uploading a new photo to your Instagram is very easy. This can be done on both iPhone and Android. In both versions of the application, there are two ways to upload photos: from the Instagram menu and through the gallery or camera roll on the device. The simplest and most common first method is to just launch a social network and press the download button to search for an image in the memory of your mobile gadget.
How to upload a photo to Instagram from a computer
Saving other people's images to yourself in OK
From PC
You can not only publish your data, but also save photos that we liked.
- We take it, open the necessary image and at the bottom right there will be a list of various functions.
- You can choose either “Save to Album” or “Save to Computer.”
- You can also hover over the image and right-click. And select “Save as...”.
- Explorer will open, and there you decide where exactly to save.
From phone
- Open the photo and find three horizontal dots on top, click on them.
- Or press your finger on the photo.
- A mini menu will appear there, select “Save Photo”.
- And our photo is automatically saved in the phone.
A few words about adding images to Instagram from a PC
For users who are more comfortable using Insta from a computer, we recommend downloading Bluestacks to publish content. This is a program that emulates the Android operating system. If you have a problem with how to upload photos to Instagram from a PC, take the following steps:
- download and install the emulator on the device;
- go to the program, enter Instagram in the search bar and download the application;
- when the insta icon appears on the desktop, click on it, click “Login” and go through authorization;
- At the bottom, click on the “+” button, which is responsible for loading posts;
- select “Gallery” and activate the “Others” section on the top panel.
After these steps, you need to tap on the “Select from Windows” line. And at the end, select a photo on your computer or laptop.
Also read: Instagram social network: how to access your page in your personal account, via login, from a computer, via Facebook