17.12.2018
| no comments
You sit on VK and regularly cover your life there, but is it inconvenient for some of your older relatives to watch your reports there? Do you have a small store on VK, and do you want to expand its audience by opening a profile on Odnoklassniki? One way or another, you are faced with a task: how to transfer a photo from Contact to Odnoklassniki. Solving it is not difficult.
Transfer a small number of photos manually
When you need to transfer several photos, the easiest way to do this is by copying:
- We go to our page in Contact, find the necessary photos.
- Right-click on each image and in the menu that appears, click on “Save image as...”.
- Then select the folder where the photos will be placed. Let's save them.
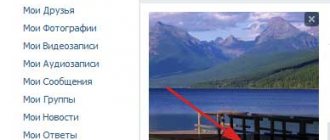
- Open a page on Odnoklassniki. Go to the “Photo” tab.
- Select an album from existing ones or create a new one. We are looking for the “Add Photo” button, it is located above all the pictures.
- By clicking on it, you can see all the drives and folders that are on the computer.
- Now you just need to find the folder with saved images (1), select one or more photos with the cursor (2) and click on “Open” (3).
After a few seconds, the photos will appear in the album.
Attention: if you have photos on your computer, you do not need to copy them from VK.
Mobile app
Let's start looking at the same methods, but by implementing them through the Odnoklassniki mobile application. In addition, you will need to use the VKontakte social network program and the mobile version of the site, open through any browser. A detailed analysis of each method is needed so that novice users do not get confused in application interfaces.
Method 1: Attaching a link in notes
Unfortunately, the functionality of the VKontakte application does not yet allow you to copy a direct link to a photo, bypassing the user’s personal albums, so you will have to use the mobile version of the site. To do this, you only need any browser.
- Go to m.vk.com, find the photo and open it to view.
- Hold your finger on the photo for a few seconds to open the context menu. If it is not displayed, you will need to find a button in the form of three horizontal dots, which should be located on the side or top of the photo. In the menu itself, you are interested in the “Download original” item.
- Click the link in the address bar.
- Copy it to the clipboard using the dedicated button.
- Go to the Odnoklassniki mobile application, where in the main section, click on the “Note” panel.
- Enter text and insert a link by holding your finger on the empty input space and selecting the “Insert” option that appears. After that, all you have to do is click “Publish”.
- As you can see, the post is now visible on your personal profile, and the image itself has been added to the Miscellaneous album.
Method 2: Download the photo and then upload it to OK
Of course, you can download a photo through the mobile version of the VKontakte website, but it will be a little easier to do this through the application, besides, we have already talked about using this source above, so now we suggest focusing on two programs.
- Launch VKontakte and go to your personal profile or the location where the desired photo is stored.
- Find it and open it for viewing.
- At the top right, click on the icon in the form of three vertical lines.
- In the menu that appears, tap on the “Download” item and wait until the photo is loaded into the gallery.
- Open Odnoklassniki and go to the menu.
- Select the “Photo” section there.
- Tap the “Upload Photo” tile.
- In the gallery, find the last uploaded photo.
- Edit it as necessary using the built-in functions, and then publish it.
Using exactly the same images, you can upload an unlimited number of pictures, placing them, for example, in different albums or creating a separate one for storage. The given instructions will help you quickly understand the solution to the problem and find the method you like.
We are glad that we were able to help you solve the problem. Add the Lumpics.ru website to your bookmarks and we will be useful to you. Thank the author and share the article on social networks.
Describe what didn't work for you. Our specialists will try to answer as quickly as possible.
Transfer a large number of photos manually
But what should you do if you want to transfer a large number of images, or even an entire album, from VK? The safest and easiest operation is performed using Yandex disk.
- First, you need to register a mailbox on Yandex or log into an existing one.
- At the top of the page you will see four tabs. We are interested in "Disk". We click on it.
- There is a list on the left, select “Photo” in it. Several more sub-items will open for you. From them you need to select the line called “Photo from social networks”.
- A list of all available social networks will appear in front of you, select VK from them.
- In the window that appears, you must enter your username and password for your page. The system will ask for permission to access personal and general information; you need to provide it by clicking on “Allow”.
- After this, copying all photos to Yandex disk will begin automatically.
Now you should send the photo to Odnoklassniki
- We mark on the Yandex disk all the photos that need to be transferred (you can mark one or more folders) (1).
- A menu will appear on the right. Select the “Upload to social networks” button there (2)
- In the list that appears we find Odnoklassniki.
- Then follows the identification procedure that is already familiar to us (enter your login and password, allow access to the data).
- Click on the “download” button. After some time, the images will appear on Odnoklassniki.
Attention: saving photos to Yandex disk and further posting them on social networks is absolutely free, any request to transfer money for services rendered is fraud!
From computer
The developers do their best to encourage users to add new information about themselves. So the download button can be found in almost any corner of the site. Let's figure out how and where you can add photos to Odnoklassniki.
Through the “Photo” section
Uploading through a specially designed section on the site is the most common and logical way (in my opinion). To download, you need to log in to ok.ru and go to the photo section. You can get there by clicking on the item of the same name in the main menu.
The same section is available in groups and public pages on Odnoklassniki. So you can post photos to the group in a similar way.
Now you have three options:
- Create a new album and upload pictures to it.
- Place the images in a previously created album.
- You can simply click “Upload Photo”.
Let's take a closer look at each option.
Creating a new album
To get started, click “Create Album”.
A dialog box will open in which you will need to enter a name and click “Create”.
Please note additional privacy settings. You can limit who is allowed to view your photos. If you wish, you can even deny access to all users. Then only you can see the content when you log into your account. At the same time, you can send any image in a private message at any time.
You will find yourself in the window of the created album. Click “Upload Photos”. A standard Windows (or macOS) window will open, in which you will need to select files and then click “Open”.
You can also simply select and drag the desired images from a folder on your PC directly into the browser window from ok.ru.
When the pictures are uploaded, you will see them on the page. Plus, a small pop-up window will appear notifying you that the process has completed successfully.
Add to an existing album
You can place pictures in a photo album that was created in advance directly from the photo section. Click on the three vertical dots in the upper right corner of the album thumbnail. A menu will appear in which you should select “Upload photo”. After this, an explorer window will appear. All you have to do is find the pictures you need and click “Open”.
You can open any old photo album and add pictures to it in the same way as we added them to the new one. That is, using a button or simple dragging.
Use the “Upload photo” button
Photos from your computer do not need to be immediately placed into an existing photo album or created a new one. You can throw them directly into the photo section. To do this, you need to use the “Upload Photo” button or use the mouse to transfer files from Explorer directly to the Odnoklassniki window. In this case, the images will be automatically placed in a place called “My Photos”.
From the main profile page
You can quickly and conveniently upload pictures directly from your personal OK page. For this purpose there are 2 buttons.
The first one with the unambiguous name “Add Photo” is located in the “Photos” block. After clicking on it, you will find yourself in Windows Explorer and you will only have to select the necessary files on your PC.
The second is located in the note-taking block. According to the placement logic, it should add pictures specifically to the notes being created. But apparently the developers have a different opinion on this matter. The “Photo” button performs exactly the same function as the “Add Photo” button - it allows you to upload images from your computer. It is unclear whether this is a flaw or an original solution, and whether it will be fixed. It doesn't matter. So far it works, so you can safely use it.
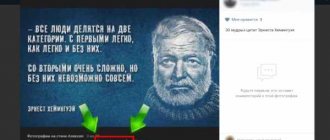
There are also three links on your page that can take you to the photo section. I marked them in the screenshot below.
From the news feed
The first page that a user lands on after logging in to ok.ru is the news feed. So, you can add new materials to your photo section directly from your feed. To do this, there is the already familiar “Photo” button in the block for creating a new note. The algorithm of actions is the same: click on it and select the necessary files on your computer.
Transfer photos automatically
There are various services that transfer photo albums from one social network to another, for example itamitut.ru and filecloud.me. Each has certain pros and cons, but the principle of operation is similar to Yandex disk, which is currently considered the safest. It is difficult and time-consuming only during the first transfer; later it will be much easier. When saving photos next time, you will not need to re-authorize, just click on “Save new photos”. Uploading to Odnoklassniki is also carried out without re-entering data. The process will take a maximum of a couple of minutes.
When using various services to synchronize data between social networks, do not forget about security and do not leave your passwords on unverified sites. Then you will be protected from unpleasant surprises in the form of account hacking and unauthorized debiting of funds.
Next page
Related Posts
How to change your phone number in Odnoklassniki
How to leave a group on Odnoklassniki from a computer or tablet
How to download photos from Odnoklassniki to your computer or phone
How to hide or close photos or a photo album in Odnoklassniki?
When you upload photos to your social network page, sometimes you don’t want your friends or some of them to see them. Often you want to close the album completely from all users. Is it possible to do this in Odnoklassniki?
Let's figure it out right away. The most important thing is that you cannot hide a single photo; this is true for all social networks. However, you can hide a photo album, and therefore all the photos that are in it. First, you will need to transfer all the images that you want to hide to a specific album.
You can create it according to these instructions, and if the album has already been created, then transfer photos to it - we talked about transferring earlier. You must remember that the “Personal Photos” photo album is created automatically when registering an account and cannot be hidden. At least at the time of writing. Now let's get down to business.
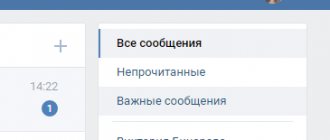
The first thing you need to do is go to the photo section by clicking on the “Photo” button in the menu.
In this section you will see both a list of photos and photo albums. Select the album you want to hide, in our example it's called "Miscellaneous". If you have only one “Personal Photos” album, create a new one (the link to the instructions is given above).
- When the page with the album opens, on the right side of the window, click on the “Edit, change order” button.
Additional buttons will immediately appear, one of which is called “Privacy Options”. Click on it.
Now you will see a window with privacy settings in front of you. The checkbox will be installed opposite the “In general” item; you won’t find a separate button here to hide the album, but there is a special solution.
Here you can choose who will see photos from the album. You must select a category in which you have no friends added.
For example, your “Colleagues” section is empty, that is, not a single friend has been added to it, so check the box next to this item.
It turns out that this album will be available only to “Colleagues”, but this friends section is empty, which means no one will see it. Except you, of course.
Select a section and click "Save".
This way you can hide other albums as well.
What if there are friends in each category? You need to remove them from the specified category, otherwise they will see the album and the photos in it.
Did our site help? Did you not like something? We will be glad if you leave your comment - positive or negative. Thanks in advance - you make us better!
Source: https://gidodnoklassniki.com/kak-skryt-ili-zakryt-fotografii-ili-fotoalbom-v-odnoklassnikax/
If there are not enough photos
If you only need to transfer one, two or three images, then you should not look for complicated ways. There is a very simple way to do this: download photos from Contact to your computer.
Then you need to go to Odnoklassniki and upload the same images to your page from the folder to which they were moved.
By the way, this way you can “steal” a photo from someone else’s page. However, you should not do this without the permission of the profile owner. This method is quite simple and convenient, but it is ineffective if you need to move a lot of photos at once. The user will have to spend a lot of time. Therefore, in such situations, the following, more complex method is used.