The VKontakte reviews widget is one of the most popular because it provides the opportunity to discuss published articles. Thanks to this, users stay on the page longer, which has a positive effect on its ranking by search engines. Another important advantage of such a widget is that user messages immediately appear on their personal pages and are displayed in the news feed of all people in their contact list. Thus, additional links to the article under discussion are formed, which also allows you to advance in search results.
- How to install the VKontakte reviews widget
- Widget for the VK community
- Removing an application from a community
What are VKontakte discussions and why are they created?
Before I move on to the issue of creation, let's look at what they are and why community owners need them.
Discussions are a standard block for administrators of VKontakte groups and communities, allowing them to create special “Chats” for communicating with the audience.
This is also a great way to not only provoke subscribers to be active, but also to receive feedback from them, which, in the right hands, can serve as an excellent tool for assessing the quality of services or goods.
So, why discussions in the VKontakte group can be useful:
- Customer communication;
If the community is entertaining: a fan club or a humorous public, then the chat will be an excellent platform for discussing news or popular events. After all, any activity is a plus for the community.
- Games are everything to us;
Yes, they can be used as a playground for word games. It's fun, funny and again motivates people to communicate with each other.
- Comments and suggestions;
Many popular public sites use chats as a means of receiving feedback. This is very important, especially when you need feedback from customers about the quality of the products or services being promoted.
- FAQ and block with additional information.
You can also create a FAQ or a convenient page with information about the community, and thanks to Wiki markup, you can arrange it all very beautifully.
How to install Vk comment widget on a website
Go to the next page using this link and configure the future block.
Previously, I had already created a social button from vk.com “Like” using this page, the article can be read here, so my blog is already connected to the application.
If you came to this page for the first time, then select “Connect a new site” in the drop-down menu and enter the name, address of the site and its main mirror.
Then you need to select the number of simultaneously displayed comments on the page, check the necessary extensions (will allow you to display photos, videos, links and other media elements in comments), and also set the width of the comment form.
These settings can be edited at any time during testing of the social widget. networks.
Next comes the most difficult part, which is installing the code on the site.
Since seoslim.ru runs on the WordPress engine, the first part of the code must be inserted into the header.php before the closing tag.
And the second part of the code must be installed in the place where the VKontakte widget itself will be displayed.
I decided to display it before the main comment form, so I had to add the code to the single.php , but it could also be done through comments.php . In general, everyone adapts to their own design.
By the way, pay attention to the line limit: 10, width: “620”, using these values you can set the settings for displaying the number of commenters and the width of the field, respectively.
After the work has been done, we upload the changed files to our hosting and look at the result.
How to make a group discussion on VK from a computer
First, you need to go to the public page of which we are the owner or admin and open the “Management” tab. The required button is located immediately below the community avatar.
Then, go to “Sections” and check if “Discussions” are enabled. If not, turn it on. There will be two options to choose from: open and limited. I advise you to set it to “Limited” so that users do not create a bunch of unnecessary chats.
We return to the main page and go directly to the creation process. The required button will appear at the bottom, immediately below the “Contacts” block. Click on “Add” and go to the editing window.
And now a little about what you can do here:
- Attach a photo. If it is too large, VKontakte will automatically reduce it;
- Add video recording;
- Attach an audio recording;
- Attach a document;
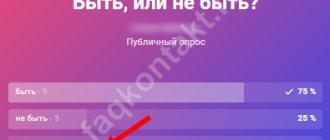
- Add a poll;
- Select on whose behalf it will be created: administrator or community;
- Headline and in Africa header;
- The text of the message, survey, request for feedback or calls to action;
- Well, and the “Create” button, where would we be without it?
When finished, something like this will appear in front of us:
Here you can re-edit the text or pin the message, in case you have a lot of them and need to move something to the top.
Widget for the VK community
A similar widget exists for the community on VK, to install it, use the link to the application
https://vk.com/app6326142_251476967
Select the “Management” tab and click on the “Install” button. After that, select the community where you plan to install. Next, you will need to select one of the two proposed display styles and click on the “Install widget” button.
Or, this application - the “Reviews” widget, can be accessed through the “Manage”\”Applications” button.
An important point is that a maximum of 3 applications can be installed in each community.
When the widget is installed, configure it in the “Application Privacy” section and set the name of the button. It is also possible to change a parameter such as “Visibility”. You can make the widget visible both for everyone and for certain categories of users - subscribers or administrators.
How to create a discussion from a mobile phone
Go to the mobile version of VKontakte or the application on your phone or tablet. Open the desired community and click on the “Discussions” tab.
Click “Create theme” (plus sign on the top right) and you will be taken to the editing window.
Here enter the name and click “OK”.
Finally, send your first message.
That's all. Agree, it’s very easy?
Add a discussion from your computer
Let's find out how to add categories for communication from a computer or laptop.
Adding to public
Let's go to the public. Under the avatar we find an icon with three dots - this is a menu of available actions. Click.
Select the first action – “Community Management”.
In the menu that opens, find the “Sections” block.
Check to see if the “Discussions” section is checked. If necessary, install it and save the changes by clicking “Save”.
Below is the “Main Block” function – here you can choose what type of content the emphasis will be on.
If you select discussions as the main block, they will be displayed either under the public header or after the products (if there are any). It will look like the screenshot below.
By default, the section is on the right, under albums and videos.
If no discussion has been published before, then the section will be displayed exactly like this - a link, by clicking on which you can publish the first topic in the public.
Click on the “Add discussion” link. We find ourselves in a standard template, where you need to enter the title and text of the first comment (without it you won’t be able to publish it).
The functionality is standard, as for any public message on the wall in VK: you can attach a photo, video, audio, statistics or survey. If you check the “On behalf of the community” checkbox, the new publication will be on behalf of the public.
If there is already at least one category in the community, then by going to the exchange of opinions section, we will see a list of published topics. The creator's name, number of posts, and date are also displayed.
You can search for messages using any words if you don't remember where the information you need is located.
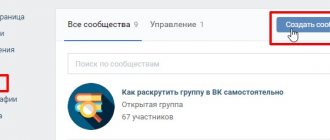
To add a new discussion, click on the blue “Create topic” button.
Any already published topic can be changed and adjusted. To do this, open the desired one and click on the “Edit theme” button.
A functionality opens where you can pin the selected category, and then it will be displayed first above all the others.
There is also a “Close topic” function here. When using it, viewing will remain available to all participants, but adding new comments will no longer be possible.
There is a button at the bottom left that allows you to permanently delete the discussion.
Configure the number of categories that will be displayed on the page and sorting (by update date or creation date). To do this, from the main page of the community, click on the “edit” link.
A functionality will appear where you can make the necessary adjustments.
After making changes, click on the “Save” button.
Add to group
The interface for creating a sharing space is slightly different here.
We take the first steps in the same way - you need to get into community management through the ellipses icon. Under the “Settings” sector we find the “Sections” sector we need.
If discussions are turned off, you need to turn them on. Choose what they will be: open, when the publication is available to all participants, or limited, when only administrators can create them.
Below is the “Main block” function - set the “Discussions” value there if you want them to be displayed immediately under the header on the page.
As in the public page, by default the section will be located on the right above the contact block. It looks like this.
Creating, sorting, deleting and pinning occurs in the same way as for a public page.
How to delete
What to do if the discussion is no longer relevant or urgently needs to be deleted? To do this, go inside and click “Edit Theme”.
And now to choose:
- You can close it: the chat will continue to exist, but no one except the administration will be able to write in it.
- You can remove it so that no trace remains.
What to do is up to you to decide.
How to write in discussions
To create a new topic in discussions on behalf of the community, you need to check the “On behalf of the community” checkbox. Otherwise, the entry will be published on behalf of the user under which you are logged in to VKontakte.
An example of how to write in discussions on behalf of a group
The settings look a little different if you need to reply to an already existing discussion. Similar to writing comments. In essence, these are comments.
By default, the answer in the discussion will be asked to write on behalf of the user; to switch to a group, you need to click on the user’s avatar and select the desired community in the drop-down list.
How to reply to a discussion as a community


