How to find out the VKontakte group ID (how to find out the VK group number)
If you have not changed the page address, the default ID will be the last row of numbers contained in it (set automatically).
If you changed the page address to a specific name, it will be more difficult to find out the ID. To do this, move the cursor over one of the menu items and use the right mouse button to copy the link address. Enter it into the browser, and if it contains numbers (which it doesn't always do), then this will be your page ID.
Click on any menu item
Editing a post in groups
We learned how to edit a post on the “VKontakte” wall on your page, but how to edit a post in communities and publics? In order to modify the message in the community, you need to click on the same pencil icon.
You can edit a post on a public page, as well as on the wall of your personal account, within 24 hours.
If you don’t see the icon you need, even though you did everything correctly, it means the message can no longer be changed. Therefore, in the community you need to edit a post on the wall in “VK” quickly, just like on your page - the rules are the same for everyone.
How to manage a group in contact if you are an admin, moderator or editor
First, you need to obtain the right to administer the community from the group creator.
To do this, the creator of the group must go to the group, click on the 3 dots under the cover or avatar of the group, and select “community management.” In the right menu, select the “participants” button. In the window that opens, assign any of the group members as a leader.
A window will open in which you must select the form of participation of the assigned group leader. This could be an administrator, editor or moderator. This window describes in detail what powers each type of manager has. The community administrator has the greatest authority.
An administrator can manage a group in much the same way as its creator. He will not have access only to the advertising account if it was opened by the creator of the group. But the creator of the advertising account can separately open access to it to any admin.
The second point is that the admin has no authority to remove its creator from the group and from the administration of the group.
The third point is that the admin will not be able to transfer the group to public and vice versa - this is the exclusive right of its creator.
Advantages of VKontakte
VKontakte is a social network that contains all the main advantages such as:
- VKontakte makes it possible to communicate with work colleagues, friends, relatives who live in different cities or countries;
- VKontakte can be used as a tool for self-development. You can watch educational films, listen to good music, read interesting books. You can subscribe to an interest group where you can find the information you are interested in
- VKontakte helps with studies. Are you surprised? And that’s exactly how it is, because this social network is very convenient for exchanging notes, labs, assignments and other useful information! Do you want to improve your knowledge? Join a group with a topic that interests you and there you will find both video materials and useful links, and you can also discuss questions with group members!
- VKontakte is a platform for business development! Here we can advertise your online store, web design studio, etc.
Are you interested in creating a VKontakte community? Then let's first look at the main differences!
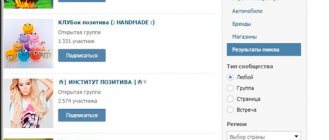
The main differences between the Public Page and the VKontakte Group
| Group | Public page | Conclusion | |
| Purpose | For discussions and associations of interests | To publish news on behalf of a company or famous person | Choose the type of community that suits your goals. |
| Privacy | Open, closed, private | Open | The group can be made closed or private. The public page is always open. |
| Profile display | To view the groups to which the user is subscribed, you need to click “Show detailed information”. But they are not always visible: if the group is private or users have hidden their display in the privacy settings, you will not see them. | Public pages to which the user is subscribed are located under the block with friends, and this list cannot be hidden in any way. | People see interesting public pages on friends’ pages and subscribe to them. This happens less often with groups due to their poor location and privacy settings. |
| Inviting friends | Yes | No | You can invite friends to join your group. To do this, go to “Community Management” - “Participants” - “Invitations”. Public pages do not have this feature. |
| Posts from subscribers | In groups, you can enable the “Open Wall” mode. Any user can write a post on such a wall, and it will be seen by everyone who enters the group. However, such posts do not appear in the news feeds of group members. | Any user can propose a post in the public, administrators will be able to publish it on behalf of the community with the signature of the author. Before publication, the proposed post is not seen by anyone except administrators, and after that it appears in the news feeds of subscribers. | If you need moderation of posts, it is better to give preference to the community. |
| Changing community type | Yes | Yes | A public page can be transferred to a group and vice versa. But only the creator of the community can do this. Changing the community type again is possible only after 30 days. Also, to transfer the number of participants must be no more than 10,000, otherwise the decision will be made by VKontakte support at your request." |
| User Content | Not only the wall can be “open” in groups, but also almost all sections: photos, videos, music, documents, photo albums, etc. | Administrators in public spaces can give users permission to upload photos to certain albums - nothing more. Users cannot add anything else. | Want a lot of user-generated content? Then a group is best for you. As for the public, users can only upload photos and propose posts for publication. But even this is enough. |
| Places and check-ins | In group management, you can specify a location. It will appear in the description. People who will be near the specified place, when creating a record and attaching their location to it, will be able to select your group as a point to mark. | You can specify several places in a public page at once. They are displayed in the hotel block in the right column on the page. However, unlike groups, you can check in in these places only through the community itself. | If you are the owner of an offline business, your visitors often visit your establishment and check in, then you should choose a group. If there are few check-ins and you realize that this function is not effective and does not provide the desired result, you can always change the type of community. |
| Group | Public page | |
| Live broadcasts | ✅ | ✅ |
| Ability to pin a post | ✅ | ✅ |
| Subscribe to notifications | ✅ | ✅ |
| Community online | ✅ | ✅ |
| Detailed statistics | ✅ | ✅ |
| Comment ban | ✅ | ✅ |
| Goods | ✅ | ✅ |
| Money transfers | ✅ | ✅ |
| Applications and widgets | ✅ | ✅ |
| Dynamic cover | ✅ | ✅ |
Perhaps these are all important differences.
Most likely, you don’t need a group “just to have it.” You are pursuing a specific goal, right? Most likely, you want to make your brand more recognizable, or perhaps you want to increase sales or you want to attract new customers. To achieve these goals, it is very important to properly create a VK community and configure it. I will help you deal with this quickly and completely.
Are you ready to learn all the intricacies of doing business on VKontakte?
Then let's get down to business!
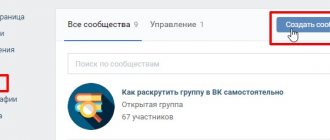
How to create a VKontakte group?
Creating a group on VK in 7 simple steps:
- Go to the site
- Click "My Groups" and "Create a Community"
- Select community type
- Enter the title
Important! The title should contain a keyword by which potential subscribers can search for you.
- Fill in information about your group:
- The description should be interesting and exciting, so that after reading it, there is a desire to subscribe to this group.
- Intrigue your subscriber.
- Create a page address
The page address should be simple and memorable so that it is not difficult to find you.
- Create an avatar for your group
- If your company has a brand name, then decorate the avatar with the colors of your company, and also use the logo to better remember your company.
- When searching, the first thing a person sees is the group’s avatar. It is visible in the news feed and in search results. Your task is to make it very high quality!
- The avatar should be meaningful and intriguing. If you decide to add text to it, check whether it will be readable in miniature.
- Community Avatar - 200 pixels wide x 500 pixels high
- Use no more than 2 fonts.
How to create a menu for a VKontakte group?
For convenient navigation of subscribers on the site, a menu is often used when creating a VKontakte group.
The main features of a good menu:
- Everything is structured;
- It is easy to find the information you are interested in;
- Beautiful and clear design.
How to create a menu:
- Create a page in the VKontakte group. The link to it will look like this: vk.com/pages?oid=XXX&p=YYY. XXX is the page id of your group, and YYY is the name.
- Add to this page everything that subscribers should know about.
- Write text and insert an image inviting you to open the menu and add a link to the page you just created. Now, when a person clicks on the picture, he will see the page you need.
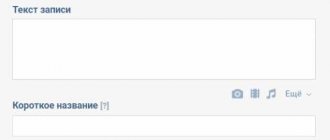
- Make a post from text and pictures and click “Attach”:
This post will be pinned to the top so that new subscribers will see it immediately.
To prevent a new subscriber from changing everything in your menu, make sure that only the group administrator can edit. Allow subscribers to view only.
Let's take a closer look at how to properly set up a group.
How to set up a VKontakte group?
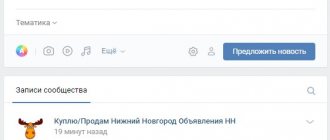
Community settings are on the right and they are divided into sections.
This section contains basic and additional information:
Name. You have already come up with a name, but you can change it at any time.
Description of the community. The description should reveal the essence of your community, its purpose, and detailed information about the community. Remember, the description should not be too long, it should be no more than 10 lines.
Group type.
There are 3 types of group:
- Private
- Open
- Closed
When you choose a group type, follow the prompts.
Community topic. Choose the right topic for your community.
Web site. If the materials that you will publish relate to your site, then enter the address of your resource in this field.
Addresses. If you have an establishment, then you can indicate the work schedule, breaks and working days. You can make the block the main one in the settings so that clients see it at the top of the community. Then users will be able to see your location and get directions to it, which is very convenient.
Another very convenient function is available to the community administrator. It can display one button and assign one of the following actions to it:
- Call by phone or VK.
- Write by email.
- Open a site or community.
- Go to an app on your phone or community.
How to manage a group in contact if you are the creator
We believe that our group has already been created. Now what?
To begin with, we can configure the blocks we need:
- Links
- Photo albums
- Videos
- Audio recordings
- Discussions
- Events
- Places
- Goods
We can either turn them on, turn them off, or make them limited.
How is the group managed?
Our main button is three dots under the avatar or group cover.
Click it and select “Community Management” from the drop-down list. We will also discuss other items in the drop-down menu within the framework of the article.
In the window that opens, we have the opportunity to: change the name of the group, write down its description, upload the cover, give a nice address, add a link to the site if there is one.
Item "Sections"
In the next item on the right menu, “Sections,” we can enable the sections we need or disable those we don’t need. Among them are: links, discussions, photo albums, videos, products. You can edit their locations. This is done in the same window, by designating the main block and the secondary one.
The main block will appear at the very top, immediately below the group description.
"Discussion" item
Find out how to enable the “Discussions” section and all the accompanying features from the article.
Item "Comments"
Here we can completely disable the ability to comment on any group posts, or vice versa, enable them. You can also enable the obscene language filter.
Working with API It is better not to touch the “Working with API” item at first.
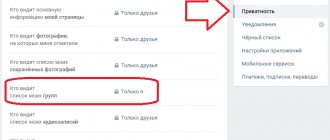
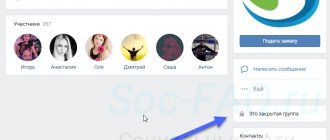
Item "Participants"
But we will need the “Participants” item. Here we, as the creator of the group, can remove any member from the group or appoint him as a leader (by selecting one of the forms administrator, moderator or editor).
Here you can send any group member to the blacklist. Once a person is blacklisted in your community, he will be denied access to your group.
Item "Messages"
The next menu item in the right column is “Messages”; by clicking on this button we are taken to the window for editing this function.
If you want people to write to you in the name of the group and not in a personal message, then you need to enable this feature. Below you can write a welcome speech that a person will see when he decides to write something to you for the first time.
After enabling this function, a “Community Messages” button will appear in your group on the main page. And if you click on it, you, as the creator or admin of the community, will have the opportunity to switch the slider to the right (it is located in the upper right corner), thereby turning on the “Community is online now” notification.
After this, each visitor to your group will display this inscription “Community online. They will answer right now” - which will further encourage them to write to you and, perhaps, become your client.
Item "Applications"
The “applications” menu item was added a couple of years ago and is constantly being updated.
Here is a complete list of applications approved in contact. You can choose any application suitable for your business and configure it in your group.
Item “Group Statistics”
In addition to the listed settings, the creator and admin of the group can view its statistics. And based on the data obtained, regulate the vector of development of the group.
You can view it by also clicking on the three dots under the cover or group avatar and selecting “Community Statistics”. In the window that opens, you will see 3 or 5 tabs - this depends on the settings you have made and how popular your group is.
If you have just created a group, there will be 3 tabs: reach, attendance, activity.
By scrolling through all the tabs to the end, you will find out who your audience is in the majority - men or women, how old they are, what cities they are from, how they got into your group, from what devices, how many new participants were in the group today, what was the attendance and how many people saw your posts today or any other day.
This is a separate, very large section of knowledge in the field of the social network “in contact”, and the next point in group management.
Item “Add to left menu”
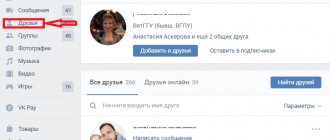
This item in the drop-down menu is displayed in the same way as the previous ones only for the creator of the group and its admin. After clicking on this button, you will see a link to your group in the left menu of the VK interface and can quickly go to your community.
This is also convenient because you can quickly respond to messages sent to you by potential clients addressed to the community - they will be displayed as a number indicating the number of unanswered messages.
Item “Transfer to group”
This item is displayed only for the group creator. Only the creator of the group can transfer the group to a public page (or public page) and vice versa. To do this, you will be asked for a code via SMS that will be sent to your phone.
You can transfer groups to public and vice versa no more than once a month, and only until the number of community members exceeds 10,000 people.
How to edit a group in contact?
A group in contact is a great way to maintain some kind of audience for a famous person or a service provided, a business, and so on. How to create and learn to edit a group in contact?
It’s simple if you’ve been in contact for more than a day. Then you will know which action will lead to what.
So, let's figure it out step by step.
If you are an administrator or editor (moderator) of a group, you can change some information about the group. Without going into any menu, right on the page you can change the status of the group or go into discussions and find the Edit button there. This way you can specify how many topics will be shown on the page and how the topics will be displayed; at the top there may be the one that was recently edited or some entries were made there.
Under the group avatar there is a Community Management button. There you can thoroughly change the group - name, page address (instead of numbers you can write a word). There you write a description of the group, select a category and decide what to do with privacy, whether the group will be open or closed, who can add photos and audio, create albums, and so on. You can also edit members, add them to the blacklist, make someone an administrator or demote someone. Also in the same menu you can indicate the city in which the group is located or add a link to other accounts or services.
You'll figure it out quickly, good luck!