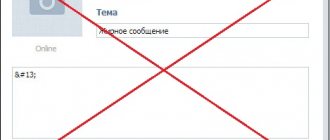
More and more, closer and closer, people are discovering the Internet... more and more often they communicate on various messenger feeds (messengers), or simply on social networks...
I have to write a lot, creating my posts, and responding to the remarks of my interlocutors... Everything seems wonderful... however, when working with a computer (in this case, with a keyboard), most users have many questions, one of them is how to break a line on a new line (for a new paragraph) when you type text?
In fact, if you type text without any formatting, it looks somehow sloppy, the meaning is lost - our writing looks illiterate...
How to become more literate - let's learn how to move a line to a new paragraph: examples on several well-known social networks...
post sections:
- how to make a line break in Skype
- how to wrap text on a new line on Twitter
- how to make a line break to a new paragraph on Facebook
- how to make a line break in Odnoklassniki
- Changing the screen scale using the keyboard
As a rule, on social networks, when typing text - if suddenly) you want to continue the letter from a new red line - most users cannot do this! The fact is that if, out of the habit of simply moving text to a new line, you press the Enter key, our message will be sent to the recipient... You will have to edit it, if anything... This is not always convenient and advisable for communication...
To prevent uncontrolled sending of a post, you need to take a closer look at the keyboard, namely hot key combinations for quick and convenient work... because these useful key combinations organize more precise control of the computer. Very helpful! Below are links to articles...
But in any training, as is widely known, there are nuances and secrets: for example, the difference in keyboard shortcuts when breaking a line in some social networks, for example on Facebook - I will share these secrets with you))
So:
how to make a line break in Skype
Full selection of Hot Keys
The article provides a complete selection of Hot Keys - computer keyboards for controlling Windows - for more convenient, faster work on the computer... with the keyboard.
The most complete list of commands for the Run utility...
The best free programs for every day that you need to know about - 14 pieces...
Built-in Windows System Utilities You Need to Know About! 11 instruments!..
To move a line to a new one (in a new paragraph) in Skype, proceed as follows:
...press both keys at the same time: or press the first one Shift and then Enter...
Shift + Enter
After this manipulation, the line (cursor) or text in Skype will be moved to a new line, i.e. to a new paragraph.
How to change the keyboard shortcut
Not everyone is comfortable using hotkey combinations to navigate. But fortunately, the settings can be changed so that when you press the enter button, it moves to a new line.
It's very easy to do. Go to any dialog and start typing something. It is enough to enter any symbol, letter or number in the editor window so that the icon for recording audio messages (which can be downloaded) changes to the airplane icon. After that, move the mouse cursor over this airplane and hold it until the settings pop-up window appears. In this window, select the desired sending mode by setting the switch to the combination you need.
Now you can send messages by pressing Enter. You can return to the previous sending mode at any time.
how to make a line break to a new paragraph on Facebook
Moving a line to a new paragraph (on a new line) is, in general, not much different from all the methods described in this post, with the small exception that:
...we press both keys, but in this case - Ctrl + Enter - if we want to move the line to a new one on Facebook:
Ctrl + Enter
And we’ve dealt with Facebook’s red paragraphs... From now on, our text will be more literate!..
Using Formulas
When the user needs not only to divide the text into lines, but also to first collect information from several places, then the above methods are not suitable. In this case, several types of word transfer formulas are used:
- symbol ();
- concatenate();
- substitute().
Symbol
Inside the brackets , the code is indicated - a digital value from 1 to 255. The code is taken from a special table, where the number and the corresponding hyphen symbol are indicated. The transfer code is 10. Therefore, the formula used is “character(10)”.
Let's look at a specific example of how to work with the formula “character(10)”. First, let's fill in the cells, which we will later merge. 4 columns of the first line - last name, gender, age, education. The second is Ivanova, female, 30, higher education.
Select, then select the cell where we will transfer. Place the cursor in the formula bar.
Fill in the formula (for the selected cell):
=A1&A2&CHAR(10)&B1&B2&CHAR(10)&C1&C2&CHAR(10)&D1&D2
Where the “&” sign means concatenation of corresponding cells, and the symbol (10) means a line break after each concatenated pair.
After writing the formula, press the “ Enter ” key. The result will appear in the highlighted area.
The screenshot shows that the format is not set. We use the “ string format ” as indicated above. After the checkbox next to the “ wrap by words ” item is checked, the cell will look like the picture below.
There is another way to quickly use this command. Format section at the top right . Click on the small black arrow to bring up a dialog box. Below is the desired command.
If you replace the original data with others, the contents of the cell will also change.
Couple
The “concatenate()” function is similar to the previous one. It is also given by a formula, but in brackets it is not the code that is indicated, but the formula “character (10)”.
Let's take for example only the first row with 4 columns.
Excel - getting started with the program
Select the area to be transferred and point the cursor at the formula bar. Let's write down:
=CONCATENATE(A1,CHAR(10),B1,CHAR(10),C1,CHAR(10),D1)
Press the “ Enter ” key.
Let's set " wrap by words ". We get:
number of cells for adhesion.
The main advantage of this method is that changing the data in rows and columns does not change the formula; it will have the same specified algorithm.
Substitute
When a cell contains many words and you need to move them to another place immediately with a transfer, then use the “substitute()” formula.
Enter the required text in A4.
Then select A6 with the left mouse and write it in the formula:
=SUBSTITUTE(A4;" ";SYMBOL(10)) Insert the address of the cell with the text - A4 - into the formula. After pressing the “ Enter ” key we get the result.
wrap by words command for the selected area .
how to make a line break in Odnoklassniki
How to backup your Facebook account - a complete backup copy of it
How ? two trouble-free ways!
How to put a link to another author or page in your Facebook post
How to set up a Facebook page using the Social Fixer plugin
In Odnoklassniki, moving a post line to a new paragraph is no different from other descriptions:
...typing the key combination shown below:
Shift + Enter
It works in personal correspondence and in comments to Odnoklassniki statuses, etc., etc.
bonus...
bonus... don't forget to read the article Hotkeys - useful!..
Replacing a hyphen with a space and back
Sometimes you need to replace the hyphen with a space and make a column of words a solid text. There are several ways to do this. Let's look at two of them:
- Find and Replace window ;
- VBA scripts .
Find and Replace
Find and replace opens with the keyboard shortcut Ctrl+H . For convenience, you first need to hold down the Ctrl key, then press the English letter H. A dialog box with customizable parameters will pop up.
In the “ find ” field, enter Ctrl+J (first holding down the key and then typing the letter). In this case, the field will remain practically empty (there will be only a barely noticeable blinking dot).
In the “ replace with ” field you need to put a space (or several), as well as any other character to which you plan to change the hyphen.
Click on the “ find next ” button.
The program will highlight the area of the file with the required values. After that, all you have to do is click “ replace all ”.
How to build a Gantt chart in Excel, online services and other programs
Columns of words will be rearranged into lines with spaces.
Using a VBA script
You can open the editor window with the keyboard shortcut Alt+F11 .
In the editor, find the “ VBAProject ” panel and click on the file you are looking for. Right-click to open the context menu. First select “ Insert ”, then “ Module ”.
A window appears to insert the code.
We type the code there. If you need to replace a space with a hyphen , then write:
Sub ReplaceSpace() For Each cell In Selection cell.Value = Replace (cell.Value, Chr(32), Chr(10)) Next End Sub
If it's the other way around :
Sub ReplaceTransfer() For Each cell In Selection cell.Value = Replace (cell.Value, Chr(10), Chr(32)) Next End Sub
Where Chr (10) is the line break code, and Chr (32) is the space code.
A window will pop up where you need to click the “ NO ” button.
Next, you need to save the document with support for the new macro.
To close the editor, press “ Alt+Q ”.
The main disadvantage of this method is that it requires basic knowledge of the VBA language.
Variable solutions to a problem allows the Microsoft Excel user to choose the method that suits him.
Method 2: Transfer via Insert
Using the paste method makes it much easier and faster to change the location of rows compared to the copying method described earlier. Let's look at the functionality of this method using the table from the first method as an example.
- On the vertical coordinate panel we find the number of the required line, click on it with the left mouse button. This action resulted in the allocation of the entire deadline. Find the “Clipboard” block in the tool ribbon, which is located in the “Home” tab, and select “Cut” (the scissors icon). You can also use the context menu (called by right-clicking on the selected fragment) in which we select the appropriate “Cut” item.
- Now we right-click on the coordinate panel on the number of the line above which we want to place the data cut out in the first stage. In the context menu that appears, select “Insert cut cells.”
- As a result, the desired line moved to the selected location, while the remaining lines retained their sequence.
This method involves performing only three simple and understandable steps, which significantly saves the user’s time and effort. But using the appropriate tools and launching the context menu slows down the process of changing the location of rows in the table. Therefore, let’s move on to analyzing the fastest way to solve the problem assigned to us.
Move and copy cells, rows and columns
Note: We strive to provide you with up-to-date reference materials in your language as quickly as possible. This page has been automatically translated and may contain inaccuracies and grammatical errors. It is important to us that this article is useful to you. Please take a few seconds and let us know if it helped you using the buttons at the bottom of the page. For convenience, we also provide a link to the original (in English).
When you move or copy rows and columns, Excel moves or copies all the data they contain, including formulas and their result values, comments, cell formats, and hidden cells.
If a cell has a formula, the cell reference does not change. Thus, the contents of the moved or copied cell and the cells pointing to them may display #REF! error value #VALUE!. In this case, you will have to configure the links manually. For more information, see Detecting errors in formulas
You can use the Cut or Copy command to move or copy selected cells, rows, and columns, but you can also move or copy them with the mouse.
To move or copy cells, do the following:
Select the cell, row, or column you want to move or copy.
Perform one of the following actions.
To move rows or columns, on the Home tab, in the Clipboard group, click the Cut button.
Keyboard shortcut: CTRL+X.
To copy rows or columns, on the Home tab, in the Clipboard group, click Copy.
Keyboard shortcut: CTRL+C.
Right-click the row or column below or to the right of where you want to move or copy the selected item, and then do one of the following:
To move rows or columns, select Insert Cut Cells from the context menu.
To copy rows or columns, select Paste copied cells from the context menu.
Note: If, instead of choosing a command from the context menu, you click Paste on the Home tab in the Clipboard group (or press CTRL+V), the contents of the destination cells are replaced.
Move and copy rows and columns with the mouse
Select the rows or columns you want to move or copy.
Do one of the following:
To move rows or columns, hover your mouse over the border of the selection. When the pointer changes to a move pointer, drag rows or columns to the desired location.
To copy rows or columns, press and hold the CTRL key and hover your mouse over the border of the selection. When the mouse pointer changes to a copy pointer, drag rows or columns to the desired location.
Important: While dragging, hold down the CTRL key. If you release the CTRL key before the mouse button, the rows or columns will be moved rather than copied.
If you paste copied or cut columns or rows using the mouse, the contents of the destination cells are replaced. To paste copied or cut rows or columns without replacing the cell contents, right-click the row or column below or to the right of where you want to move or copy the selection, and then choose Paste Cut Cells or Paste Copied Cells from the shortcut menu.


