How to make a photo status in VK yourself without using Photoshop?
Good day to everyone, my dear friends and readers of my blog. Have you ever noticed that many people have 4 photos on their VKontakte page that form one whole, that is, the so-called photo status? Please tell me, do you like this kind of performance? The fact is that I began to notice that many people ask for a photo status.
Yes, you can tinker with Photoshop, cut the photos into four equal squares, fit them as expected, save them and post them manually in an album. But of course, this is all too dreary, especially since there are ways to make a photo status in VK with a couple of simple movements. But if you suddenly need instructions on Photoshop, then write in the comments, and I will write a detailed article especially for you.
Photostatus
And the first service that we will touch on will be one very good website, which has the address fotostatus.me. This site is good because here you can choose ready-made photo statuses for any of the proposed topics, or create your own, for example from your own photo. As for the ready-made status, everything is clear here, but we’ll look at creating your own in more detail.
- To begin, go to the “Create photo status” menu item and click on the only available button that appears on the right side of the screen, that is, “From your computer.”
- The image you need will open and you will have to adjust the area that will be displayed. To do this, just move the selection area beyond the edges. After you complete everything, click on “Install a photo status on your page.”
- Now, if you do not have a special VKontakte application installed, you will be transferred to your account so that you install the application and launch it. After which you will receive a message indicating successful installation. You can look and see for yourself. Your status is fine and, as expected, it consists of four photos.
Luckily, you won’t need to visit the site anymore. Now you can do all such manipulations directly through the application. All the steps remain exactly the same, so you won’t have any problems.
Other applications
In fact, such applications are just a wagon and a small cart. Believe me, there is plenty to choose from! Well, just in case, I’ll show you how to do everything we need using the example of another application.
So, go to the “Games” menu and start typing “photo status” in the search. A lot of things should come out. Select “Photo statuses - .yu...”, basically what is shown in the screenshot, and install this program, after which it will launch for you immediately.
Here everything happens approximately the same as in the previous example, namely, you choose either ready-made pictures or create something of your own. After that, adjust the photo to your needs and launch it. It's simple.
I chose these two programs because they are the simplest and most functional. Some applications give you an error when you try to upload a photo. The thing is, they don't like the sizes you upload.
Well, in general, that's all I wanted to tell you today. I hope you liked the article and don’t forget to subscribe to my blog updates and share with your friends on social networks. Well, I, in turn, will be waiting for you again on my blog and writing useful articles for you. Good luck to you. Bye bye!
Best regards, Dmitry Kostin.
koskomp.ru
How to make a status on a computer
Open the ok.ru website and enter your credentials. At the top of the main page you will see a field for creating a note. Click on it.
A window will open in which there is a text field and additional functions that I mentioned above. Write 1 – 2 sentences with ideas, thoughts, wishes for your friends. They can be complemented with a beautiful background and emoticons. Place the bird in the special box and click on the “Share” button.
How to pin a song
After you have written the text, click on the icon depicting notes.
You have a choice: you can take the song from your page or find it on the website. Click on the desired track and an orange “bird” will appear next to it.
If you want, you can tag multiple ringtones and they will all appear on your profile. I won’t say the maximum number, but 15 songs can definitely be played, it’s been checked. When all the necessary files are selected, click on the “Add” button at the bottom of the screen.
We returned to the message window again and see that the selected composition was successfully attached.
This option is good if you want to tell your friends something and have decided in advance which melody suits your current mood. But it happens that you listen to music on Odnoklassniki, and suddenly there is a desire to pin a cool song. This can be done very easily and quickly. You just need to click on the corresponding inscription in the player.
Done, just one click and you can share your mood with your friends. But keep in mind that you can only attach one song this way, unlike the first method.
How to attach a video
The first method looks the same as in the case of music. Select the appropriate function and upload the file from your computer or from Odnoklassniki.
If you are watching a clip and want to pin it, then copy the link.
Then open a note, insert the video you like into it and save the result.
How to attach a photo
We do everything exactly the same as with music and video. Click on the desired item.
We select a photo on the computer or take it from one previously uploaded to the site.
If the publication contains only a photo, song or video, friends will see exactly these in their feed. If you make text accompaniment, the text will be visible, and under it you need to click 3 dots to view other materials.
Photo status in contact
New changes to the Contact site related to the display of photographs on the user’s main page have opened up new opportunities for us to create statuses. Now every social network user can give themselves a Photo status , which is five photos lined up in one line and creating a single image.
Below are examples of photo statuses that you can set on your contact page.
You can make a photo status yourself or using special applications with ready-made collections of pictures.
In order to create a photo status in a contact, there are two free applications:
They are no different from each other, except for the available selections of pictures for statuses.
It’s very easy to add a photo status to your page:
- Go to one of the applications presented above;
- Select the section and picture you are interested in;
- Click “Upload to your page”;
- Refresh the page and admire the photo status right above your wall in contact!
You can also send your friend the photo status you like, adding your message to it and even adding music.
How to make a photo status yourself
If the application does not have a picture that you would like to see in your status, you can upload one yourself. The easiest way to do this is using the same applications for Photo status in contact. All you need is to press a button
“Create it yourself” or “Add a picture”, wait until the image is loaded and select the part of the picture that you would like to see in your status. You can add pictures both from your own albums in Contact and from your computer.
You can also create your own photo statuses consisting of graphic text . To do this, you need to select the “Create your own text” section and enter your phrase in the provided field. In this case, you can choose the background color, text and font size.
Having created your photo status, you will find that a new album has been automatically created in your albums, which contains the 5 pictures that are in your status.
The logic of all this is very simple: your status contains exactly the five photos that were added last. Therefore, if you want to create a photo status without applications yourself , you can do it according to the following scheme:
- Select the image you want to see in your photo status.
- Go to Photoshop or any other graphic editor that allows you to crop pictures.
- Split the image into five equal parts and save as separate files in jpeg format.
- Upload these 5 photos to a separate album in contact in such a sequence that the last part of the picture is uploaded first.
kontaktlife.ru
How to set status from phone
Log in to the application and touch the entry line with your finger.
Write the text and, if necessary, add marks, background and files. Then slide the lever to the right to pin the message.
After that, in the upper right corner, tap on the inscription “Publish”, and the text will appear on your page. To make sure everything went well, open the menu by clicking on the 3 bars on the left.
Then go to your profile.
The message should appear above your profile picture on a yellow background.
Only the text or part of it is visible here. If you tap on the yellow cloud, you can open and view the entire message: with the background, songs and videos.
If you need to create a new post from your profile, tap the orange circle with a plus and select “Write a note.”
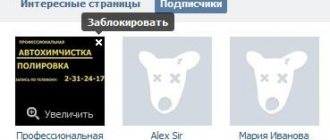
Photo status on VKontakte « VKontakte - secrets, programs, opinions, pictures, avatars
A new feature of VKontakte is photo status. Do you want a photo status on VKontakte ? Then you need to follow a few simple steps. So, let's begin:
1. Go to your page, select “News” from the menu at the top
2. Then, in the page that opens, select “Add news”: “Attach” -> “Photo” (if you want a photo VKontakte status):
3. When you press the button, a photo selection window will pop up in front of you. Here we select a finished photo in your albums or upload a new one using the “Browse” button:
4. After you have clicked or uploaded a new photo, you can write a comment on the photo status, or simply click “Send”:
That's all! Now you have learned how to send photo status on VKontakte! There is also a super application that will help you place a super photo status on your page, for example like here:
Photo status VKontakte
To do this, you need to install the PhotoStatus application >> create it here << at https://vkontakte.ru/app2175066
Select a photo status from the category, or by popularity and click “Upload to page”
Photo statuses in contact
vkontakte.jem.org.ua
How to make a photo status on VK
How to make a photo status on VKontakte
Ivanova Natalya | Updated 2017-07-30 | Design |
Photo status is a photograph cut into several equal parts and published in one post. Photo statuses are popular on the social network VKontakte. To create photo statuses, applications, special programs, and online generators have been developed. You can also create your own photo statuses using any graphic editor.
- The easiest way is to use the Photostatus application
Work in "PhotoStatus"
Another undoubted advantage is that you can use the application without adding it to your page. They set the photo status, closed it - and that’s it. No annoying mentions or other inconveniences.
There are only a few buttons here: sorting by new and popular, as well as the “Create” button, which allows you to set your own, unique photo status. Simply select a picture with a resolution of at least 397 by 97 pixels and mark the required area, which will become our photo status.
All images are sorted into categories - there are about two dozen of them, so you can easily find what you need. Let's say you take a closer look at this picture of a beautiful silver Aston Martin.
In order to make it a photo status, you just need to click on it and press the “Install” button. Easy, simple, and without unnecessary steps.
After the latest global updates to the VKontakte social network, many interesting opportunities have appeared with which you can beautifully decorate your personal page. One of these features is photo status
. Photo status is 5, which are placed in the section for displaying the latest downloaded photos; thanks to their location, they got their name “Photo Status”. This beauty looks like this:
As you can see, it looks beautiful, with the help of a status photo you can show your uniqueness or just show off to your friends. You've probably seen the VKontakte photo status from your friends and want to ask, “How to make a VKontakte photo status yourself?”
I’ll tell you everything in detail now.
How to set a VKontakte status
How to set a VKontakte status
VKontakte status is important because with its help the user can share some of his own thoughts or, for example, make it clear his mood at a given time. If a person decides to change his status, then he needs to do the following simple steps:
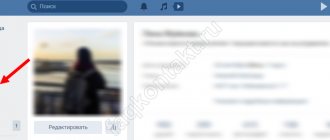
- We go to the personal page and where the first and last name are indicated, you must click “Change status”;
- Now you need to write your VKontakte status, and then be sure to save it.
After this, the status is considered successfully changed. In general, there is absolutely nothing complicated about how to set a status in a contact , and if desired, a person can write any sentence that will definitely be seen by both friends and other users who visit this page.
You can also hover your mouse over this status and click “Tell friends.” Thus, a repost is made on VKontakte, which will be posted on the wall.
If you want to have a lot of hearts under your avatar, then the function of our service is suitable for you - free boost of likes. You can add likes to absolutely any photos, as well as posts and videos.
How to put an emoticon in VKontakte status
Sometimes users want to stand out from the crowd not only thanks to an original written status, but also because it will combine letters and emoticons. VKontakte statuses made from symbols are becoming more and more popular today, but not all users understand exactly how such a status can be created.
And so, in order to make such a unique status, you must first know the codes of emoticons. For example, a person decided to use an emoticon with the code 🍱. To do this, you need to select the appropriate code, paste it into the field where the status is written and save.
After this, you must update your personal page and the status will be visible to both the account owner and all users who visit the page.
bosslike.ru
How can you delete, edit and replace status
If you want to remove a pinned news item, simply hover your mouse over it and click on the pop-up caption.
Confirm your wish and the field will clear.
If you want to post fresh thoughts, impressions and emotions in it, simply create a new status as described above, and it will automatically replace the old publication.
To change the text, add a melody or other materials, click on the news.
In the window that appears, click on the triangle in the upper right corner and select “Edit”.
Add or remove text and attached files, and then save the new version.