Continuing the series of instructions on this social network, today we will tell you how to remove a friend from friends on Odnoklassniki. At the same time, our step-by-step instructions will contain information for a personal computer and phone. Moreover, the latter option allows you to remove a friend using the proprietary OK application or through the mobile version of the site. So let's get down to business without delay.
From computer
We will start with the computer version. After all, the history of using the Odnoklassniki website began with a PC. There are two ways to delete a friend in OK. Let's consider them sequentially.
Via friends list
In order to delete a friend on a given social network using a list, we take a few simple steps:
- Go to the Odnoklassniki website and on the main page click on the “Friends” link (it is located in the left side menu of your profile).
- Next, a list of all our friends will appear. In order to erase one of them, simply hover the mouse pointer over the user’s avatar. As a result, a context menu will appear from which we will need to select the item marked in the screenshot below.
- Finally, all you have to do is confirm your intention by clicking the “Stop” button.
- Click the close button.
Before deleting your friend, think carefully about whether this is worth doing. The fact is that in the future, without submitting a second request, we will not be able to restore the user as a friend. Not only that: finding distant friends on Odnoklassniki will also not work.
Via user profile
We can also remove an unwanted person through his own profile. To do this we do the following:
- Anywhere on the site, be it a message, a list of friends, guests, etc., click on the person’s icon.
- As a result, we will be taken to its home page, on which we will need to click on the button with the image of three horizontal dots in the upper right corner. After this, a context menu will open in which we will need to select the last item, namely “Remove from friends”.
- As in the previous case, the operation must be confirmed. Click the button circled in red.
This is the end of working on a personal computer and we move on to deleting friends on Odnoklassniki via phone.
Attention: at the very bottom of this page there is a detailed training video in which the author clearly shows and tells how to do the same. Perhaps, after watching the video, you will no longer have to read the article.
From your phone or tablet
On the phone there are also two ways to delete friends in OK. The fact is that the user works with this social network through an application or mobile version of the m.ok.ru website. Let's take a closer look at both options.
Via the app
The percentage of application usage is much higher than that of the mobile version of the site. Therefore, we will start with it. Follow our short algorithm:
- To remove yourself from friends on Odnoklassniki, launch the application on your phone (if it doesn’t exist, download it from the Google Play Market) and go to the list of our friends.
- We find the person we want to delete and click on him with your finger.
- As a result, we will be taken to the user's home page. Here you need to click on the icon with the image of three horizontal dots, which is signed with the phrase and “Other actions”.
- A context menu will appear in which we will need to select the last item called “More”.
- As a result, we will have access to the function of removing a person from friends. Click on the button indicated in the screenshot.
- As in other cases, a warning will appear here. If we haven’t changed our minds and want to delete our friend on Odnoklassniki, click on the link circled in red.
If you didn’t have the application and just downloaded it, you will have to go through authorization, which involves using your username and password from the Odnoklassniki social network.
mobile version
Using the mobile version is good because we can access the Odnoklassniki website from any phone, even a device that does not have an operating system. That is, it could even be a push-button Nokia. So let's look at how to use the mobile version of the site:
- Let's go to any browser on your phone (in our case it will be Google Chrome).
- Follow the link ok.ru and log in by entering your username and password. Next, go to the list of your friends.
- We select the person we want to remove from our friends list.
- On the user’s home page, click the “Friends” button and from the drop-down menu select the item indicated in the screenshot below.
- When a small window appears with a button to confirm deleting a friend, click on it.
As a result, our friend will be immediately deleted. In this case, all events will also be removed from the feed.
At the same time, it is impossible to understand who removed you from friends.
How to remove a friend from the categories: family, best friends, classmates, classmates and other categories?
If you need to remove a friend from various categories (for example, friends, colleagues, relatives), then you need to go to the person's website again. A little lower than the photo you will find the inscription “Friends” in a frame. There is an arrow drawn right next to it. By clicking on it, you will see all categories. Here you can indicate who the person is to you. Next to the category name there is an empty cell in which, depending on your wishes, you can check or uncheck it.
How to quickly delete several friends at once (all at once and forever)
Many users come to us with this question. However, at the moment (2018, 2021, 2021 and 2021) the social network in question does not have such functions. How to get out of this situation, what to do if you need to delete 100, 1,000 or more friends at once? The answer is simple: you will have to delete people from your profile one by one.
You need to do as we described in the first method of working with a computer. Open the list of friends and, one by one, hovering over each of them, select the last item responsible for deletion. As a result, the process will go quite quickly.
Removing friends from photos
Sometimes we are tagged in photographs. However, such a development of events is not always appropriate. Therefore, in order to remove yourself from marks in photographs, we do this:
- We go to the page of the user who posted the photo and tagged us there.
- Under the image itself we find a link with a cross and click on it to remove the mark.
- We confirm our intentions, after which the mark will be removed.
If a user tags you again, ask them not to do so. As a last resort, you can remove the person from your friends list, after which this procedure will become impossible.
Does such a function exist?
Unfortunately, you will not be able to remove several users from your friend list at once. The developers simply did not implement this function, so you will have to constantly go to each person’s page and delete them one by one.
We agree that cleaning a profile with a hundred or more friends in this way is very inconvenient. There are several options that can save you from this routine task. But let’s say right away that they all require capital investment.
These are the methods:
- gradual manual removal;
- hire a person who will do everything for you (suitable for accounts that were created to run or support a business);
- run a script that will independently delete all friends (here you either need to be a programmer or pay one).
The script will help you delete all users at once. Naturally, no one will give it to you for free. Although VKontakte has plenty of such programs in the public domain. They not only remove friends, but also clean the wall, music, etc.
If you want to delete your friends one by one, read how to do it correctly here. We also have instructions for the phone.
Deletion without notification (without going to the page)
In order to quietly remove unnecessary people without going to his page, do as we wrote in the first method of working with a personal computer. Briefly it looks like this:
- We launch our Windows PC, open the browser and go to the Odnoklassniki social network.
- In the right menu, select the list of your friends.
- We point the pointer at one of the users, and in the drop-down menu that opens, select the delete option.
As a result, the user will be deleted and he will not know about it. He won't receive any notice of what we just did. You can also delete a contact in messages in the same way.
A person can only find out that you have unfriended them when they go to your profile and see the lack of connection. However, you cannot see deleted friends.
Removing friends through the application
- To do this, go to the “Friends” section.
- Then we find the candidate for deletion and go to his profile. If you have a large list in the subscriptions section, I advise you to use the search, it is very convenient.
- Then you need to click on “Other actions”, which will allow us to go to the drop-down menu.
- Here we need to reveal the entire list. The “more” button will do this.
- And all we have to do is click on “Remove from friends” and confirm our choice.
How to delete a friend request in Odnoklassniki
Let's look at how to do this for different platforms when working on a social network.
From computer
Very often we are invited as friends by those users with whom we do not want to communicate. To do this, you can reject the application or take more effective measures. Let's take a closer look at both options:
- Go to the list of friends by clicking on the link located on the left side of the window.
- At the very top of the screen we see friends who have submitted an application. If we do not want to accept it, click the “Hide” button.
- The person we did this with ends up in the subscribers section. It can read all our profile updates, view photos or play videos. However, he is not listed as a friend. If we want to delete subscribers in Odnoklassniki, we go back to the list of friends.
- In the left side menu, select the item that we marked with a red stripe in the screenshot.
- We move the mouse pointer over the user who is our subscriber, and in the drop-down menu we select the option to block him.
- We confirm our intention by clicking on the item indicated in the screenshot.
As you can see, it is impossible to remove a person from subscribers in Odnoklassniki without adding him to the blacklist.
Via phone
Accordingly, 2 instructions await you: for the Odnoklassniki application and the mobile version of the site.
Odnoklassniki application
Now let's look at how to do the same on the phone:
- We launch the application and go to the list of our friends. In the “Friend Requests” section, click the “Reject” button next to the person you don’t want to see on your friend list.
- As a result, we will see a notification about the successful completion of the process.
In this case, the user, as in the version with a computer, is included in the list of your subscribers.
In the mobile version of the site
In order to cancel a friend request through the mobile version of the site on your phone, we take a few simple steps:
- Launch the mobile browser.
- We switch to the mobile version of the Odnoklassniki website.
- Open it to your friends list and click the “Reject” button next to the person you don’t want to be friends with.
The instructions below are perfect for an Android smartphone or iPhone running iOS.
After this, the user will be added to your list of subscribers. We can remove it from there, both in the case of the application and through the mobile version of the site, using the method below.
How to prevent your ex-friend from noticing that he was deleted
The system does not inform you that someone has removed you from friends. Therefore, do not be afraid that your ex-friend will receive a similar notification. This information will become available to him during his stay on Odnoklassniki. And if this user is not active online, he may not pay attention to the fact that he has ceased to be your friend.
This will first become noticeable if you visit its removal page. Once you go to the tab of your guest list, your ex-friend will see your avatar there and understand that your profile has become a stranger to him.
Therefore, if you want to keep your decision in the dark from the user for as long as possible, before removing a friend from Odnoklassniki via phone, go to the full version of the site or use a computer to delete a friend through the “Friends” .
But if your goal is to prevent an ill-wisher from writing messages to you, it is better to blacklist him. This will limit any of his activity in relation to your account.
Adding to the blacklist
So, if you not only don't want to be friends with a person, if unfriending them isn't enough, you can add the user to your blacklist and block them. Let's look at how this is done on a PC and phone.
Via computer
Adding a person to the Odnoklassniki blacklist is very simple. To do this we do the following:
- Launch Odnoklassniki and go to the list of friends using the left side menu.
- Select the user we want to blacklist.
- Once on the user’s home page, click the icon with the image of three horizontal dots on the right side of the window. From the drop-down list, select “Complain”.
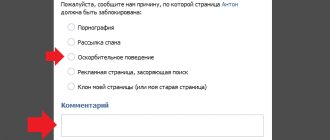
- Select any reason and check the box “Add this person to the blacklist.” Finally, press the only orange button.
After this, the user will immediately be added to the blacklist and will lose any ability to view your profile, write messages or take any other actions.
On the phone
Let's look at how to register a person in an emergency situation in Odnoklassniki through the application or mobile version of the site.
Via apps
Let's proceed as follows:
- We launch our application and, if necessary, go through authorization. We go to the list of friends by finding the desired item on our page.
- We open additional options by clicking the indicated button.
- Select the user blocking option (indicated in the screenshot below).
After we confirm our intention, the user will be blocked.
Mobile version of the website ok.ru
The same thing can be done through the mobile version of the site. This is done like this:
- Launch the browser and open the Odnoklassniki website.
- We go to the list of our friends by clicking the button marked below.
- We open the drop-down menu of additional functions and in it we live according to the blocking item.
When we confirm our plan, the user will be added to the blacklist.


