How to make a wiki page in a VK group
Making a wiki page in a VKontakte group is even easier than in a public page. No preliminary preparation is required here; all functionality is directly accessible to administrators and group owners.
Using wiki markup, you can design a group menu, analytical articles, cases, and instructions. Of course, you will need to spend a little more time on this than on creating the usual posts on the wall. But the more you bother with content design, the more grateful your audience will be.
Features and secrets of wiki markup
In order to register a group in your account, you must fulfill certain rules and requirements:
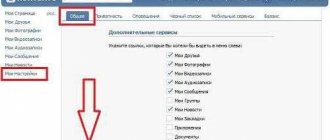
- The group needs to be connected to the “news” . Connection occurs by checking the box next to the “news” section in the “settings” functionality;
- An image is inserted into the Wiki page only if the image is posted on the main account page in a dedicated album;
- One Wiki page cannot contain more than seventeen open and unclosed tags ;
- One markup line can contain up to eight list elements ;
- The width of the inserted image cannot exceed 610 pixels;
- When editing the image size , all the proportions of the picture change in proportion to their value ratios.
How Wiki Markup Works
Wiki markup is a language that is used to layout pages. Conventionally, it can be called the younger brother of HTML. Wiki pages make it easy to write and format text, insert illustrations, videos, links, and tables. You can create a simple article or create an entire interactive guide with chapters and subheadings.
The width of any wiki page is 607px. The height is limited only by the number of characters; there can be about 16,000 in total.
All wiki markup is based on tags, just like HTML. There are single tags (for example, line break) and paired tags (for example, bold text
).
How tags work for text in wiki markup
In some cases, wiki markup uses simplified syntax (tags are replaced with typographic characters). For example, asterisks “*” are used to create a bulleted list, and hash marks “#” are used for a numbered list.
How typography works in wiki markup
All existing tags and methods for using them are collected in the official wiki markup community VKontakte. Use the materials of this community as a reliable cheat sheet. In this article we will go over the basic principles of working with wiki markup and show you step by step how to use it to create group pages and menus.
The standard wiki page editor has two modes: visual and wiki markup mode (the switch button looks like this: ).
This is what the active wiki markup mode looks like
A simple text with a couple of pictures can be made up in visual mode. This is a regular text editor and does not require any knowledge of wiki markup. But if you want a neat wiki page with tables, links and embedded videos, you can only do it in markup mode - using code.
Creating tables using a wiki
What else can the VKontakte wiki markup do? She can create tables. This is done just as easily as with all other objects. Special characters are also used to insert tables into text.
First, let's see what the plate itself consists of:
- {| — open the table;
- |+ — table title, centered (optional);
- |- — new line;
- | — make the sign transparent;
- ! — dark cells;
- |} - close the table (optional element used to prevent errors).
The penultimate two operations are variable! If, for example, you made a dark cell, you cannot apply the “Transparency” function to it!
Now let’s fill in the resulting table:
- | - open the cell;
- || either!! — we separate one cell from another.
The result will be something like this (plate size 1*3):
{|
|-
|'''Beauty'''||'''Health'''||'''Sports'''
|-
|}
You can insert anything you like into your table: pictures, links, texts. It is only important to take into account the rules that the VKontakte wiki markup offers us.
How to create a wiki page
The “Create a new page” button does not exist in the interface of VKontakte itself. Therefore, we are talking about two methods, standard and advanced (using the application).
Standard
For the group.
Go to “Community Management” → “Sections” → “Materials” and select “Open” or “Restricted”.
How to enable “Materials” in a group
Now the “Latest News” section will appear on the group’s main page. This is the location for the group's proposed menu. To create a new page, you can write its name directly in the “Latest News” page editing mode, enclose it in square brackets, click on “Preview” and get a ready-made link to the new page.
How to create a new page via Latest News
For the public.
To create a new page, you need to find out the id of your public. To do this, go to the “Community Statistics” section. In the address bar of your browser you will see code like this:
https://vk.com/stats?gid= 123456789
The required group id is all the numbers after “gid=”.
Now you need to enter the following code into the address bar of your browser:
https://vk.com/pages?oid=-ХХХ&p=Page_Name
Instead of XXX we substitute the id of the public, and instead of “Page_Name” - the name that you came up with. The name can use Cyrillic, Latin and numbers. It is not forbidden to use special characters, but it is better not to take risks: because of them, you may lose the ability to edit the page. We paste all the data into the right places, press Enter, and the browser will open the created page.
Using the app
VKontakte developers recommend using three applications for working with wiki markup: Mobivik, Source Code and Wiki Poster.
In this guide, we will take the Mobivik application as an example. In November 2021, it received second prize in the VKontakte Start Fellows program. Works without installation and additional registration in the desktop, mobile version of VKontakte and in the phone application (the developer recommends using versions no earlier than Android 5.1, iOS 9 and Windows Phone 8.1).
To create a new page, on the main screen of the application, select the desired group and enter the name of the new page, and then click “Get link”.
How to create a new page using the Mobivik application
Links to the new wiki page in the Mobivik application
Here is a life hack for those cases when you have made a complex page with a large number of elements, and are afraid that the layout will not work on a small screen. Copy the address from the “Code for wiki page” item. Go into edit mode of your page and paste it at the very beginning of the code. You will get an image like this:
When the user clicks on it, they will be taken to the Mobivik app, which will show a neat mobile version of your page.
On the left is the LIVE community menu page opened on a mobile phone, on the right is the same page, but opened through Mobivik
How to delete a community on VKontakte?
Sometimes VKontakte users have a different need. For one reason or another, you need to delete your group. Unfortunately, this cannot be done with one click, since such a function is simply not provided in this social network.
But now you will learn how to delete a group in a contact by following just a few simple steps. Essentially, deleting a community on VK comes down to erasing all data from the group and making it closed to visitors.
To do this, go to the desired group and select “Community Management” in the sidebar on the right:
Then delete all possible data about your public, change all content settings to “Disabled”, and change the group type to “Closed” or “Private”. Just in case, you can change its name and URL so that someone very meticulous cannot find it.
On the “Members” tab, you can remove all members of this group.
Save the settings, and then click on the “Leave Group” button, which is located on the same right panel.
Now you know how to delete a group on VK by following just a few simple steps.
How to make a post with a link to a wiki page
Copy the link to the wiki page and paste it into a new post on your wall or community wall. If everything is done correctly, the site will generate a link block under the post text field. Now remove the link text itself, attach the banner and click “Submit”. In the desktop version, the banner will also become a link to the wiki page, and in the mobile version it will open as a regular image.
The image attached to the post will become part of the link to the wiki page in the desktop version
Access for viewing and editing
- Copy his full address and paste it into a community post or on your profile.
- The resource logo will appear at the bottom, after which the link can be deleted.
- When you click on a post, the content will open in a separate window. At the top you will see a transition to editing.
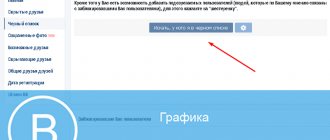
- Use the Page Access button to allow or deny access to specific user groups.
Text
The possibilities for formatting text in wiki markup generally do not differ from those of an ordinary text editor. When editing the text itself (make it bold, align to the right, etc.), we use wiki markup tags, do not forget to close them:
Centered text.
To structure the text in wiki markup, combinations of typographical characters are provided. For example, this code “—-” will put a horizontal separating bar in the text, and this “::” will double indent the paragraph.
You can fit about 16 thousand characters on one page.
Where is the wiki menu located?
At the very top of the group, near the information, there is an item called “menu” . When the user clicks on it, he is taken to a navigation menu, usually consisting of categories and pictures. You can also attach a Wiki menu instead of a post. It will appear as a picture that you can click on. Today we will build a Wiki menu using the example of my IT Media group.
Code in Wiki markup
Wiki markup is a simpler option than HTML . VKontakte has its own group that tells you how to create a menu and gives layout options. For example, there are ways to create tables, links to a picture, a post, a Wiki page, or a category.
I use tables and headings in my menu. Tables look like frames with text. If we use a list, it looks about the same as a bulleted list in any text.
Images
The maximum width of an image that can be used in wiki markup is 607px, which is the width of the wiki page itself. The height is practically unlimited (remember that the height of the page itself is 16,000 characters). Images can be uploaded in two ways.
Using the loader in the top menu of the editor.
Using code.
We upload the picture to a separate album of the group, open it, and in the address bar we see a long code like this
https://vk.com/club12345678?z= photo-12345_12345
%2Falbum-12345678_12345678
Copy the id of the picture from it (highlighted in bold). Then we frame it with double square brackets and paste it into the right places on the page. It turns out something like this:
[]
What's next? Edit alignment, text wrapping, size, link. To do this, write the required parameters after the vertical bar and separated by a semicolon. For example, in this code we set the size of the image to 300x100px and the text to wrap on the right:
Video
First, you need to upload a video to community videos. After downloading, open the video and copy its id (in bold) from the address bar.
https://vk.com/videos-12345678?z= video-12345_12345
%2Fclub12345678%2Fpl_-12345678_-2.
We frame this with square brackets and get this code:
We get a small picture with a play icon, which, when clicked, opens a full-fledged video player. In order for the video to be played on the page itself, VK developers suggest using the player tag.
But here we get a disproportionate black border around the video:
To remove it, you need to adjust the player size to the size of the video itself. For example, in our case the following parameters were suitable:
We received the video without black frames, it will play directly on the page
Tables
If you want to beautifully structure the content of a wiki page and ensure it displays neatly on mobile devices, you cannot do without a table. Here you will need the following simple signs:
When working with tables, you can use 4 tags: noborder (makes the table borders invisible), nomargin (makes the table the full width of the wiki page), nopadding (removes padding in cells) and fixed (allows you to create a table of fixed sizes). The number of cells you specify in a row determines the number of columns in the table.
Here's an example of a 2x2 table without padding at the top and bottom of the text inside the cells:
The width of the first column is 200px, the width of the second is 300px.
That's what came out of it:
You can place text, pictures, audio and video recordings in table cells.
Tables in wiki markup
How to create a table in wiki markup?
Tables in contact are created using a series of characters. All of them are listed in the correct sequence below:
| Code | Action |
| {| | Start of table (required for every table, used only at the beginning) |
| |+ | Centered header (optional, immediately after the beginning of the table, on a new line) |
| |- | Line start indicator (required after the beginning or (if any) table header and in case of creating cells on a new line) |
| | | Transparent cell (required, but replaced by subsequent code if necessary) |
| ! | Dark cell (required, but replaced by the previous code if necessary; text in the cell becomes bold and centered vertically) |
| |} | End of table (optional, but desirable (to prevent errors) parameter) |
How to fill out a table in wiki markup?
The necessary elements are written in it after a vertical slash or exclamation mark (“|” or “!”). Tables and spoilers within others are inserted on a new line.
Bringing tables closer together in wiki markup
Any two tables can be brought together vertically. With this action we simply remove the distance between the tables.
To do this, remove unnecessary line breaks between tables. For the first table, replace the closing tag “|}” with a new line tag “|-”, and after the second table add an additional closing tag “|}”:
| {| |- ! Contents of the first table |- {| |- | Contents of the second table |} |} |
Design options and table expansion in wiki markup
| Design option No. 1 | Design option No. 2 |
| {| |- | space to fill |} | {| |- |space to fill |} |
| The results for the examples are identical | |
The only difference is that you can write text either after the signs “|”, “!”, or on a new line.
| Additional cells | |
| {| |- |Cell 1 |Cell 2 |} | {| |- |Cell 1 || Cell 2 |} |
| The results for the examples are identical | |
Here we see that new cells can be designed in various ways. For some it is clearer in one way, for others in another.
| Additional lines | |
| {| |- | Line 1 |- | Line 2 |} | {| |- |Line 1 |- |Line 2 |} |
| The results for the examples are identical | |
At this step we are not doing anything fundamentally new: we simply add a new line to the table through the “|-” sign.
| Combination | |
| {| |- | Cell 1 | Cell 2 |- | Cell 2.1 | Cell 2.2 |} | {| |- |Cell 1 || Cell 2 |- | Cell 2.1 || Cell 2.2 |} |
| The results for the examples are identical | |
Here we combine all the previous steps and get a 2x2 table.
Hidden text in table
You can write any text on the page, which will be visible only in the editing state. When viewing, several empty lines will appear instead of text. As a rule, programmers actively use such things to indicate what a particular piece of code does.
If you have a large enough page, you can mark important parts with hidden text to make it easier to navigate.
| Sample | Result |
| A{| | Hidden text. |} |
Table parameters in wiki markup
The table has 4 parameters that can be configured:
- noborder;
- nomargin;
- nopadding;
- fixed.
The first makes all table frames invisible, the second allows you to make the table the full width of the wiki page, the third will remove unnecessary padding in the cells, and the fourth will allow you to create a page of a fixed width.
Invisible table borders in wiki markup
The noborder parameter, placed immediately after opening the table, will remove all visible table borders:
| Code | Result |
| {|noborder |- ! 1 | 2 | 3 |- | 1 ! 2 | 3 |- | 1 | 2! 3 |} |
Full-width tables in wiki markup
Wide tables. Using the nomargin parameter you can make the table full width. The cells will be of equal length, although this factor will depend on what you fill the table with.
| Code | Result |
| {|nomargin |- ! 1 | 2! 3 |- | 1 ! 2 | 3 |} |
Tables without indents in wiki markup
Placed immediately after opening the table, the “noppading” parameter will allow you to remove indents in table cells:
| Code | Result |
| {| |- ! 1 | 2 | 3 |- | 1 ! 2 | 3 |- | 1 | 2 ! 3 |} | |
| {|nopadding |- ! 1 | 2 | 3 |- | 1 ! 2 | 3 |- | 1 | 2! 3 |} |
Fixed table width in wiki markup
You will be able to fix the width of the table using the fixed parameter. This option also works with right (right alignment) and center (center alignment).
In order to fix the size of the table, you need to enter the fixed parameter after the table beginning sign “{|”, and on the next line indicate the cell parameters after the “|~” sign:
| Code | Result |
| {|fixed |~20 40 80 |- |1 |2 |3 |- |1 |2 |3 |} |
Extending a table in wiki markup
The tag can be used to adjust the height of the table. For a minimum table expansion, 2 tags should be specified.
| Empty table without line break | Table with minimal line breaks | Line break after centered test |
| {| |- | |} | {| |- | |} | {| |- | text |} |
| Result: | Result: | Result: |
Best regards, Artyom Sannikov
Website: ArtemSannikov.ru
Tags : wiki markup.
artemsannikov.ru
How to make a wiki menu
The VK group menu is not some kind of separate functionality, but simply a wiki page with several pictures, each of which contains a link to a specific page. In fact, everything is simple here.
- Preparing the cover for the menu.
You can take any suitable picture and put text on it. Or you can hire a designer who will draw you beautiful blocks and buttons. We will have a menu with 6 buttons. To do this, we need a picture where these buttons will be indicated. Let's decide on its size.
When preparing an image for the menu, remember that the width of the wiki page is 607 px. The width of the image should not be larger, otherwise the image will shrink and lose quality. For example, we took an image measuring 510x300 px.
- We cut this picture into 6 parts
(one part for each button). This can be conveniently done in Adobe Photoshop with the Cutting tool. If you don’t want to bother, use, for example, the online service IMGonline (cuts pictures into equal parts). We did everything in Photoshop.
With the “Cutting” tool active, right-click on the picture and select “Divide Fragment”, indicate the required number of fragments and click “OK”.
How to cut a picture in Photoshop
Our menu will be designed as a table of 6 cells: three rows and two columns. To do this, we cut the image for the menu into 6 equal parts measuring 255x100 px. The same size will need to be entered for each cell.
- Create a frame for the table.
We go into editing mode for a new page and create a table. We open it with the tag {| and immediately set three important parameters:
- nopadding - allows images to touch
- noborder - will hide visible table borders
- fixed - allows you to set exact cell sizes.
We specify a fixed cell width - 255px 255px (twice, because there are also two columns). Next, we set the places for the beginning of new lines with the |- tag and new cells (columns) with the | tag. . We close the table with the |} tag and get the following frame:
- We place pictures in cells and set links for them
. One by one, open the necessary parts of the picture in the community album, copy their id (photo-12345_12345) from the browser line, enclose them in double square brackets, enter the dimensions 255x100px and the nopadding tag for gluing the pictures. After the vertical bar we assign a link for each button. We get the following code.
{|noborder nopadding fixed |~255px 255px |-
| [] |- | [] | [] |- | [] | [] |}
- Ready!
Click “Save Page” and get a convenient menu for the community.
Ready-made group menu in the desktop version
Ready-made group menu in the mobile version
If you were making a menu for a group
, then it will be easily accessible by clicking on “Latest News” (by the way, this page can be renamed to “Menu” in editing mode).
If you made a menu for a public
, then it can be placed in a prominent place under the name of the community using a pinned entry.
To pin a menu to a group
, publish a post with a banner and a link to the wiki page on behalf of the community (if you publish on your own behalf, it will be impossible to pin the page).
in the public
: you can pin any author’s post there.
How to make a post with a link to a menu in public
How to pin the community menu
Menu
We will look at the simplest type of graphical navigation. You will need an image cut into several parts or ready-made icons.
To divide photos into elements, use the IMGonline service. Download them and load them into the editor. Don't forget to click <>. If you want to combine them so that there are no borders between them, add nopadding to each. After this word, add a link to the section to which the button leads.
Save the results and pin them to the community wall (on behalf of the group), pin it in the settings. Choose a picture. The menu is also designed in wiki markup applications.
New VKontakte article editor and wiki markup
The VKontakte administration announced the launch of the article editor on December 22, 2021 and is positioning it as a tool for publishing longreads.
Some users decided that it was created to replace wiki markup. But it’s too early to draw such conclusions, because the functionality of the editor is still quite poor. It cannot edit media files (size and alignment) or make tables, and hyperlinks can only be assigned to text. There are no tags or code, there is only a visual mode, like in a regular text editor.
From this it is clear that it is still possible to create a convenient menu for the community or a wiki landing only using wiki markup. What will happen next - time will tell.
This is what the interface of the new VKontakte article editor looks like
What to remember about wiki markup
- The standard method of creating wiki pages is laborious and not very convenient. The easiest way to create a page is through the Mobivik, Source Code or Wiki Poster application.
- The community menu needs to be made into a table so that it looks neat on mobile devices.
- When editing a wiki page in the standard interface, you should not switch between visual editing mode and wiki markup mode. Because of this, the layout may be affected.
It is not necessary to remember all the tags, just keep the link to hand
You've probably heard that if you create a VKontakte Wiki page, you can forget about the boring and banal presentation of information. After all, when publishing a post on your profile, you are limited only by text, link and image. As a rule, this is a short explanation of the photo and may be the address of a third-party resource. No design, no design options. A wiki page is free of these limitations - it is based on wiki markup, similar to HTML, but much simpler. If you are interested in a live example, take a look at Wikipedia. , italics, tables, photographs and much more all help create visual articles.
What is a VKontakte Wiki page?
Before you begin step-by-step instructions on how to create a Wiki page on VKontakte, you need to understand the concept itself. So, what is it: VKontakte Wiki page and what is it for?
Wiki page on VK
is a special markup format that allows you to independently edit and format the display of information on the site. With its help, you can set the design of the group menu, select fonts, insert graphic elements, set table parameters, change themes to suit your mood, and much, much more. And all this without using the standard, extremely limited tools provided by the social network.
Why this is needed is probably already clear. Without using markup, your page/group will look quite gray and banal. To be noticed, you need to attract attention. What could be easier if you have at your fingertips a huge list of tools that will make you stand out from other authors?! Simply insert tables, use links and lists, highlight text in different fonts, create product catalogs or write posts with colorful photo collages! And all this using a layout language that is accessible to everyone! Great? Not that word!
Creation of a VK Wiki page
The rules for creating wiki markup largely depend on whether you plan to promote through a community or through a public page. We remind you that these two types are significantly different from each other. For example:
- A group can be closed for viewing by all users except its members. Or you can close individual functions (such as comments);
- the “Latest News” section is available for group owners;
- but public owners can create events, while documents can be uploaded to the community.
Due to significant differences in functionality, we will consider each option separately. So let's begin.
In the community
How to make a VKontakte wiki page for a group, let’s figure it out step by step:
- Open the VK group and select “Management”.
- Go to sections.
- Click next to the text “Materials”. You can choose open and limited. In the first case, all participants will be able to create resources, in the second - only persons with the status “administrator” or “editor”.
- You can create content in a simple text editor.
- To save a wiki page, click the button of the same name. Preview available.
Now the “Latest news” option will take you to the created wiki page.
You can create a VKontakte wiki markup in the editor: to go to it, click the “” icon located on the right. A detailed description of the rules, as well as the course “Creating a Wiki page on VKontakte”, examples for it, can be found in the training community.
In public
It’s even easier to create such a Wiki page on VKontakte - it will automatically appear when you enter an address like this in the browser:
https://vk.com/pages?oid=-XXXXX&p=NAME
- oid – community identifier, taken from the address when the public is open on VK.
- NAME – a name that you come up with yourself. By the way, remember that you’re right, it’s not a simple matter, and brainstorming for the evening, or even a week, is definitely provided for you.
To create, follow these steps:
- Enter the address and press Enter.
- On the new screen, click on the “Fill with content” button.
- Once everything is ready, copy the ID in the address bar and paste the link into your menu. Then you can remove it, the text will still remain in place.
The main thing is not to forget to set the conditions for editing “Only group leaders” in the access settings. Otherwise, you risk finding yourself in an awkward situation when the participants, for the sake of a joke, change the recording at their own discretion.
Thanks to markup, you can also add an image to the text of the post. If, after publication, you click on such a photo, you will see not an enlarged copy of it, but the Wiki page itself.
Menu for a group
Now let's move on to the question of how to make a VKontakte wiki menu for a group. Essentially, it's just a set of links that can be attached to text or pictures. You need to start creating by selecting a picture from your album and copying the link. After that, all that remains is to enclose it in double square brackets (for example, []). After this, you can start editing the image as you wish. You can add text using the text tag or insert a link using the link tag.
That is, to put it briefly, in order for a menu to appear on your page, you need to create a set of graphic buttons and place them in the content area. For each element, insert a link to another wiki page. As a result, you will see that the following type of markup has appeared in the code:
The destination of the transition is highlighted in bold: it could be your wiki page or one belonging to another community - it doesn’t matter.
To create a link to a third-party resource relative to VK, select a picture or text and click the anchor icon. In the “Link” field, enter the address, for example https://ya.ru.
How to delete a wiki page?
Unfortunately, at present you cannot destroy the created resource, since it is impossible to delete a VKontakte wiki page. Remove all links to it, deny access to all VK users, and the resource simply will not appear. If you don’t remember her address, then she will also cease to exist for you.
Please note that when creating a wiki page in contact, it is worth remembering some features of its placement:
- Currently, the site supports 100% display of information, so when creating markup, do not set a different value. Otherwise, when other users view your page, the picture may “float”;
- Unfortunately, this type of layout does not adapt to the mobile version. Therefore, when creating, constantly check how information from your group is displayed in the application;
- For markup, the length of the characters in the link is very important (limit 6 characters). So remember before you paste them into the text.
- do not use special characters in the name (for example, +, _, *). It is possible that problems may arise during encoding of such characters.
- choose one layout option: either a virtual editor or wiki markup.
How to delete an official (public) page in a contact?
With the official page (VK public) everything is somewhat more complicated than with deleting a group. However, the sequence of actions is approximately the same. While on your official company or website page, you will need to click on the “Manage Page” link.
On the tab that opens, go to the “Participants” - “Managers” tab and remove all administrators of this page using the “Demote manager” button.
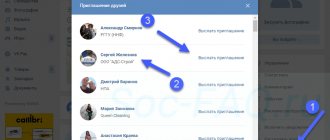
You can also delete all members of this VK community on the “All Participants” tab.
On the “Information” tab, you can change the name of your official page and its URL address on Vkontakte. Then click on the “Save” button located below.
After this, all you have to do is unsubscribe from the mailing list from this official page by clicking on the corresponding “Unsubscribe” item in the right menu (shown in the first screenshot in this chapter with an arrow).
This is all you can do yourself to delete your public page on VKontakte. If you want to achieve more, then contact the administration of this social network with a request to help you resolve this issue.