Live broadcasting on VK is a popular option that gradually began to be introduced in 2021. Today, almost every popular social platform has such a feature, which is due to great interest from users. Live broadcast is also called broadcast, stream, live broadcast - all these concepts mean the same thing.
Live broadcast allows you to broadcast online directly through your computer or phone - you can communicate with subscribers (via chat and webcam), show your actions on the monitor, and stream 24 hours a day.
At first, celebrities and gaming bloggers began to use this option with pleasure. The former shared all the details of their lives, recording videos “here and now,” while the latter demonstrated gameplay on their screens. Today everyone broadcasts - they are available both in personal profiles and in communities and public pages. This is an excellent promotion tool, attracting attention to the site, and also, many have learned to make money on streams. By the way, in many ways this is much easier than making money from a group.
In this article we will tell you in detail about live broadcasting on VK - we will touch on all the nuances that you should know about this function. You are interested? Today you will learn how to stream!
Detailed instructions for creating live broadcasts from a computer/laptop
- On the main page we will make a transition to your videos. Then at the top of your files, pay attention to the inscription “Create broadcast”.
Menu item Video in VK
- Click on it. A window will appear. Note.
- Follow the steps strictly, starting with the cover and title of the broadcast, ending with privacy settings. When everything is ready, click the “save” button.
- You will then need to open the software on your computer. Any “video encoder”, copy the URL and KEY and click publish, making sure that the broadcast has started in the browser and is stable. (For more details, read the article OBS program for live broadcasts on VKontakte: detailed instructions)
- The broadcast has started! A chat room will appear on the right side for communication. In addition to live communication, you can respond to guests in writing.
- If you are planning to stop the live broadcast, you should do so by pressing the stop button in the program on your computer. It can be restored within a minute.
Broadcast data for video encoder
methods through services and software
Relatively recently, everyone has the opportunity to create broadcasts on VKontakte and talk about their life “live.” This style of communicating with your friends and subscribers became popular after the advent of Periscope.
The stars really liked this format, which is why they decided to quickly add it as an additional function of VK, thereby significantly expanding the overall functionality of the resource. Now anyone can organize their own broadcast to communicate with friends or subscribers, so that they can send their questions at any time, to which the respondent will answer.
Broadcast to VK from a computer
general information
The introduction of broadcasts occurred gradually, starting in the summer of 2015. In 2021, popular bloggers, information channels and stars could create direct lines. In the same year, the platform provided streams of computer games. And from the beginning of 2021, everyone who considered it necessary was able to use the function.
By the way, you can broadcast in several ways at once, depending on the user’s preferences. All options will be discussed below.
How to create a broadcast without using special software
Especially for those who want to start broadcasting, but are far from their workplace, it was possible to start recording through a social networking site. This greatly simplifies the work with live broadcasting and requires just a few sequential steps:
- select the section with videos on the user’s page or within the community;
- pay attention to the upper right corner, where the “Create broadcast” button is located;
- follow the instructions provided and begin broadcasting.
The developers have tried to simplify as much as possible all the additional add-ons, which often discourage the desire to start your own public blog or become a public person. First of all, it is necessary to note that the cover can be loaded in just one click, which helps attract a new audience. You can add a short description of the upcoming broadcast. It was not possible without first choosing the topic of the broadcast: sports, music, hobbies, news or something else. If you are going to stream a video game, be sure to include its name. In the end, you just have to choose whether there is a need to broadcast on the page and notify subscribers.
It is worth noting that this is the simplest option for those who do not want to spend time installing auxiliary software or simply do not have the opportunity to get to their workplace, but really want to communicate with subscribers or friends, especially since you only need a PC or laptop with a connected webcam and high-speed Internet access.
Broadcast to VK via Mail.ru service
Probably every social network user knows that the controlling stake has long belonged to the giant Mail.ru. Therefore, there is nothing surprising in the compatibility of these broadcasting platforms. Creating a broadcast in this way is quite simple; to do this, you will need to go to the official website from Mail.ru, dedicated to video streaming https://streams.mail.ru/restream/.
Follow the instructions presented on the site, make the necessary adjustments regarding the video editor, set the theme before starting the video broadcast and start broadcasting.
Unlike the method described above, the platform from Mail is much more flexible and lends itself to additional add-ons, which are extremely necessary for advanced streamers.
Broadcast to VK via Mail.ru service
OBS for broadcasting to VK
As often happens, not everyone likes the official version of the product, so third-party developers or ordinary users who want to improve an already excellent streaming resource begin to modify it.
In this case, we are talking about a program from a third-party manufacturer, which distributes it completely free of charge. The entire installation process and additional settings are as follows:
- Immediately after downloading the software to your PC, run its installation by specifying the final folder for downloading files.
- Immediately after launching the program, log in through your account. This is where the broadcast will take place.
- Go to the program settings and adjust it so that you feel comfortable working.
- All that remains is to indicate the page for the stream and start a live broadcast where everyone can communicate.
By the way, the developers of the official version do not interfere in any way with third-party software for streaming. Therefore, you can, without fear, take advantage of all its functions and comfortably conduct your broadcasts with subscribers or close friends.
Third party software
If the method given above applies exclusively to the VKontakte social network, then there are programs created for a large number of sites, including your favorite social network. networks. You can use any option convenient for you. In reality it happens like this:
- you again create broadcasts via PC, using exclusively the full version of the site;
- After preliminary settings of the video encoder and preview, all that remains is to start the broadcast through third-party software;
- finally check the quality of the connection, after which all you have to do is click “Publish” and start broadcasting to your viewers, notifying them prematurely of the upcoming event.
An excellent option for anyone who wants to broadcast in first-class quality.
Launch “VK Live” from a smartphone.
This instruction will use an iOS mobile device.
- Go to the App Store through the main menu on your smartphone. The application is free!
- Download and launch.
- Below we see a red button in the very center. Click.
VK Live application for live broadcasts A window will open asking for access to geolocation, camera and microphone. We confirm. You need these permissions for the application to function properly.
Setting up the necessary permissions Next, we go to the window for creating a video broadcast. Work with the privacy settings and choose the ones that are best for you. You can specify access to comments for certain groups or everyone.
Setting up access and comments Now we choose where we will broadcast, in which of the available communities. Namely, in those where you have administrator rights. After clicking on the icon, the entire list will appear.
Selecting available communities for broadcasting
You did it! You can safely start video broadcasting.
Interesting broadcasts increase the activity and loyalty of users; if you have something to say, conduct them in your communities, this is very helpful in promoting VK groups.
Download video broadcasts from the VKontakte network.
Everything is extremely simple, but you won’t be able to do it without third-party sites and applications.
Let's show one of these. The site is called getvideo.org
The site is the fastest and is capable of supporting many well-known and popular formats (Ultra HD, Full HD, HD, MP3), and resolutions.
- We follow the link and see this page
Service for downloading from VK getvideo
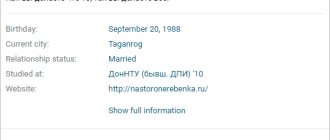
Is it possible to restore a video on VK after deleting it?
Theoretically, it is possible to recover lost video recordings. The easiest way to do this is immediately after removal. To do this, just click on the “restore” inscription that appears in place of the deleted video. It is important to emphasize that such actions are possible before updating or closing the album. After refreshing the page, you will not be able to return the destroyed file.
The second option concerns situations where videos were downloaded from third-party services and sites. In such a case, it is worth placing them on the wall or in the group again, finding them again on the same portal. It's free and convenient, so you don't have to worry about an accident. The main thing is to remember the exact name of the recording so as not to waste time searching for the clip.
We are changing access to comments in VKontakte video broadcasts.
This item is regulated by your privacy settings. Let's move on to creating a broadcast in video recordings. In the window that opens, at the bottom we see a tab with commenting settings. Select the desired item and, following your preferences, the broadcast will prohibit comments for categories of users or for all.
How to limit comments on a VK broadcast
VKontakte broadcasts are a convenient and fun way to communicate with friends and subscribers. Thanks to real-time video, your conversations will become more confidential and emotional.
Externally, broadcasts look like regular videos: they can be added to a profile or community page, sent in a message, posted on a wall, installed on an external website, and so on. The peculiarity is that the live broadcast cannot be rewinded until it ends. But viewers and authors can communicate in the broadcast chat.
Recovering deleted videos
But if more than 24 hours have passed, and the past information was automatically deleted into the archive, this does not mean that it is now completely inaccessible.
Unfortunately, finding and watching an already deleted broadcast on Periscope will be quite problematic, but this issue can be solved - you just need to use search services. First, try searching for a completed YouTube stream using its title. Quite often, recordings of periscope tv broadcasts can be found through the search sites Google and Yandex. It is better not to use other search engines, since they have rather poor performance for Russian-language sites.
What do you need to broadcast from a computer?
To start a live broadcast, you need a special program that allows you to broadcast video and sound from a computer or laptop screen, as well as use additional professional video equipment.
For example, for going live on VKontakte the following are suitable:
We advise you to try different options to choose the most convenient for you. Please note that these are third-party programs, so if you have any questions, you should contact their developers.
Recommendations for hardware and Internet channel for broadcasting
For uninterrupted broadcasting at 3500 kbps, 8-10 megabits of outgoing speed is enough. The most important thing is the stability of the channel.
There are no clear recommendations regarding computer power; specifically, OBS Studio is stable and consumes relatively little PC resources. Then everything depends on the number of sources. If a webcam is broadcast, screen capture (program) without recording, then even an average computer will be enough. External Avermedia capture cards consume CPU resources and drop frames if there are not enough of them. Here you need to look at the circumstances.
Overall, OBS Studio is an excellent program that works stably and is easy to customize. Plus it is absolutely free and works on all platforms: Windows, Mac OS, Linux. It has all the options for streaming computer games, including changing the background.
How to prepare for the broadcast?
Before you start a broadcast, you need to create and design it. For this:
2. Go to the page from which you want to broadcast - you can go live on VKontakte both on behalf of your personal profile and on behalf of the community of which you are the administrator.
Please note: one administrator can only create one broadcast at a time. In order for several live broadcasts to be broadcast simultaneously in a community, they must be created by different administrators.
3. Go to the “Video” section of the selected page.
4. Click on the “Create broadcast” button in the upper right corner.
5. Upload the cover of your future broadcast in 16x9 format, the recommended size is 1280x720 pixels. The cover of the broadcast can tell the user a lot about the planned broadcast: for example, when it will start and what will happen in it.
6. Indicate the title and description of the upcoming broadcast. A good headline should make it clear what will be discussed, but leave intrigue so that viewers want to watch the broadcast to the end. In addition, we do not recommend writing the title and description in capital letters only - this will more likely alienate viewers than attract attention.
7. Select a broadcast category - this will help the algorithms select viewers who may be interested in the topic of your live broadcast.
8. Expand the “Setting up a program for broadcasting” section.
9. Copy the link (URL) and key (KEY) of the stream.
Never share the link and stream key with anyone! With their help, anyone can broadcast on your behalf. If necessary, you can generate new settings in the window for creating or editing a broadcast.
10. Without closing the browser tab, open your broadcast program and paste the received data into it (read more about setting up programs below).
In some cases, you may need to combine the link and key into one line (for example, when using server programs for broadcasting): to do this, add a slash ( / ) after the link and then insert the stream key.
rtmp://stream.vkuserlive.com:443/vlive.567.eyJuI...MDh9 / Fv3_JmFZp05G4p,
where rtmp://stream.vkuserlive.com:443/vlive.567.eyJuI...MDh9 is the link,
11. Return to your browser and check the Preview checkbox to test your video and audio before broadcasting. In this mode, only you will see the signal; other users will see a standard blank.
12. Check the “Notify when broadcast starts” checkbox so that your friends and subscribers (or only subscribers, if the broadcast is planned on behalf of a community) will receive a notification when you go live. This feature is only available once per hour - if you start the next broadcast less than an hour after the start of the previous one, you will not be able to send such an alert.
13. Click the “Save” button to complete creation and begin testing the signal for the future broadcast.
14. Start the stream in your broadcast program.
15. Return to the browser and open the player of the broadcast you just created.
16. Make sure video and audio are working without problems.
17. Click the Publish button when you are ready to go live.
At this moment, the broadcast signal will become available to everyone inside the player, your friends and subscribers will receive a notification about the start, and viewers will have a chat to communicate during the broadcast.
How to start a broadcast on VK from a computer
Almost the entire process is carried out directly from the social network. To do this, think about on whose behalf you want to broadcast. You can do this on behalf of yourself or the community you administer. Go to the selected page. Further actions will be concentrated there.
- Open your videos and click Create.
- Connect the cover. Recommended size: 800*450. Others will be displayed incorrectly.
- Enter an interesting, catchy title and description.
- Be sure to select the correct category. This is necessary so that the entry gets into the thematic catalog and is found by interested people.
- Go to the next field - “Video Encoder Settings”. Unfold it. You will need the key and link that you see in the next step. Don't tell them to anyone. Don't close your browser.
Download Open Broadcaster Software. Open the application and go to File-Settings-Broadcasting. In the top field, put “Custom broadcast server”. Add the URL and key from the broadcast to the empty lines.
For the next step, you will need the Output, Video, and Audio sections. In the first tab, set the bitrate in accordance with the selected recording quality. Fill out the remaining fields as in the screenshot.
Recommended bitrate
In "Audio" select your audio device and microphone. If there is only one of them on your computer, set it to “Default”. Sampling frequency – 44.
In the third section, in the drop-down list of the first item, select the recommended monitor resolution. The next line should have the same parameters. Then set the bicubic scaling filter and the frame rate to 30 or 60. Save the changes by clicking “Apply” and “OK”.
Further actions are related to setting up the broadcast itself. To do this, you need the main page of the application - the lower left corner. There are two windows there. “Scenes” are collections of sources that you can switch between during broadcasting. “Sources” is what viewers will see. Images from the screen, cameras, inscriptions and other materials. To create them, click on the plus and select the appropriate capture type. Follow the instructions given by the software.
You're almost done. Now go back to the browser, check the boxes for preview and notify the audience. Save. Go to OBS again and in the lower right corner, launch the broadcast. Open your browser, check the signal, and click Publish. Completing the broadcast process is simple. Stop it in the program using the same button you started it with.
How to start a live broadcast on VK: useful tips
Don't be late for your announced start time. It's better to connect a few minutes earlier to check if there are any problems with sound or picture. This way you can fix them before subscribers catch up.
Greet the audience and ask them to put pluses or numbers in the comments to evaluate the quality of the connection. If everything is fine, just talk about abstract topics while waiting for other users. If possible and the topic is relevant, promise bonuses and gifts to those who watch to the end. Move on to the main issues as soon as there are enough people and their arrival stops.
How to broadcast on VK from a computer and not lose views
The obvious advice is to make unique, interesting content that people will want to watch. If you are the owner of a small business related to production or visual components, show the work process. For example, broadcast from a beauty salon while doing makeup. You can conduct a master class by providing useful information. This will attract attention and potential clients to you. A few more ideas:
- Organize a competition with a nice gift for the winner.
- Interview a thought leader in your industry.
- Remove step-by-step instructions for the product.
- Introduce viewers to your employees.
- Make a presentation of new products.
Engage and retain your audience while broadcasting. For this:
- Ask for questions and answer them.
- Read the comments that are written in the chat on the right.
- Address users by name when replying to them.
- Please like.
- If the influx of subscribers to the broadcast continues, briefly introduce yourself again and tell what you are talking about.
- Thank you for sending gifts.
- Be natural, show emotions, joke.
- Don't react negatively to provocateurs. Just block them.
- Prepare surveys and games to increase people's participation.
After finishing the recording, thank those who came, conduct a survey about what they liked and what they didn’t. Find out the preferences of viewers - what they would like to watch a video about next time. Find out a time that would be convenient for them to do this.
How to end the broadcast?
To end the broadcast, first stop the stream in the program, and then click the “End broadcast” button above the broadcast player. If the stream does not arrive on VKontakte servers within five minutes , the broadcast will end automatically.
After the broadcast is completely completed, a video with a recording of the live broadcast will appear in place of its player, which can be rewinded and commented on like a regular video.
Important: if you click the “End Broadcast” button before stopping the stream in the program, the current broadcast will end and your signal will appear in a new player that will be created automatically.
If you stop the stream and decide to continue it after five minutes, the signal will also appear in a new, automatically created player.
How to earn money while broadcasting?
You can accept paid messages from your viewers using the DonationAlerts service.
To start receiving rewards:
- Go to the DonationAlerts website.
- Log in using your VKontakte page.
- Customize the appearance of notifications about paid messages, subscriptions to your page, as well as viewers who shared your broadcast on their wall.
- Install the DonationAlerts widget in your broadcast program. Read more about installation on the service’s website in the “Help” section, as well as in separate instructions for the Open Broadcaster Software and XSplit programs.
Now, during your VKontakte broadcast, a bright green “Support” button will appear under the player, with which viewers will be able to send you paid messages, and notifications about them and other events will pop up right on top of the broadcast.
Earned money can be withdrawn directly to your VK Pay wallet without commission. The minimum withdrawal amount is 1 ruble, the maximum withdrawal amount at a time is 15 thousand rubles.
If you have any problems, contact service support.
Setting up OBS Studio and broadcasting on Youtube and VKontakte
Let's start by installing and setting up OBS Studio. This is free software that can be downloaded from the official website of the program https://obsproject.com/ru, go to the Download section and download the distribution. Follow the instructions during installation.
Let's start right away by adding a source. A source is a separate broadcast layer, which can be a video, image, audio file, screen capture window (of a separate window or application) or an external video camera. The OBS Studio program is mainly used for streaming computer games, so the first thing we do is add a screen capture: click the plus in the lower left corner, then “Screen Capture”.
Next, select the necessary checkboxes at your discretion and save.
Using the same method, you can add a video or image, plus all this can be done by simply dragging it into the “Sources” area.
You can add a camera in the same way, select the “Video capture device” item. The computer's webcam should be detected automatically, and an additional capture card is required to connect an external video camera. The most popular Avermedia gaming capture cards, below is an option for 4K broadcasts, with which you can capture not only an external camera, but also a second device (laptop or PC).
We add video recording, adjust the screen size a little and start previewing. On the screen on the left is what will go on air, on the left is a preview.
We set the volume level of each stream in the “ mixer”
", it is recommended to do this before the start of the stream so that there are no sudden changes between sources.
Next, we’ll deal with broadcast control. The whole system is divided into sources and scenes, it’s quite easy to understand. To turn on the next source (from the preview), click “ Go
”.
Now let's get ready for the start of the broadcast. To change the stream settings, go to File – Settings, then the “ Output”
" The video bitrate and resolution are set based on the goals of the tasks, if it is a stream of a computer game, usually 4500 is more than enough. You can set 6000, this is the maximum bitrate that the YouTube server can handle.
Next, go to the “Broadcasting” tab. To configure the broadcast, you can use prepared presets, but we recommend that you always do it manually. Select “Custom broadcast server”, here you will need to enter the URL address of the server for broadcast and the access key. Each service has approximately the same system for creating broadcasts; below we will consider popular broadcasting services - Youtube and VKontakte.
FAQ
Is it possible to limit the broadcast audience?
When creating or editing a broadcast from your personal page, you can configure which users will see the live broadcast. You can make the broadcast available to everyone, to friends and friends of friends, only to friends, and also only to yourself. In addition, you can select specific friends or lists of friends who can be either allowed or blocked from viewing the broadcast.
For communities, setting up a broadcast audience is currently not available.
Is it possible to limit broadcast comments?
Advanced privacy settings are available for broadcast chat from your personal page: You can allow comments to be made by all users, friends and friends of friends, only friends, only yourself, as well as specific friends and lists of friends.
During the broadcast, on behalf of the community, you can turn on or off viewer comments at any time in the broadcast editing window.
How long can the broadcast last?
The maximum length of a broadcast that will be automatically saved after completion is eight hours . If your broadcast lasts longer, then after its end only the last eight hours of broadcast will be saved in the recording.
Is it possible to make a non-ending broadcast?
We have provided a hidden function that allows the broadcast not to end if the signal does not arrive at the VKontakte servers for more than five minutes. This is primarily useful for round-the-clock broadcasts of TV channels and radio studios. After enabling this function, your broadcast will end only if you click on the “End broadcast” button. In this case, the broadcast can last as long as you like, but only the last eight hours will be available in the recording.
How to create a VKontakte broadcast
First, let's look at the preparatory activities.
Go to the “Video” section and click on the “Create broadcast” button.
A form will open that you need to fill out.
- Upload a cover for the community (see how to add a photo to VK).
- Enter the title and description of the broadcast (see how to create strikethrough text).
- Select a broadcast category.
- Configure the video encoder parameters - more on this below.
- Configure access parameters for the video stream.
- Share your new stream with your friends.
The most important thing here is to understand the encoder settings. Expand this section.
A video encoder is a program that allows you to use a camera on your computer to broadcast a video stream to the network.
Here we are offered a unique link and key to launch the video. This data must be copied and pasted into the appropriate fields in the program that you will use.
When finished, click on the “Save” button. You will be taken to the broadcast page. As soon as you configure and activate the stream in the video encoder, it will be launched.
Now I will show you a program for creating a video stream and an application for your phone. With their help, we will complete the launch of the broadcast.
OBS video encoder program for launching live broadcasts on VKontakte
The download link is available in the official VK group.
Download and install the program. After launch, you will be asked to enter the credentials that you use to log into Contact (see forgot VK password). Do this and click on the “Login” button.
OBS makes our life a lot easier. It automatically reads the unique link and key that we received in the previous step. All we have to do is select from the list the page on which we want to publish the live broadcast and click on the “Launch” button.
The broadcast will start - you can watch it by returning to the browser window.
How to create a broadcast from your phone
For this we need the official VK live application. It is used to create and conduct online broadcasts on VKontakte from a mobile device.
Download links.
Download, install and launch the application. You will be asked to log in to the social network - click “Log in via Vkontakte”.
Confirm access for the application to your personal page.
To start broadcasting from your phone, click on the video camera icon in the lower right corner of the screen.
Now you need to configure the settings. Select the page from which you will stream, specify the name of the broadcast. Then click "Edit".
The broadcast will start. The camera of your mobile phone is used for shooting. And viewing is available on the VKontakte video recording page.