Step-by-step instructions for folding
- Go to the official VKontakte website and find the “Music” section.
- Sound recording. There are several recording options: through a computer and a phone voice recorder (on an iPhone, like on any other phone, the voice recorder is equally functional).
- Upload a file with audio recording. This can be done via a USB cable, Bluetooth or Wi-Fi. The transferred audio file must have the extension .mp3. Although the voice recorder is almost the same for all phones, on some devices audio can be recorded in a different format.
- In the “Music” section, find the download button in the form of a cloud in the right corner.
- Go to the dialog window and attach the required recording as music.
List of hidden Force Touch features in Apple Watch that you might not know about
The Force Touch function is in use.
How to quickly calculate the total bill for all guests and determine tips on Apple Watch
Release of a new OS on Apple Watch mod.
How to enable Power Reserve mode on Apple Watch
The Apple Watch smart watch has become excellent.
907 Theme
Lorem ipsum dolor sit amet, consectetur adipiscing elit. Donec condimentum accumsan ligula, non commodo dolor varius vitae.
Morbi dapibus neque a mauris sodales bibendum. Phasellus at ornare tellus. Suspendisse consectetur laoreet diam eleifend interdum.
Feedback form
Feedback
Latest Posts
List of hidden Force Touch features in Apple Watch that you might not know about
The Force Touch function is in use.
How to quickly calculate the total bill for all guests and determine tips on Apple Watch
Release of a new OS on Apple Watch mod.
How to enable Power Reserve mode on Apple Watch
The Apple Watch smart watch has become excellent.
Recent Portfolio
No Posts To Display
Contact Info
Lorem ipsum dolor sit amet, consectetur adipiscing elit. Donec condimentum accumsan ligula, non commodo dolor varius vitae.
How to delete a recording from a voice recorder on VK, instructions
Contents of the article (navigation)
So, for some reason you needed to send someone a recording from a voice recorder in a private message, and for some reason you are not able to record a voice message? This instruction is for you:
- First of all, go to the VKontakte website https://vk.com
- Next, go to the “My Audio” or “Music” section.
- The next step is to record audio from the recorder. In order for you to have something to upload, you first need to write it down. For this you can use:
- Record directly from your computer. To do this, you will need special sound recording equipment (microphone), as well as some program that allows you to edit sound. After recording, you must save the result in .MP3 format
- Recording from a phone. To do this, you can use the voice recorder built into the operating system, and then transfer the sound file via USB/Bluetooth/WI-FI. Finally, make sure that the transferred file has a .MP3 extension, as some devices record audio in other formats.
- Then you need to upload the audio recording to the site itself, use the “music” section, where in the right corner find the corresponding button.
- Once again, make sure it is in .MP3 format
- Next, go to the required dialogue and simply attach your recording as music.
Conclusion
It is also worth noting that you can edit the title and description of the downloaded file; to do this, simply click on the pencil icon located to the right of the title of the audio recording. To make it appear, you just need to hover your mouse over the audio.
How to save a voice recording from iPhone to computer
Long audio recordings do not fit into email attachments. I will show you two ways to send a long audio recording from an iPhone to a computer.
For example, you recorded a long interview or speech of 50 minutes or more on an iPhone voice recorder and now want to transfer this recording to your computer to edit a video.
To do this, click on the “send” icon at the bottom left.
And choose one of the proposed options. For example, send by e-mail.
But the error message is that the attachment size is greater than 25 MB. Unable to attach attachment.
It will also not be possible to send via imessage, since “The attachment is too long. Would you like to select a smaller clip of this attachment to send?" imessage also has a limit on the maximum size of a sent file.
It will also not be possible to send via iCloud email due to the error “The message size is 36.2 MB, which exceeds 27.0 MB, the maximum size allowed by the server.
And then the error “Preparation failed” may appear. The recording is currently being optimized for sending. And no matter how much you wait, it will continue to be optimized.
Using audio editing.
The first method is audio trimming. So, to reduce the size of an audio recording on an iPhone made using the voice recorder application, click “edit”.
Then click on the crop icon at the bottom right.
You will now enter file trimming mode. Drag the right bounding line further to the left to trim the end of the recording (don't worry, nothing will be deleted).
I made 39 minutes out of 57 minutes, cutting off almost 20 minutes from the end. Now click "Crop".
There will be options:
- Crop original
- Save as new entry
- Cancel
Select Save as new entry.
A new audio file will be created with the same name, but with an addition (copy). This way we created a copy of the file with the ending cut off. On iOS 10, this problem should no longer occur, although anything can happen.
Now all that remains is to do the same thing, but only cut off the beginning of the file and the end of the file. And from one large file we will receive two medium ones, which can be sent to a computer or anywhere.
Using iTunes.
Connect your iPhone to your computer, open iTunes and click on the iPhone icon that appears.
Now click on the “Music” tab and check the “Sync music” checkbox, and also check the “include voice recordings in synchronization” checkboxes.
Synchronize your iPhone with your computer by clicking “Sync” at the bottom in iTunes.
Wait for the synchronization to complete. Now all your voice recordings have been transferred to your iTunes library. Click on the Music icon in iTunes to open your music library.
Find here the file name you named your audio recording.
Right-click on it and select “Copy”.
Now you can paste this entry into any folder on your computer. To do this, right-click on an empty space and select “Paste.”
The audio recording from your iTunes library will be transferred to your disk. Only it will not save the name, the audio recording will be renamed. Also, for the security of your Apple ID account, I recommend installing Two-Step Apple ID Verification.
The audio recording format will be .m4a, to convert .m4a to .mp3 or any other format, you can watch the video tutorial. It shows how to convert from .flca format to .mp3, but also instead of .flac you can do it with .m4a format.
Other articles on this iOS topic:
You need to know the rules for uploading music to VKontakte
Hello, friends! Social networks have become an integral part of our lives. With their help, we communicate, find clients for business, earn money via the Internet, and of course, relax. The VKontakte social network allows you not only to add music from other people’s accounts and groups, but also to upload your own audio files from your computer. There are rules that will help you safely upload music to VK:
- the audio recording must be 200 megabytes in size (otherwise the file will not download);
- The recording format must be mp3;
- music downloaded to VK must not violate any copyright.
In fact, free information that can be downloaded on the Internet, especially music, does not carry copyright. If we talk about paid information products on the Internet, then copyright is assigned to them. How to add an audio recording from a computer to VK? Everything is very simple. Next, we will act according to the instructions.
Uploading iPhone voice recorder recording to cloud storage
Cloud storage is the most convenient way to store information these days. They are easy to use, reliable, and save space in the gadgets' memory. Anyone who has the address and password for the storage can use the posted information. In order to download information, you do not need any additional programs or cables. All you need is an Internet connection.
iCloud cloud storage
Apple has developed its own cloud storage, the free volume of which is 5 GB. The developers recommend storing all necessary files in it, as well as backup copies. If the volume provided is not enough, you can purchase additional reserves for just under a dollar per month for 50 GB.
Note! Unnecessary information from cloud storage can be deleted, transferred to other devices, and archived.
How convenient is this storage? If no special settings are entered, all files from the iPhone are automatically saved to iCloud. The data can be viewed from any Apple device with Internet access. And now iCloud storage is available for computers running the Windows operating system.
To be able to use audio recordings from the voice recorder on Apple devices via iCloud, they need to be synchronized. This is done quite simply:
- Open your account “Apple ID, iCloud, iTunes” in settings.
- Select iCloud.
- Find “Voice Recorder” in the menu that appears.
- Drag the slider to the right to open access.
After this, all audio files from the recorder will automatically go to storage, where they can be used at any time.
iCloud is also available for Windows
Dropbox cloud storage
Audio information from your iPhone can also be uploaded to other cloud storage services, such as Dropbox. To download information you need:
- Log in to Dropbox.
- Choose one of the proposed tariffs (2 GB of memory is provided for free).
- Install the iFile manager on your iPhone and launch it.
- Go to “Settings” of the manager.
- Go to “Link to Dropbox” (you will need your Dropbox account login and password.
- Click on the “Change” button at the top, then on the “+” at the bottom of the page.
- Select the Dropbox folder.
- In the list of folders that appears, go to the one where the desired file is stored and click on it.
- Then activate "Edit".
- Determine the action that needs to be performed with the file from those suggested on the bottom panel - “Move”.
All you have to do is wait until the file is transferred to the Dropbox cloud. In exactly the same way, you can copy any information from your iPhone.
Important! Dropbox storage is unlimited compared to other cloud storage services.
The options to transfer information from the voice recorder, share it, and have access from anywhere in the world or any other device are enough to use the Voice Recorder application without any difficulties or concerns. This situation cannot but please users.
How to add an audio recording from a computer to VK
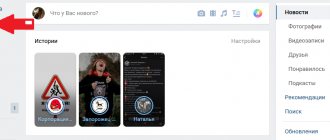
So, to add an audio recording to VK, first go to your page. On the left side of the page you need to click on the “music” section. (Picture 1).
Next, click on the icon that appears as a cloud - “download audio recording”.
After this, a window appears with which you can download audio files from your computer. Click on the “select file” button. (Figure 3).
A desktop explorer will open, where you need to select exactly the folder in which you saved previously downloaded music from the Internet. Select the desired audio file and upload it to your VKontakte account. (Figure 4).
How to send an audio recording from iPhone?
The Voice Recorder application is not one of the most used on the iPhone, but when there is a need to record a voice message or note, we turn to it. iPhone users usually don't have any problems with recordings, but when it comes to trying to send it to someone, that's where the real difficulties begin.
Before you start reading these instructions, we immediately want to make a reservation - we are not talking about sending songs available on your iPhone to other people, but about sending audio recordings. Moreover, there are no adequate ways to transfer music tracks from iPhone to iPhone (and especially to smartphones running Android or Windows Phone).
Now let's get back to sending audio recordings. There are several ways to transfer audio recordings from iPhone to other devices, but the most effective is simply sending the recording via email or in the body of a text message. This process cannot be called complicated, by any means.
Step 1: Go to Voice Recorder app
Step 2: Click on the audio you want to share
Step 3. Click on the send button (marked in the screenshot) and select the method convenient for you
In this simple way, you can save audio recordings or send them to your friends without connecting your iPhone to your computer.
What is useful to know:
Rate: (3.06 out of 5, rated: 18)
Return to the beginning of the article How to send an audio recording from iPhone?
Adding music to VK dialogues
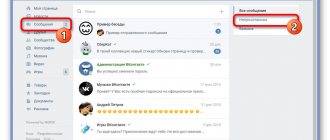
How to add music to VK dialogues? To do this, go to your messages, select any dialogue and click on the paper clip icon. (Figure 6).
Then add any downloaded audio recording and attach it to the dialogue. Music is added instantly, so you can share your favorite music with your friends and acquaintances.
Playlist and adding music there
To add an audio recording to a playlist on VK, first create it. To do this, you need to go to the “music” section again and click on “playlists”, “add playlist”. (Figure 8).
Next, enter the playlist name and description. Then click save. After saving, your playlist will appear in your list. You can upload music there as follows. Click again on the created playlist and add audio recordings. Music can be distributed in order and then you will know where it is.