The social network Vkontakte continues to delight its users with more and more new opportunities. At the end of 2021, VKontakte added a voice input function that allows you to record and send voice messages in a regular text chat window. VK also recently introduced the ability to organize video broadcasts, allowing you to create and conduct streams from your page on the social network. At the same time, people who want to do this may encounter the system message “Access to the microphone for the site vk.com is prohibited in the user’s browser.” In this material I will tell you how to set the microphone resolution in VK, and what methods will help us with this.
How to allow access to the microphone in VK
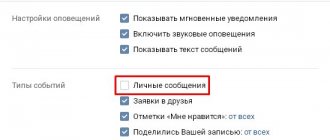
The social network Vkontakte continues to delight its users with more and more new opportunities. At the end of 2021, VKontakte added a voice input function that allows you to record and send voice messages in a regular text chat window. VK also recently introduced the ability to organize video broadcasts, allowing you to create and conduct streams from your page on the social network. At the same time, people who want to do this may encounter the system message “Access to the microphone for the site vk.com is prohibited in the user’s browser.” In this material I will tell you how to set the microphone resolution in VK, and what methods will help us with this.
How to enable and configure the microphone in the Yandex browser
Everyone already uses instant messengers and other applications that support voice communication with interlocutors on the other side of the screen. We mainly use smartphones or programs for this, such as Skype, TeamViewer, RaidCall and many other voice managers. In fact, we can turn on the microphone directly in the Yandex browser and immediately start communicating on numerous sites without the need to download separate applications. A voice recording device significantly expands the capabilities of a web browser and improves the comfort of its use in many areas. In addition to the material, we will touch on topics with ways to set up and turn off the microphone.
Why is a microphone useful in a Yandex browser?
The most common ways to use a sound recording device:
- Voice search. Regardless of which search engine is installed, it supports voice input. Artificial intelligence immediately converts speech into text and begins searching for the request. This function is known on smartphones, but nothing prevents it from being used on any device with a Yandex web browser;
- Fast transfer of information. If you enable the microphone in the Yandex browser, it becomes possible to record and send an audio message on VK, Viber and other social networks. This saves a lot of time. It will take twice as long to write down the same thought in a VKontakte text block;
- Communicate with other people in real time. This includes dating sites, web resources for video or voice communication with friends and acquaintances, as well as streaming services.
There are many other areas of the Internet where a microphone will be very useful. There is no point in considering all of them, because the reader has already understood the main reasons for turning on the microphone.
Causes of dysfunction in VC
Most browsers, when a site accesses the microphone, prompt the user to allow or disable this operation by clicking on the corresponding menu button.
If for sites using an unsecured connection (http), the user's choice will be fixed for one session, then for secure sites (using a secure http connection) the user's choice can be fixed for all subsequent sessions.
Therefore, if you accidentally clicked on “deny” when a sign about the possibility of accessing the microphone appeared on the VK website, the system will remember this and will subsequently block VKontakte’s attempts to gain access to your microphone.
In addition, the lack of access to the microphone can be caused by its being disabled in the Windows OS settings, the physical failure of the device, as well as the “human factor” (the microphone simply “forgot” to be connected to the computer).
Ways to activate the microphone on VKontakte
So, to turn on the microphone in VK, we need, first of all, to do the following:
- If, when you try to activate the microphone, a sign appears asking for access to the microphone, click on “Allow”;
Click on "Allow" to confirm access
- Check if your microphone is connected to the PC (if you connect an external microphone);
- Make sure your microphone is not muted on the system. Go to Control Panel – Hardware and Sound – Sound. In the window that opens, go to the “Recording” tab, where the list of microphones available in the system is located, and make sure that your microphone does not have the “Disabled” status. If it has this status, then move the cursor over this microphone, right-click on the mouse, and select “Enable” in the menu that appears;
- Remove the microphone access rule in your browser settings. For example, in Chrome this is done by going to “Settings” - “Show additional settings”. Then, in the “Personal Information” option, click on the “Content Settings” button. Find “Microphone” there and click next to the “Configure exceptions” button, a list of sites with rules set for them will open. If there is a site “vk.com” and next to it there is a “Deny” rule, then by clicking on the cross on the right, delete this rule, then go to VK, and when asked to grant access to the microphone, click on “Allow” ;
- Change a number of browser settings. While on the VK website, click on the padlock to the left of the address bar, find “Microphone” there, and select “Allow”. For example, for Firefox you need to click on the padlock, then on the button with the right arrow - “More details”. Go to the “Permissions” tab, find the “Use microphone” option and, if necessary, activate the “Allow” option;
- Check your microphone settings in Adobe Flash Player. Despite the fact that VK developers have recently abandoned the outdated Flash functionality in favor of HTML5, I still recommend checking your microphone settings in Adobe Flash Player. Go to the Control Panel - in the "View" option on the right, select "Large Icons". Find “Flash Player” on the left and click on it. In the window that opens, select the “Camera and Microphone” tab, then click on the “Camera and microphone settings for website” button. Look through the list of sites, and if you find vk.com there, then change the settings for it to “Allow”;
- Try using a different browser to work with the microphone in VK.
How to enable microphone in Yandex Browser
Some websites, online games and services provide the opportunity for voice communication, and in the Google and Yandex search engines you can voice your queries. But all this is only possible if the web browser allows the use of a microphone by a specific site or system, and it is turned on. How to perform the necessary actions in Yandex Browser will be discussed in our article today.
Activating the microphone in the Yandex browser
Before you turn on the microphone in your web browser, you should make sure that it is properly connected to the computer, configured, and generally works normally in the operating system environment. The guides provided in the links below will help you do this, but we will begin to consider all possible options for solving the problem voiced in the topic of the article.
Read more: Checking the microphone in Windows 7 and Windows 10
Option 1: Activation on request
Most often, on sites that provide the ability to use a microphone for communication, you are automatically asked to provide permission to use it and, if necessary, turn it on. Directly in Yandex.Browser it looks like this:
That is, all that is required of you is to use the microphone call button (start a call, voice a request, etc.), and then click “Allow” in the pop-up window after that. This is only required if you decide to use the voice input device for the first time on a particular website. This way you will immediately activate it and be able to start a conversation.
Option 2: Program settings
If everything was always done as simply as in the case discussed above, this article, as well as such a high interest in the topic in general, would not exist. It is not always the case that this or that web service requests permission to use the microphone and/or begins to “hear” it after it is turned on. The operation of the voice input device can be prohibited or disabled in the web browser settings, both for all sites, and only for a specific one or some. Therefore, it needs to be activated. To do this, follow these steps:
- Open the web browser menu by left-clicking (LMB) on the three horizontal stripes in its upper right corner and select “Settings”.
- In the side menu, go to the “Sites” tab and in it click on the “Advanced site settings” link marked in the image below.
- Scroll down the list of available options to the “Microphone Access” option block and make sure that the device you plan to use for voice communication is selected in the list of devices. If it is not, select it from the dropdown list.
Having done this, set the checkbox next to the “Ask permission (Recommended)” item if it was previously set to “Prohibited”. - Now go to the site that required you to turn on your microphone and use the call function. In the pop-up window, click on the “Allow” button, after which the device will be activated and ready for use.
- Additionally: in the “Advanced Site Settings” subsection of Yandex.Browser (specifically in the block dedicated to the microphone, which is shown in the images from the third paragraph), you can see a list of sites that are allowed or denied access to the microphone - corresponding tabs are provided for this. If any web service refuses to work with a voice input device, it is quite possible that you previously prohibited it from doing so, so if necessary, simply remove it from the “Forbidden” list by clicking on the link marked in the screenshot below.
Previously, in the Yandex browser settings you could turn the microphone on or off, but now you can only select an input device and determine permissions for its use for sites. This is a safer, but, unfortunately, not always convenient solution.
Option 3: Address or search bar
Most users of the Russian-language Internet, to search for this or that information, turn to either the Google web service or its analogue from the Yandex company. Each of these systems provides the ability to use a microphone to enter search queries using your voice. But, before using this function of the web browser, you must grant permission to use the device to a specific search engine and then activate its operation. We previously wrote about how this is done in a separate article, and we recommend that you read it.
Read more: Voice search in Yandex.Browser Activating the voice search function in Yandex.Browser
Conclusion
Most often, there is no need to actually turn on the microphone in Yandex.Browser; everything happens much simpler - the site asks for permission to use the device, and you provide it.
We are glad that we were able to help you solve the problem. Describe what didn't work for you. Our specialists will try to answer as quickly as possible.
Did this article help you?
NOT REALLY
How to allow access to the microphone in VK
Today in our article we will tell, show and teach you how to allow the VKontakte social networking site to use a microphone.
You will learn how to enable the microphone for VK in the browser. This question is now more relevant than before; at the moment you may need a microphone in VK for:
- Sending voice messages.
- Conducting online broadcasts.
- Making calls.
- Other voice actions.
As you can see, the use of a microphone and the interaction of the VKontakte site with your browser is more than justified.
Guide to setting up a microphone for VKontakte
Telegram channel Programmer and business. Every day there are interesting stories about how a programmer builds a business.
New functionality regularly appears on the VKontakte social network. A voice input option is now available to users. You can record messages and send them to other people. To do this, you need to use the text chat window. But not everyone manages to do it the first time. In this article we will look at how to turn on the microphone in VK for making calls and sending voice messages. We'll talk about ways to set it up on your computer and phone. You can easily send recorded notifications to users.
READ How to connect Wi-Fi queens
How to allow access to the microphone in VK
Contents of the article (navigation)
There are 3 simple ways to allow or block VK from using your microphone
- Enable the microphone in the browser address bar.
- Turn on the microphone before use.
- Enable the microphone in the browser settings.
It’s up to you to decide which method to use, but let’s take a closer look and analyze each of them.
Turn on the microphone before use.
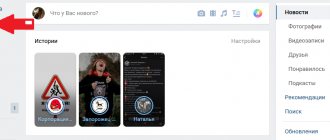
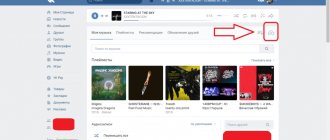
The easiest way to activate a microphone in VK is to go into a dialogue with a friend and click on the icon for recording a voice message; the site will automatically ask you for permission to use the microphone.
Below is a screenshot of what it looks like.
Enabling the microphone in the browser address bar
The following is the simplest and easiest way to solve this problem. To turn on the microphone in VK you need to:
- Hover your mouse over the padlock in the address bar of your browser.
- Press the protocol lock.
- Allow microphone use.
To make it more clear to you, below is a screenshot of what you need to do.
Everything ingenious is simple.
Enabling microphone in browser settings
The most difficult method is to allow the VKontakte site to use a microphone in your browser settings. Below we will show how to do this using the example of the Google Chrome browser, but in Opera and in Mizil the procedure is approximately the same.
- Let's go to the browser settings.
- Additional settings.
- Content settings.
- Microphone.
- Allow on VKontakte yes.
This method is the most difficult, but no less relevant. Let's look at the most frequently asked questions on this topic
How to prevent VK from using a microphone
To prevent the VKontakte site from using a microphone, you can use the permission method through the address bar or through the browser settings and instead of allowing, check the block box.
As it is shown in the screenshot below
How to allow access to the microphone on your phone in VK
If you encounter a settings problem on your mobile phone:
- You need to go to your android settings.
- then go to the application management section.
- Next, find the official VKontakte application.
- Go to Manage Permissions
- Allow an application to use the microphone
We hope you find our article useful, we welcome your comments and observations
Source
How to disable
Disabling forwarding is done manually. To disable forwarding, you need to deactivate the function through the smartphone settings (click on the slider again) or request the operation from the operator using one of the available methods. After this, any calls will be sent to the main SIM card inserted into the smartphone.
The option is available not only for landline phones, but also for modern smartphones, which you can configure yourself without involving telecom operators or installing various applications. This feature is available on most devices that can make and receive calls.
To mute the sound from the speakers, some keyboards have a special key. Those keyboards that are not equipped with one still have a number of function buttons that are used as controls for multimedia devices. A similar hotkey designed to turn on the microphone and then turn it off, as we know, does not exist by default.
This usually happens because the microphone is not always in use. It turns on only when an application accesses it. In this case, the user is expected to use the on/off button within the application. But this, unfortunately, does not work fast enough. Therefore, we have the option of assigning the keyboard shortcut that the user needs to control the microphone.
GrandGuide | We will answer your questions
VK developers try to keep up with the times and regularly add new useful functions in accordance with the wishes of users. So at the end of 2021, the ability to send voice messages was added, and more recently - video broadcasts in VK. Naturally, it is impossible to implement these functions without a normally working microphone, and many users are faced with a ban on access to the microphone on the VKontakte social network. That is why we will tell you how to allow access to the microphone in VK!
How redirection works
Forwarding is the operation of transferring an incoming call to another number or voicemail if the subscriber does not answer the call. Forwarding is done automatically thanks to the built-in functions of the smartphone or connected operator options.
If the forwarding is internal and the call goes, for example, to the number of the same operator, payment is charged in accordance with the established tariff plan. External transfer means that the service is paid according to the prices of the company that provided this opportunity.
Enabling call forwarding on phones is not always possible. Some models may not support this feature due to outdated hardware or software. The option is available on all modern smartphones.
Why doesn't the microphone work in VK?
In fact, the microphone in VK may not work for several reasons, and accordingly, the methods for allowing the use of a microphone in VK will vary.
It is worth noting that the first time you access the microphone on any site, the browser prompts you to allow or disable the use of the microphone. The user may inadvertently or mistakenly deny access to the microphone, in this case:
- On sites with an insecure http connection, the user's selection will only be applied for that session;
- On sites that use a secure https connection, the user's choice will likely be captured and applied to all subsequent sessions.
In addition, the microphone may be unavailable or disabled in the operating system settings, or it is also possible that the microphone is simply broken!
How to allow access to the microphone in VK (VKontakte)
So, how to allow access to the microphone in VK? The cause needs to be determined, so we recommend trying the following:
- If the microphone is external, that is, connected to a computer, then it is worth checking the connection;
- If, when activating a microphone in VK, a message appears asking for access to the microphone, you must allow access by clicking on the “Allow” button;
- We recommend checking your browser settings. To do this, click on the lock icon in the address bar and turn on the microphone if it is turned off;
- You need to make sure that the microphone is enabled in the system settings. To do this, you need to open the Control Panel and select the “Hardware and Sound” section, then go to the “Sound” subsection, select the “Recording” tab and check whether the microphone is turned on;
- You can also check your microphone settings in Adobe Flash Player. To do this, open the Control Panel, select “Large icons” in the View option, find Flash Player and left-click. This will open a menu where you need to select the “Camera and Microphone” tab, then click on “Camera and microphone settings for the website” and select “Allow” if Vkontakte is in the list;
- Finally, you can log into VK in another browser!
Ways to solve the problem
Problems with sending voice messages to VK can arise for various reasons. First of all, you should check the functionality of the microphone. Then you need to turn on the device by going to the section called “Recording Devices”. Next, find and select the “Listening” column and check the appropriate box. Now the sounds will be played through the speakers on the PC. Below we will look at ways to solve problems related to microphone settings.
Method 1: On a computer
To record voice notifications in VK, you must perform certain actions on your computer. If problems arise, you can fix them yourself. No special knowledge is required. Now we will describe the problems that you may encounter and methods for solving them. First way:
- When you activate an audio recording device, it should automatically prompt you to use the device. You need to confirm it.
- When using a third-party device, you should find out how correctly it is connected. To do this, use the section called “Sound” in the Control Panel.
- If the settings are not set correctly, you must delete the settings in the browser and enable the client setting in automatic mode.
- Perhaps the browser is set to prohibit the use of a microphone. To remove it, you need to adjust the settings or use a different browser.
If the recording device is not performing well, increase the volume. This way, recording voice notifications will be of better quality. Now let's look at the second way to fix problems:
You need to install a new version of Adobe flash player. First you need to uninstall the old program. You can also update the player. Next you need to restart your computer and the microphone will work. Also, if the microphone does not work in one of the browsers, you should try its operation in another browser. Usually the problems are fixed.
How to allow access to the microphone in VK (Vkontakte)
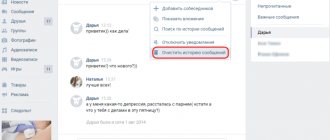
If the user once denied access to the microphone for VKontakte, then this action was saved in the browser settings. To cancel this action in Chrome and allow access to the microphone in VK you need to:
- Open browser settings by clicking on the button with three dots;
- Select “Settings”;
- Select “Advanced” at the bottom of the page;
- Click on the “Content Settings” section;
- Select the “Microphone” tab and, if there is a VKontakte site in the “Block” section, then you need to delete it by clicking on the cross;
In these simple ways you can allow access to the microphone in VK or on other sites in the browser! You can also learn from us how to surf VK invisible offline!
Source
Is it safe to give your browser access to your webcam?
To make the user's stay on the Internet safe and comfortable, browsers impose various restrictions on sites: block pop-ups, warn about requests for location, access to a webcam, etc. Due to this, web browsers guarantee the protection of confidential information that can be used by fraudulent websites. - resources for your own purposes.
However, only the user has the choice whether to allow a certain site access to browser elements or not. Therefore, experts advise carefully choosing web resources for work and ignoring notifications coming from suspicious sites.
What are video calls in VK Messenger
The social network VKontakte offers updated functionality that has been in beta testing for a long time - video calls to friends. You can call from your mobile phone, laptop or computer. In order for the function to be available, you need to download the VK application for Android or iOS and install the latest version of the VK Me messenger (VK Messenger).
Calls to VK messenger
To ensure data confidentiality, the device is end-to-end encrypted.
To start a dialogue, you need to open a conversation with the desired person (a friend in VK) and click on the icon in the form of a phone, which is located in the upper right corner. Next, the subscriber chooses whether this will be a video conversation or only a voice call. You can change the communication mode at any time throughout the conversation.
How to set up video communication equipment
If the user does not use a laptop, but a desktop computer, before making a video call in VK through the computer, you need to configure the equipment:
- connect the video camera;
- connect the microphone with interfaces;
- install the updated flash player (latest version). If the interlocutor is making a VK video call via a computer, he must also have a microphone and video camera installed, and the “Video call” function must be enabled in the settings.
You can use webcams for communication:
- with USB interface;
- wireless IP or camera with RJ-45 connector;
- with analog/SDI output.
The simplest option would be to connect a camera with a USB port. But, when choosing equipment, you should pay attention to interface support, since cameras with USB 3.0 support may not be compatible with a USB 2.0 connector. Connector 3.0 is most often produced with blue or red markings.
To connect a webcam with a USB interface, follow these steps:
- Connect the camera to the desired connector on your computer.
- Wait for a notification from the OS that a new device has been detected.
- Make sure your computer has the necessary drivers.
- If you are having problems with the software at this point, restart your computer.
- If the operating system does not contain the necessary drivers, use the disk that comes with the camera and install them on the device. If there is no disk, you can download drivers from the Internet.
- Next, check the working condition of the camera.
How to connect
Activation of the feature depends on how the user decides to enable it. In the case of mobile operators, the setup is carried out by a company specialist. But there are several other connection methods, including the internal functionality of the phone and third-party applications.
Below are options for connecting forwarding for smartphones running on iOS and Android operating systems.
Operator services
All operators in the country offer a forwarding service. It is charged according to set rates and is often offered along with a voice mail option where the caller can leave a message for the caller. The cost of such services depends on the company’s pricing policy, but when using the standard “unconditional” option it is inexpensive.
The service is activated via a USSD command, through your personal account on the company’s official website or at any sales office. If the user's device allows you to activate forwarding, there will be no problems with it.
Forwarding may be unprofitable in roaming and when connecting “conditional” packages. In this case, the subscriber pays more, and tariffs are set on a daily basis.
Smartphone functions
The built-in capabilities of modern gadgets allow the use of forwarding to any of the numbers available to the user. This could be a second SIM card on the same smartphone or a number on another device. The instructions differ slightly depending on the manufacturer - there are different conditions for iOS and Android.
Call forwarding has long been developed on all smart phones. It has become possible even on the earliest versions of operating systems, due to which it can be used without involving an operator or installing third-party applications.
iOS Options
On an iPhone, the function is connected as follows:
- go to the “Phone” section and click on “Forwarding”;
- click on the slider to activate the option;
- enter the phone number to which incoming calls should be forwarded - the call is forwarded in the specified manner.
Thanks to the company's new developments, an option such as “Continuity” is available on the latest versions of iOS. Thanks to it, the user can unite all Apple devices under one account - Apple ID. To do this, just log in with your existing username and password on all gadgets and connect them to Wi-Fi. Previously, this required one network, but after the release of iOS 9, the restriction was removed.
How it works:
- the user receives a call on their iPhone;
- when using one Apple ID, an incoming call is displayed on the screens of all gadgets connected to Wi-Fi;
- the user answers the call from the device he needs.
How to connect “Continuity”:
- go to the “Phone” section in the device settings;
- go to the “Calls on other devices” subsection;
- click on the slider to activate the function (Allow calls on other devices);
- in the “Allow calls on” block, you can select the ones you need, otherwise forwarding will be done to everything on the Wi-Fi network.
The only drawback of the free function is that it only works within the Apple system, that is, you cannot configure it to redirect from iOS to Android.
Forwarding on Android
On Android devices everything is simple. The user has access to settings for conditional and unconditional forwarding. To connect it you need:
- go to the settings in the appropriate section (you can enter the word “forwarding” into the search, since the location differs depending on the OS version and device brand);
- select a conditional or unconditional item and click on it;
- enter the number to which the call will be transferred and confirm the operation by clicking “Enable”.
If the option is enabled, all incoming calls will be forwarded to the specified number. This can be done both on a second SIM card inserted into the device, and another on a cell phone.
Third Party Applications
Most of the applications currently available in online stores for Android and iOS do not cope with their tasks and work with serious software glitches. Since they all exactly replicate the internal functionality of modern smartphones, there is no point in using them.
How to make changes to your account privacy settings
After completing the equipment setup process, you need to set up your personal account. For this:
- Log in to your account (your VK page).
- Open the My Settings menu.
- Go to the "Privacy" tab.
- Find the Contact Me section.
- Click on the line “Who can call me via video call.”
Account privacy settings - Select the desired item in the drop-down window. It's best to set the settings to "All Friends".
- Next, go to the “My Friends” tab.
- In the list of friends, next to the name, the video camera icons should appear.
The presence of a camera icon means that the subscriber’s friends also have the correct settings for a VKontakte video call from a computer or any other device. In the absence of such designations, the subscriber will not be able to make calls because his friends do not have a camera connected or changes have not been made to their account settings.
Activation
First, you need to update the VK application installed on your phone. If this is done automatically, great. If you don’t know whether automatic updates are enabled, then go to the Play Market or App Store and see if there is a button like “Open” next to the messenger. If “Update” is written opposite, then perform this action.
Secondly, one of the latest versions of the operating system must be installed on the phone. Video calling does not work on Android 4.2.2; the required button does not appear even after activation. But on Android 7 everything works great.
After updating the application, opening the “Notifications” section in your profile, a message will appear at the very top that “VKontakte calls are available.” I didn’t click on it - but in vain! Perhaps after this I would just need to call any friend on Vkontakte via video link, and the service would be activated. But later this notification no longer appeared, so the question: how to activate video calls on VKontakte interested me. And I found a way out!
To do this, click on the magnifying glass icon below and click on the search bar.
Enter “Video calling.” We need a group with this name because it discusses issues that interest us now. The thumbnail should have a white handset on a blue background. Click on the title.
You can “Subscribe” to the group to keep abreast of all the latest news.
Next, scroll down the feed and under the post with the most comments, click on the button that corresponds to them.
Check them out. Here, those users who have video calls are offered to call. This is exactly what we need. Once the person who has this service active dials you, everything should work. Therefore, we find the message: “Who to call?”
Then you need to answer something like: “Me, please” or “Call me. Please".
The girl responded to my request very quickly, and also sent a screenshot that I needed to update VK.
Moreover, they wrote to me in a personal message that an update is required. Since it’s not very convenient to communicate in the comments under a post, I preferred the chat.
The fact that they called me and could not get through was visible in the “Notifications”.
I updated the application, but still nothing worked. In my case, the reason is an outdated version of Android (4.2.2).
Having updated VK on another smartphone, I asked to make the call again: a message appeared in PM that I had one missed call. Immediately after this, this service became available to me.
How to activate the video call feature
After completing the preparatory operations, to make a video call on VKontakte from your computer, follow these steps:
- View your list of friends who are online.
- Select the desired subscriber and go to his page.
- Make sure that a button with a video camera appears next to the “Send Messages” section.
How to call VKontakte via webcam - Next, click on the button to make a video call.
- After this, a dialog box will appear on the screen asking you to install Adobe Flash Player.
- In this window, click on the “Allow” checkbox.
- In the same section, select “Remember”.
- Close the dialog box.
To switch a voice call to video mode, you need to click the video camera symbol, which is located in the upper right corner.
During the dialogue, a window will appear, which in appearance is similar to the window when viewing video recordings. In the middle of this screensaver, at the moment of dialogue, a photograph of the interlocutor or a video image appears. At the bottom there are sound controls: microphone on/off buttons, volume control. On the right side there is a button to expand the window to the full width of the screen.
If the call is made by another subscriber, the notification “You are calling” will be displayed on the screen, where two options will be offered: “Reject” and “Answer”. The image (subscriber profile splash screen) will also be displayed. To start a dialogue, you need to click “Answer”, to end the call, “Reject”.
Video call "VKontakte"
Settings
If you have updated the application and the version of Android on your device is one of the latest, but you are still unable to get through, then you need to set up video calling correctly. To do this, open the page menu by clicking on the three horizontal lines at the bottom, and then go to settings - the gear in the top right.
Next, select “Privacy”.
Scroll down a little and click on the line “Who can call me.”
In the next window you need to, well, or select the option that suits you: only friends, certain groups, etc.
These are the nuances that users who are trying to use the new feature and make a video call on VKontakte may encounter. I hope the recommendations described will help you, and in the future the developers will make sure that absolutely everyone can make video calls on VK.