Today we will talk about a fairly useful function of the VKontakte social network, which will be more useful to group owners than to ordinary users. The fact is that we can configure the publication of posts on the VKontakte wall so that they are added at the time we need.
Just imagine, you created several deferred entries in the evening for the whole next day and you no longer need to monitor the group, because they will be added on their own. Well, okay, enough theory, let's see how all this miracle is done in practice.
Why do you need scheduled posting?
For those who are not in the know, VKontakte has the opportunity to prepare content in advance and post it not at the moment when you created the post, but at the time you specified. An indispensable feature for community owners. Delayed posting helps:
- Automatically publish content on the wall of your page or VK group at the appointed time
- Prepare a content plan for a long time in advance. For example, you can one-time fill the “snooze” with posts for a month in advance, and not spend a lot of time publishing each post separately
How to schedule messages
If you don’t closely monitor telegram updates, you may miss out on many important innovations, some of which are quite unobvious. For example, starting with update 5.11, Telegram now has the ability to send delayed messages; it allows you to independently select the date and time of sending a pre-prepared text, down to the minute. If, after reading the instructions, the required function does not appear, we recommend checking for a recent update through the Appstore or Play market, respectively.
Through built-in functionality
Due to significant differences in the location of some controls on devices with different OSes, problems often arise when searching for certain functions. Next, we will look at ways to send a delayed message using any of the possible platforms.
Android
- So, open any chat and write text in the appropriate field. After writing, press and hold your finger on the paper airplane icon on the right. A window with two functions will appear, select the first one.
- We indicate the date, month, and time. After specifying the data, tap on the blue button “ Send date_time».
iPhone
- When using IOS the situation is identical. First, write the planned text. An up arrow icon in a blue circle will appear on the left. Press your finger on it for a few seconds. A small pop-up menu will appear where you need to tap on the item “ Send later».
- Set the necessary parameters and click on the blue button below.
Now let's look at options for using a PC as the main platform.
Via browser
Not many people in the CIS know about the ability to use Telegram directly in the browser. The problem is the lack of Russian localization and a certain limitation in functionality. Although this version copes well with the basic task of comfortable and safe communication.
Unfortunately, this version does not allow you to schedule text sending.
Desktop version
- Follow the link using any browser https://desktop.telegram.org/. After downloading and entering your phone number, you will receive a secret code; you must enter it in a special field. You will be taken to the main screen. Select the desired contact from the column on the left. If you have not yet started a dialogue with a person, click on the 3 horizontal bars in the upper left corner and select “ Contacts", where click on the name of the desired user.
- Enter the required text in the input field. A blue paper airplane icon will appear in the right corner. Right-click on it and select “ Send later».
- All that remains is to set the required values and click on “Schedule».
Using a bot
The most convenient way would be to use a special bot. This allows you to perform almost all the necessary tasks within one application.
- So, first you need to find the right bot. Its developers offer many different built-in functions and a convenient configuration system. Open the search bar and enter @ControllerBot. Be careful when writing the name to avoid connecting an unnecessary control system.
- Having opened the communication mode, select “Start».
- The system will prompt you to select your preferred language, you need to tap on Russian and in the future the bot will communicate with you in the selected language.
- Introductory information about the bot's operation and a list of possible commands will appear. Choose /addchannel.
- ControllerBot will send you instructions for further actions and a link to BotFather. Go to it by tapping on its name.
- Click on START and select from the list that appears /newbot. This will begin the process of creating a new bot.
- Next you need to give it a name. It is set arbitrarily and has no restrictions, the exception is the end of the name, it must contain the word bot. For example, PomosnikEvgenia_bot. After sending the created name, BotFather will send a unique token, which must be copied and sent to the bot controller.
- Now open a personal channel and install the created assistant as an administrator.
- All that remains is to forward any message from the group to the bot controller and set the time zone.
- We find the created assistant in the contact list, it can make scheduled posts and much more!
Via SMMplanner
If for some reason you are not satisfied with using a special bot, you will have to use a third-party service called SMMplanner. It works with 8 social networks and has no time limits. For example, you can prepare a publication and set the posting for a year in advance. The service also allows you to set geotags, hashtags, polls, stickers and much more (there are more than 20 settings to choose from).
- The SMM glider also interacts with the group by creating a special assistant. To begin, we go through the simple stage of authorization on the SMMplanner website and go to the section “ accounts».
- Click on "To plug» and select Telegram from the list on the left.
- The service will open a small instruction consisting of 5 points.
- We search through the search bar of the messenger @BotFather and send him a command /newbot and come up with a name for it. In response, he will send you a special token.
- We install the created assistant as an administrator.
- Now we return to the service website and click on “Continue».
- Paste the received token and the link to the channel into the empty fields.
- Click on the paper airplane icon on the left panel and select “Schedule a post».
- In the projects section, click on the newly connected group, write the text and indicate your preferred posting time. At the end of the preparation process, click on “ OK ”. The post will be published at a predetermined time.
Now you know how to make a scheduled post in Telegram. Don’t ignore the methods provided; they allow you to save a lot of time and prepare content in advance. Otherwise, it forces you to spend energy every day preparing and designing posts.
We make a delayed entry on the page and in the VK group
To make a delayed post on VK, you must first prepare content for a future post. That is, write text, attach pictures, music, animation, etc.
Next, instead of clicking “publish” , click “now” and set the date and time when you want to publish the post
The principle of how to make a delayed post in a VK group is exactly the same. Only the ability to mark an advertising publication and indicate the source is added
Common mistakes and solutions
We have discussed with you how to postpone publication on VK - we have provided all the existing instructions. Now let’s briefly outline the problems that novice VK users face:
- There is no timing key. Please note that this option is only available to community owners or personal page owners;
- Can't make a delayed recording. Check if you have exceeded your daily or total limits?
- VK posts pending posts ahead of time. Make sure there is no confusion with time zones in your case. For example, you, as an admin, lead a Moscow group while being in Kaliningrad. Please be aware of the time difference.
- Customized posting does not help increase reach. Perhaps your timing is not the best. Try not to use round numbers (as most people do). For example, don't post exactly at 5:00 p.m. or exactly at 6:30 p.m. It's better to do it on 17.06 or 18.39. In this case, your posts will not mix with others and will appear separately in the feeds. The trick is very minor, but very effective, believe me!
Happy administration! What posting features do you use? Share!
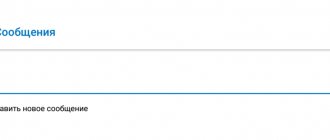
How to edit a deferred entry
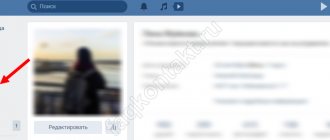
On your wall or group, another “deferred” . That is, publications that will be published in the future are posted there. Let's go there.
When you hover over the arrow, a menu with actions appears. First of all, you can delete the material and edit it. For example, both the date of publication and the content of the post.
Also read: Earning money on Aliexpress in the VK group
Making a delayed post on VKontakte
We prepare information as when posting a regular post: text, photo, video. Everything you want to share with your friends and followers.
Now, instead of clicking the “Submit” button and publishing the material right now, we select a date and time in the future.
Then we confirm our desire to put the “Queue” entry.
The rules of the social network VKontakte provide for posting up to 25 such posts per 1 day, Moscow time. In total, you can make up to 150 posts in the future on your wall or in the community.
In the VKontakte group, everything is done in exactly the same way; there are no differences from publishing on a personal page, except for the ability to sign and mark advertising messages.
And, of course, to add materials you must have the appropriate rights in the community.
How to make a delayed repost
Group owners often have to repost advertising and other advertising posts. First of all, they can be sent to deferred posts in the same way; to do this, click the “share”
Then choose where you want to share the post. Next, press “more” and “timer” . Set the post release time and click “share post”
Thus, the entry appeared in our group’s postponement
How to make a scheduled post on VK from your phone
It would not be superfluous to consider the question of how to make a delayed post in VK from a phone or tablet.
To do this, go to your page or community where you plan to post the post. Prepare content for recording and click “now”
Set the timer by date and time and click “done”
After which the recording will go to “ deferred ” . By clicking on it, you can delete the post or edit the content and moment of publication
How to postpone a post on a wall in a group or on a page
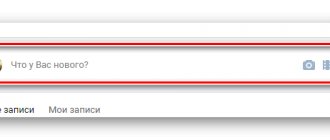
We find the place on the page where we usually create a publication. For me it will be a simple sentence: “Checking pending publications for the site.”
We write our entry and under it look for the “More” button and click on it:
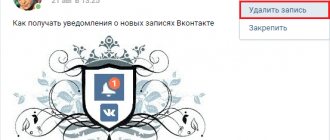
From the drop-down menu, select the “Timer” item:
We set the publication time. This will be exactly the time when it will be added to the wall in a group or page.
If you want only friends to see the post, then click on the “lock”.
After all the settings are made, click on the “Queue” button:
The “Delayed” tab appeared on the wall. If you click on it, you will see a list of posts that we have postponed and a schedule for when they will be added.
We can edit or delete any publication by clicking on the menu opposite in the form of three horizontal buttons:
Scheduled posting services
There are situations when you need to make a lot of posts, in several groups and even in several social networks. In these cases, deferred posting services are used.
SmmBox
The best service for searching and filling groups with content on eight social networks. Most importantly, you have the opportunity to use the service for 14 days free of charge. Follow the link and click “get a free account”
Next, go through a quick registration through the social network
Allow the service to access your account. This is necessary so that posts can be published through your account.
Immediately after registration is completed, posting to your communities where you are an administrator is available. The service is clear and convenient, even a beginner can figure it out.
Limits on posting deferred entries
What are the limits for posting entries in the VKontakte timer? Previously, the limit was no more than 10 posts, and many administrators had to use additional services in order to increase this limit. But now you don’t need to do this, since the social network itself has increased the posting limit in the timer. Now it is 25 records for one date. You can publish up to 50 posts per day, and in total the user has the ability to postpone no more than 150 posts.
By the way, to increase the limit, you can try contacting VKontakte support and asking them about it. In some cases, if the user owns a large number of groups and really has such a need, the limit may be increased.