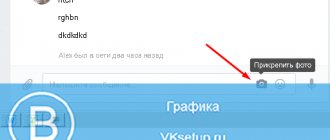
How to enable the display of the “Documents” menu item on your page
- You need to hover your cursor over any of the menu items on the left.
- Click on the gear that appears.
Setting up menu items - Next, a window will open where we find “Documents” and put a tick in front of it. Click “Save”. Enabling the visibility of the Documents item
Now on the left side of the menu we see the “Documents” section.
The documents section has appeared
Empowerment
Knowing all the secrets and functions of social networks, you can significantly expand your capabilities in using them. According to statistics, more than 70% of users are not familiar with even half the functions of such a convenient platform as VKontakte. Using these simple instructions, sharing any information on social networks will be much easier.
Stop Continue
It happens that a previously added document has lost its relevance and the user feels the need to delete the file. To do this, you will need to select the documents tab in the page menu on the left. In the list of added files that opens, just hover your mouse over the document to be deleted. A cross will be available to the right of the name; by clicking on it, you can get rid of the document.
How to enable the documents section in a VK group
If you are the owner of a group or community and you need to upload documents for members, then you need to configure this feature.
- Let's go to our group.
- Select the “ Management ” item on the right. Menu item Control
- Click on “ Sections ”. Setting the visibility of sections in a group
- On the left, opposite the “ Documents ” item, click on “ Disabled ”. Including documents in a group
- Select "Open" or "Limited" Tooltips appear on the right to explain the meaning of the different options.
Type of document availability - And click “ Save ” at the bottom of the page.
Now not only the administrator, but also community members have the opportunity to upload documents in a group.
Create an application for VKontakte in PowerPoint (step-by-step instructions)
You can create a VKontakte application from a simple PowerPoint presentation. Certified Microsoft trainer and eLearning expert Dmitry Yakushev will tell you how to do this.
On October 25, 2021, VKontakte reported that special applications can be connected to groups and communities. In essence, they make public pages a full-fledged replacement for websites.
You can install the following applications on your VK page:
Dmitry Yakushev, eLearning expert, Microsoft Office product trainer
Those for whom such an arsenal is not enough can create the VKontakte application themselves. Since I teach how to work with Microsoft products professionally, I created two Excel applications:
- Excel knowledge test Master Excel (I);
- TOP 20 Excel formulas.
They were based on simple PowerPoint presentations. Let me note that there are two types of applications in VK: flash and iframe. You can read more about each type here.
I will teach you how to create a Flash application. Go!
Step 1. Prepare a PowerPoint presentation
Let's consider the option when we have a ready-made presentation and need to turn it into an application.
What you need to create a VK application:
- iSpring Suite program versions from 7.0 to 8.7. The trial version can be downloaded here.
- The presentation with the material is the basis for the application. You can use a wide variety of content: videos, interactivity, surveys, etc. It all depends on what you want to create: a test, a glossary on a specific topic, or a slide-based e-course.
For example, I had a course with 10 Excel lessons. Each lesson is a video on a specific topic. Now the VKontakte course looks like this.
Tip: To make a presentation with a lot of video materials take up as little space as possible, post the video files on YouTube. Insert the link to the videos into the presentation. How to do this is described in the lesson:
In my case, after transferring the video to YouTube, the 182 Mb presentation began to weigh only 1.7 Mb. Size matters, because applications are larger than 12 Mb. You cannot install VKontakte.
Step 2. Publish the application to your computer
One of the most important, but very simple steps:
- On the iSpring Suite toolbar, click Publish.
- Select the CD tab and select which folder to save the application to.
- In the Output format section, check the boxes next to For computer (flash) and One Flash file.
- Click the Publish button.
Publishing will take a few minutes. Next, go to the folder where you saved the application and find the movie.swf file. It will come in handy later.
Step 3. Create a VKontakte application
By default, all social network users have Developer mode turned off. To activate it, follow this link.
If you have never created an application before, a page like this will appear:
In the future, all your apps will appear here. The next steps are:
- Click on Create an application. In the window that appears, select the platform Embedded application.
- The settings window will become larger. Here enter the application name, description, select type and category. Then click Go to download the application.
- The system will ask you to confirm the action via phone and accept the user agreement.
- After logging in, fill in the application information. Select the group in which the application will be installed, as well as the icon for it. Save your changes.
- Download the cover. The size of the picture must clearly coincide with the stated ones: 150x150 for a square cover and 278x278 for a square catalog cover.
- In the settings, select the Application disabled state, and in the “Application type” line, select flash. Click Save Changes.
- Click on the Download application button. Then specify the file movie.swf., which is stored on your computer. Click the Open button.
Now all that remains is to test the application and publish it publicly. Then it’s a matter of little things: make a post in the group, launch targeted advertising if you want as many users as possible to know about your offer.
www.ispring.ru
How to add a document to VK
- In order to add a document to your account on a social network, you need to select “ Documents ” in the menu on the left. Menu item Documents
- Click on "Add a document».
Add document button - You will see a window that opens, where the requirements for documents will be indicated: their size, file type. Click " Select a file».
Selecting a file to download - A window will open where you will need to select the storage path for your document, then click on the document itself and click “Open».
Selecting the desired file through Explorer
- Next, you are asked to select your privacy settings. And press " Save».
Selecting privacy settings and saving the document - The document is now loaded. And you can edit it or remove it from your page.
This is what an uploaded document looks like in VK
If you want to add a document from the profile of another network user that is not hidden by privacy settings, you can find it using the search by writing the name.
Search documents by title in VK
How to delete
If you have a lot of old documents on the list that are no longer needed, then you can delete them from there.
On your profile page, in the left menu, select an item that we already know. Next, move the cursor over unnecessary files and click the cross next to them.
How to delete all documents at once
Those who want to quickly delete all saved documents on their page can install an extension for Google Chrome from the Chrome Web Store - Instrumentum. I wrote about it in detail in the article: how to clean a wall in a group on VK.
Click on the extension icon in the upper right corner of the browser. Then you need to select “My Page”, find the “Documents” section in the list that opens and click “Delete....”.
Removing from a conversation
If you want to delete a specific file from a VKontakte dialogue, then go to the messages page and open a dialogue with the desired person. Then, in the correspondence, find the document to delete and click on the empty space next to it to highlight it, and click on the “Delete” button.
In order to view all the documents that you exchanged with the user, open a dialogue with him and click on the image of three horizontal dots to the right of the name. From the drop-down menu, select “Show attachments.”
The window that opens has four tabs, so you can quickly find what interests you.
How to remove GIFs
To remove GIF images from documents on your VKontakte page, select “Documents” in the left menu.
Next you need to go to the “Animation” tab. Find the unnecessary GIF here, hover over it and click on the cross.
How to send a document in a message
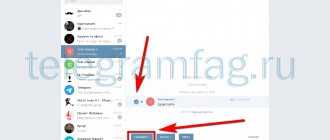
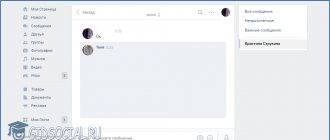
- To send a document from your page to a friend via messages, you need to select “ Messages ” from the menu on the left, and then select a dialogue with the interlocutor to whom you want to send the file. Messages on VK
- At the bottom, click on the paper clip and select “ Document ”. How to attach a document to a message
- A window will open where you need to select files from your account or upload from your computer. Window for selecting files to send to VK
- Click on the desired document and click “Attach».
Attach the required document to the message - And press the “Enter” key or the arrow.
Send a message with a document to VK
How to transfer VKontakte files from your phone
How to send a presentation to VK via message from your phone? Not long ago, VK developers added this function to their official application. The algorithm is almost the same:
- Go to the application.
- Open a dialogue with the desired user.
- Tap on the paperclip icon in the lower left corner. You will see a large field for attaching documents of various kinds.
- Now find it on your phone and download it.
- Click "Submit".
The same restrictions apply. You can use the second method via phone only if you open the full version of the site and repeat the steps described above.
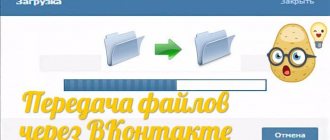
Sending documents through the social network VKontakte is a truly convenient way to exchange files. In addition, the vast majority of popular extensions are within the established restrictions.
You want to transfer saved files on your computer using the social network VKontakte, or maybe send or archive, but you don’t know how to do it. The material on how to send a file in contact is detailed instructions with examples of attached documents that you can send to your friends in contact.
Let's start with simple files that can be attached in messages and comments to publications you like, inside the most popular social platform in Russia, VKontakte, and then we'll tell you what other formats the [Document] function supports.
How to attach a document to a post
- We write the text of the post. Click on " More" and select "Document».
How to attach a document to a post
- If you do it from the mobile version or in the application, then click on the paper clip sign.
How to attach a document to a post in a mobile application - A pop-up window appears. You can choose from your documents or find it on your computer.
Document selection window - And click “ Send ”. A post with the document will be published. Publishing a post with a document on VK
For information about what else you can attach to a post, read the article Simple instructions on how to make a post on VK in a group with text and photos
List of files that can be attached in a message
Supported file types that you can send to a friend:
- Doc, doxs, psd.
- Png, gif, jpg.
- Fb2, xls, xlsx.
Attach any files to standard messages (Word document, Office document, images, music, video document and photo). There are no restrictions.
The exe file should be selected as an invalid format. The system will not let it through in any case. There is a solution: rename it on your computer. It's more difficult to do this on a phone. It is recommended to replace the existing extension with any valid one, for example, docx. As a result, the object will look like a text document, after which it needs to be archived and sent in the same way as the others.
Such a file will launch only after entering the required extension after unzipping.
How to download a document from VK to your computer and phone
In order to download a document to your computer that you have saved or received from someone, you must:
- Go to your page, select “Documents” in the menu on the left.
- Click on the file you need to download.
- It will open in a new tab. Next, click on “Save document to disk.” Save the document
If you want to save a document to your phone , you can do this through the application.
- Open your page, select the “Documents” menu section, click on the desired document.
- Select “Download”.
Download the document in the VK application
If there is no application:
- Open your page in a browser. As we can see, there is no “Document” item in the menu on the left. VK mobile version menu
- You need to write in the address bar https://m.vk.com/docs and press Enter.
Address of documents in the mobile version of VK - Select the required document. It will open in a new window. And click on the download icon.
Loading icon
Sending a VK presentation
Forwarding a presentation of any size is only possible by attaching it to a message as a document. In both options, the attachment can be made to a personal message or to some posts on the wall and comments.
Option 1: Website
When using the full version of VKontakte, accessible from any Internet browser on your computer, the procedure for sending a presentation is reduced to several steps. However, if you want to add this kind of file to a post on a page, you will have to perform several additional steps.
Note: We will only consider sending via private messages.
- Open the “Messages” section using the main menu of the site and select the desired dialogue.
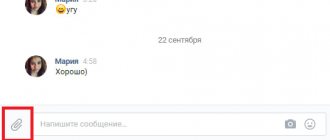
In the lower left corner of the page, next to the block for creating a new message, hover your mouse over the icon with the image of a paper clip.
From the list that opens, select “Document”.
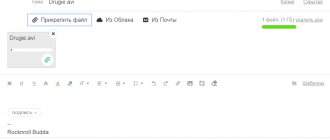
Next, click the “Upload new file” button and select it on your computer.
You can also simply drag the presentation you are sending to the “Attach Document” area or to the block for creating a new message without using an additional menu.
Regardless of the chosen approach, after the steps taken, the file will begin downloading.
Upon completion, a thumbnail of the added file will appear in the area with attachments under the “Write a message” block. Similar to any other documents, you can upload up to nine files at a time.
Use the "Submit" button to post a message with the option to download the attached presentation. Click on the link with the name of the document to go to the download page.
Depending on the browser used and some other aspects, you will be able to view the content through the PowerPoint Online program.
This concludes this section of the article, since the main task can be considered completed.
Option 2: Mobile application
For users of the official VKontakte mobile application, the process of sending presentations has minimal differences from the first method, with reservations regarding the location and name of the related sections. Any restrictions on sending, including the number of attachments and message type, are also completely identical to the previously described option.
- Go to the Messages section using the app's navigation bar and open the desired conversation.
Next to the “Your message” field, click on the paperclip icon.
Now in the menu that opens, switch to the “Document” tab.
According to your requirements, specify the way to add the presentation. For example, in our case we will boot from the device memory.
Using the file manager, find and select the document you need.
Once the download is complete, click on the “Submit” button.
The posted file will immediately appear in the message history with the ability to download it.
If you have special applications for opening presentation files, the document can be viewed. In this situation, it will be downloaded automatically. The optimal solution is "PowerPoint".
The only drawback is the inability to view the presentation using standard means of the VKontakte mobile application without installing additional software. Because of this, in most cases you can limit yourself to sending a link to a file created using Google services.
How to copy a link to a document
In order to copy the link, you must:
- Go to your page, select “Documents” in the menu on the right.
- Select the file whose link you need to copy.
- It will open in a new tab.
- Click on the address bar and select its entire contents. This will be the address of the document Document address
- It will be highlighted in blue. Right-click on “Copy” or press Ctrl+C, and then paste into a message or post.
Keyboard shortcut for saving
Don't forget that if the file is closed by privacy settings, then even if you send someone a link to it, the person will not be able to view it.
Now you know all the possibilities for working with VKontakte documents. If you still have questions, ask them in the comments.
Where to find documents
If you access your profile from a computer or laptop, then in order to view the dockets that are on your page, you need to select the appropriate item in the right side menu.
If the “Documents” line is not there, then move the cursor to any other item and click on the gear that appears.
The “Setting Menu Items” window will open. In it, on the “Basic” tab, opposite the “Documents” line, you need to check the box and click “Save”.
Setting up menu items
Now on the left side of the menu we see the “Documents” section.
The documents section has appeared
The “Documents” section in the VK application is located in the menu on the left.
Documents section in the VK application
Unfortunately, this item cannot be added independently in the application. If it is not there, but you need to add it, then you should open your page on your computer. And do everything as described above.
If you are the owner of a group or community and you need to upload documents for members, then you need to configure this feature.
- Let's go to our group.
- Select the “ Management ” item on the right. Menu item Control
- Click on “ Sections ”. Setting the visibility of sections in a group
- On the left, opposite the “ Documents ” item, click on “ Disabled ”. Including documents in a group
- Select “ Open ” or “ Restricted ”. Tooltips appear on the right to explain the meaning of the different options. Type of document availability
- And click “ Save ” at the bottom of the page.
Now not only the administrator, but also community members have the opportunity to upload documents in a group.
- In order to add a document to your account on a social network, you need to select “ Documents ” in the menu on the left. Menu item Documents
- Click on “ Add document ”. Add document button
- You will see a window that opens, where the requirements for documents will be indicated: their size, file type. Click “ Select file ”. Selecting a file to download
- A window will open where you will need to select the storage path for your document, then click on the document itself and click “ Open ”. Selecting the desired file through Explorer
- Next, you are asked to select your privacy settings. And click " Save ". Selecting privacy settings and saving the document
- The document is now loaded. And you can edit it or remove it from your page. This is what an uploaded document looks like in VK
If you want to add a document from the profile of another network user that is not hidden by privacy settings, you can find it using the search by writing the name.
Search documents by title in VK
- To send a document from your page to a friend via messages, you need to select “ Messages ” from the menu on the left, and then select a dialogue with the interlocutor to whom you want to send the file. Messages on VK
- At the bottom, click on the paper clip and select “ Document ”. How to attach a document to a message
- A window will open where you need to select files from your account or upload from your computer. Window for selecting files to send to VK
- Click on the desired document and click “ Attach ”. Attach the required document to the message
- And press the “Enter” key or the arrow. Send a message with a document to VK
- We write the text of the post. Click on “ More ” and select “ Document ”. How to attach a document to a post
- If you do it from the mobile version or in the application, then click on the paper clip sign. How to attach a document to a post in a mobile application
- A pop-up window appears. You can choose from your documents or find it on your computer. Document selection window
- And click “ Send ”. A post with the document will be published. Publishing a post with a document on VK
For information about what else you can attach to a post, read the article Simple instructions on how to make a post on VK in a group with text and photos
In order to download a document to your computer that you have saved or received from someone, you must:
- Go to your page, select “Documents” in the menu on the left.
- Click on the file you need to download.
- It will open in a new tab. Next, click on “Save document to disk.” Save the document
If you want to save a document to your phone , you can do this through the application.
- Open your page, select the “Documents” menu section, click on the desired document.
- Select “Download”. Download the document in the VK application
If there is no application:
- Open your page in a browser. As we can see, there is no “Document” item in the menu on the left. VK mobile version menu
- https://m.vk.com/docs in the address bar and press Enter . Address of documents in the mobile version of VK
- Select the required document. It will open in a new window. And click on the download icon. Loading icon
In order to copy the link, you must:
- Go to your page, select “Documents” in the menu on the right.
- Select the file whose link you need to copy.
- It will open in a new tab.
- Click on the address bar and select its entire contents. This will be the address of the document Document address
- It will be highlighted in blue. Right-click on “Copy” or press Ctrl+C, and then paste into a message or post. Keyboard shortcut for saving
Don't forget that if the file is closed by privacy settings, then even if you send someone a link to it, the person will not be able to view it.
Now you know all the possibilities for working with VKontakte documents. If you still have questions, ask them in the comments.
Instructions
The WinRAR archiver can do this. With this program you can archive multiple files or a folder
with a large amount of material, for example 200 songs, into one large file. You can download and install the WinRAR program from the official Russian website of the program: https://www.win-rar.ru/download/winrar/ Since the WinRAR program is shareware, most of its functions will work even after the trial period ends. After installing the program, restart your computer.
Select folder
, which you want to transfer or download to the file, and right-click on it. In the context menu, select “Add to archive...”.
On the main tab (General), enter the desired archive name, and also define the desired archive settings. After that, click the OK button at the bottom of the window. Another small window will appear in front of you displaying the archive creation process. Once the compilation bar reaches 100%, the archive will be created in the same directory where the original files
.
Now the resulting file needs to be transferred to another user. Since folders with a large number of files are usually large and take up more than 20 MB, they are difficult or even impossible to transfer through the messenger. In this case, use one of two methods: transferring files via and file-sharing networks. When transferring an archive via e-mail, log into your email account and select “Add file” or “Attach”. A window will appear on a new page for selecting a file and, when you click on the “Add” button, a Windows Explorer will appear in which you need to find the selected file. Once the archive is downloaded, you can send an email. The file will be included in the email attachments.
Use file-sharing networks if the file takes up more than 100 MB of disk space or needs to be sent. Having uploaded the archive once to a file exchanger, you can download it using a unique link an unlimited number of times. At the same time, any users can download (if you wish, you can set a password to open the archive). Use free file-sharing networks: https://narod.yandex.ru/https://letitbit.net/https://ifolder.ru/https://depositfiles.ru/After downloading the file from your computer, you will receive a unique link to file, which will be the address for downloading it.
To open the archive and unpack the files on the computer of the person to whom the archive folder will be transferred, the user will also need WinRAR or 7Zip installed on his PC.
You will need
- Archiver program.
Instructions
Before sending a folder with files, it is best to place it in a . To do this, you need to use one of the many archiver programs. For archiving we will use one of the most popular programs - WinRAR. So, you have the archiver installed. The necessary files are placed in the folder
you want to send. Right-click on the folder, select the WinRAR program icon and the “add to archive” function from the drop-down menu.
A program window will appear where you will need to enter the name of the archive that you will send. Click "OK". The archiving process will begin and the files will be archived.
In the window that appears, select the archive with the files you want to send. Click the "Open" button.
Video on the topic
Helpful advice
It is better to send files up to 5 MB this way. If the files are larger than 5MB, they will be automatically split by the program into several files. This may not happen correctly. Therefore, it is better to save the files yourself in advance into 5 MB archives and then separately attach them to the letter. Well, if the folder with files is very large (700 - 1000 MB), then it is better to use special file-sharing services for sending.
Transferring files via the Internet to friends or work colleagues often becomes a problematic task: you need to transfer several documents, a dozen photos, and sometimes also songs or videos. Uploading each file to file-sharing services separately is a rather time-consuming task. Archiving will help solve the problem.
Instructions
Archiving is the creation of an archive file using special software - an archiver. The archive is a file- folder
, which contains “packed” files. Unlike a folder, it is a file and can even be an executing program (COM, EXE). Therefore, an archive, unlike a folder, can be transferred. It doesn’t matter how many files it contains.
The most common archive formats are RAR, ZIP, 7Z. For users, they are practically no different. The popular WinRAR archiver can create such an archive and extract files from it. WinRAR is a shareware program, therefore, all its functionality can be used without purchasing the full version.
A WinRAR window will appear with settings for the archive name and parameters. Configure the archive as you wish or leave everything as default, then click the “OK” button. After a few seconds or minutes, depending on the size of the folder and the number of files, an archive in RAR or ZIP will be created in the source directory, with the same name as the folder you archived. It is a single file that you can upload to a file hosting service, hosting service, or attach it to an email message.
Sources:
- how to upload files to a file hosting service
Narod.ru is a place where you can store your files
, create websites. In addition, you can post all the information on your websites for free. Creating such a portal is not so difficult. Even an inexperienced user can carry out this operation, but certain rules must be followed.
You will need
- Personal computer, Internet, browser
Instructions
In order to work on the narod.ru service, get yourself a .ru mailbox. It will take you a few minutes. Then go to the Yandex search engine. At the top of the page you will see a list of subheadings. Go to "People". It will open in front of you. Find the "My Files"
" Click on it. A list of downloaded files will open in front of you. Choose the one and work with it. In order to upload a file to .ru, you need to find it. To do this, click the “Download” button. A window with files will open in front of you. Select the one you need and press the “Done” button.
Video on the topic
It is recommended to store some files as archives. This allows you to save hard disk space or burn more data when using DVD media. Sometimes archiving is used to set passwords, preventing unwanted access to data.
You will need
- - 7z;
- - WinRar.
Instructions
To get started, download the 7z program or another archiver. You can use WinRar or WinZip. Install the selected utility and restart your computer. Copy all the necessary photos into a separate folder
. To do this, use standard Windows Explorer or a file manager, such as Total Commander. Right-click on the created folder and move the cursor to 7z. In the drop-down menu, select the “Add to archive” option.
You can send information, photos or other materials through private messages. But, unfortunately, the functionality of the site does not provide the ability to transfer certain types of files, and the developers have also introduced a number of restrictions that limit the capabilities of users. Forwarding archives is one of the most common problems. How to solve it?
Sending by email in Word
All programs in the Microsoft package have the function of sending documents by mail without leaving the application. This is done as follows (let's look at the example of MS Word):
- Open a document with the required content to send.
- On the panel at the top, click on “ Customize panel ”.
- In the drop-down menu, click on “ Other commands ”.
- Find the “ Send to Recipient ” function.
- Add it to the panel.
- After clicking on this button, mail will open where you need to enter the recipient's address.
You can also send documents as attachments in different formats. This is done by going from the “ File ” menu to the “ Submit ” link.
Restrictions, size and limits
You can attach no more than 10 files to one message. Otherwise, the user will receive a push notification about the error. In this case, you can send the remaining ones with the next message, the number of which has no restrictions.
Hello, dear friends! Today we will learn how to send different files to other users of the VKontakte social network. This function can come in handy quite often, if you are an active user of a social network, why open an email if you can send everything you need here.
Let's move on to practice and see how easy it all is to do.